Archive | DIY RSS feed for this section

DIY Tea & Honey Gift Set

18 May

I have always hated coffee, and I’ve always loved tea. Of course, growing up in the south meant super sweet, super strong iced tea. (In case you’re wondering, outside of my mom’s house and local, out-of-the-way barbecue joints, the best place to get a good sweet tea is Bojangles, the second best is Chick-Fil-A, and the third is McDonald’s. I have opinions on this.)

As an adult, I still enjoy a good glass of sweet tea, especially when I’m eating barbecue or fried chicken. But I’ve expanded to hot tea, and I really enjoy a classic cup of black tea as well as various herbals. My rising interest in tea began with a search for a healthier alternative to the Coke I’d been having daily, and then really took off as I started watching BBC shows. (When every character has at least one cup of tea per episode, I just start thinking, “Well yes, a cuppa would be quite nice.”) Nowadays, take me to a nice little tea shop, and I’ll be lost for hours.

I wanted to share my love for tea with others, so I put together this adorable little tea set as gifts for my coworkers one Christmas. They would make excellent small gifts anytime of the year — for teacher appreciation, hostess gifts, anything. I think these particular pieces would serve better for occasions needing multiple sets, so you can order in bulk, but do whatever works for you.

Here’s what you need:

Tea supplies

1) Tea – Oliver Pluff & Co’s Signature Earl Grey is my absolute favorite right now – I drink a cup every morning. I’ve also purchased looseleaf tea from The Spice & Tea Exchange and from Teavana, and I’ve ordered tea and herbs (lavender, lemongrass, ginger, fennel) online. The cool part about this project is that you can blend your own flavors!

2) Press ‘N Seal Tea Bags – I found some on Ebay.

3) Sweetener of your choice – For this project, I used these super awesome honey lollipops. They come in delicious flavors like ginger, jasmine, or lemon. I would also recommend mini jars of honey. Savannah Bee Company has my favorite honey.

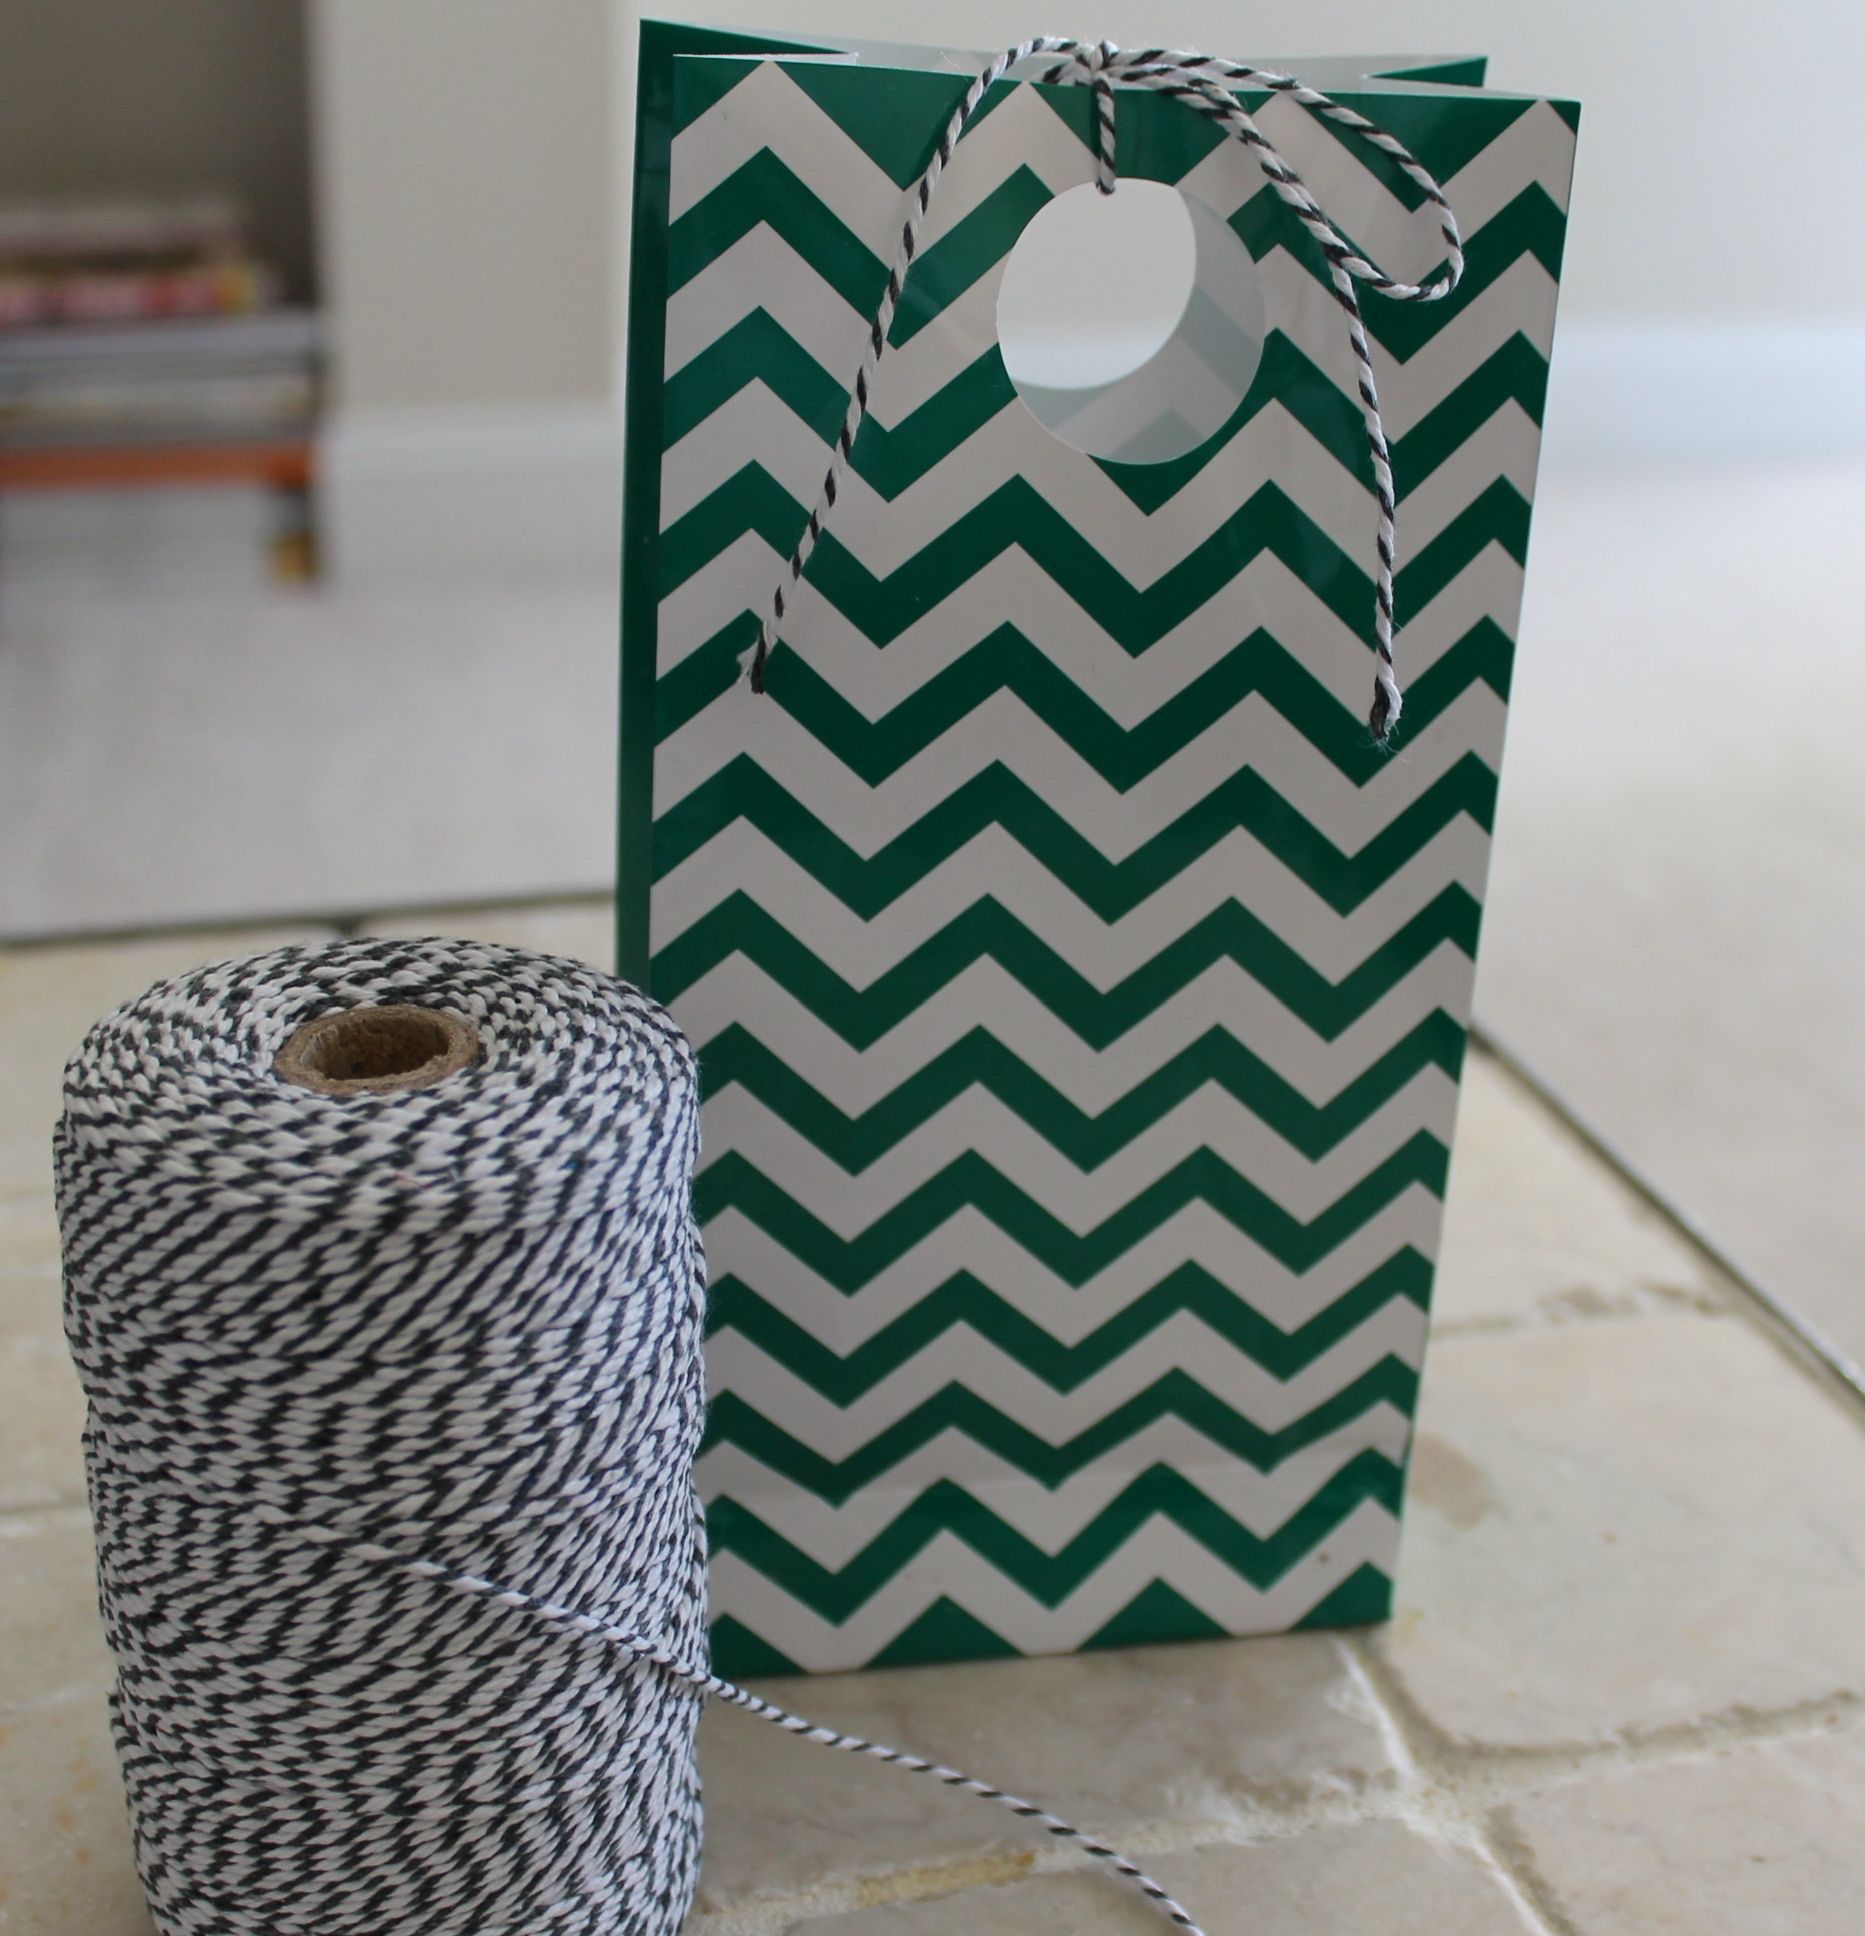
4) I found both the green chevron gift bags and the gray & white baker’s twine on Pick Your Plum.

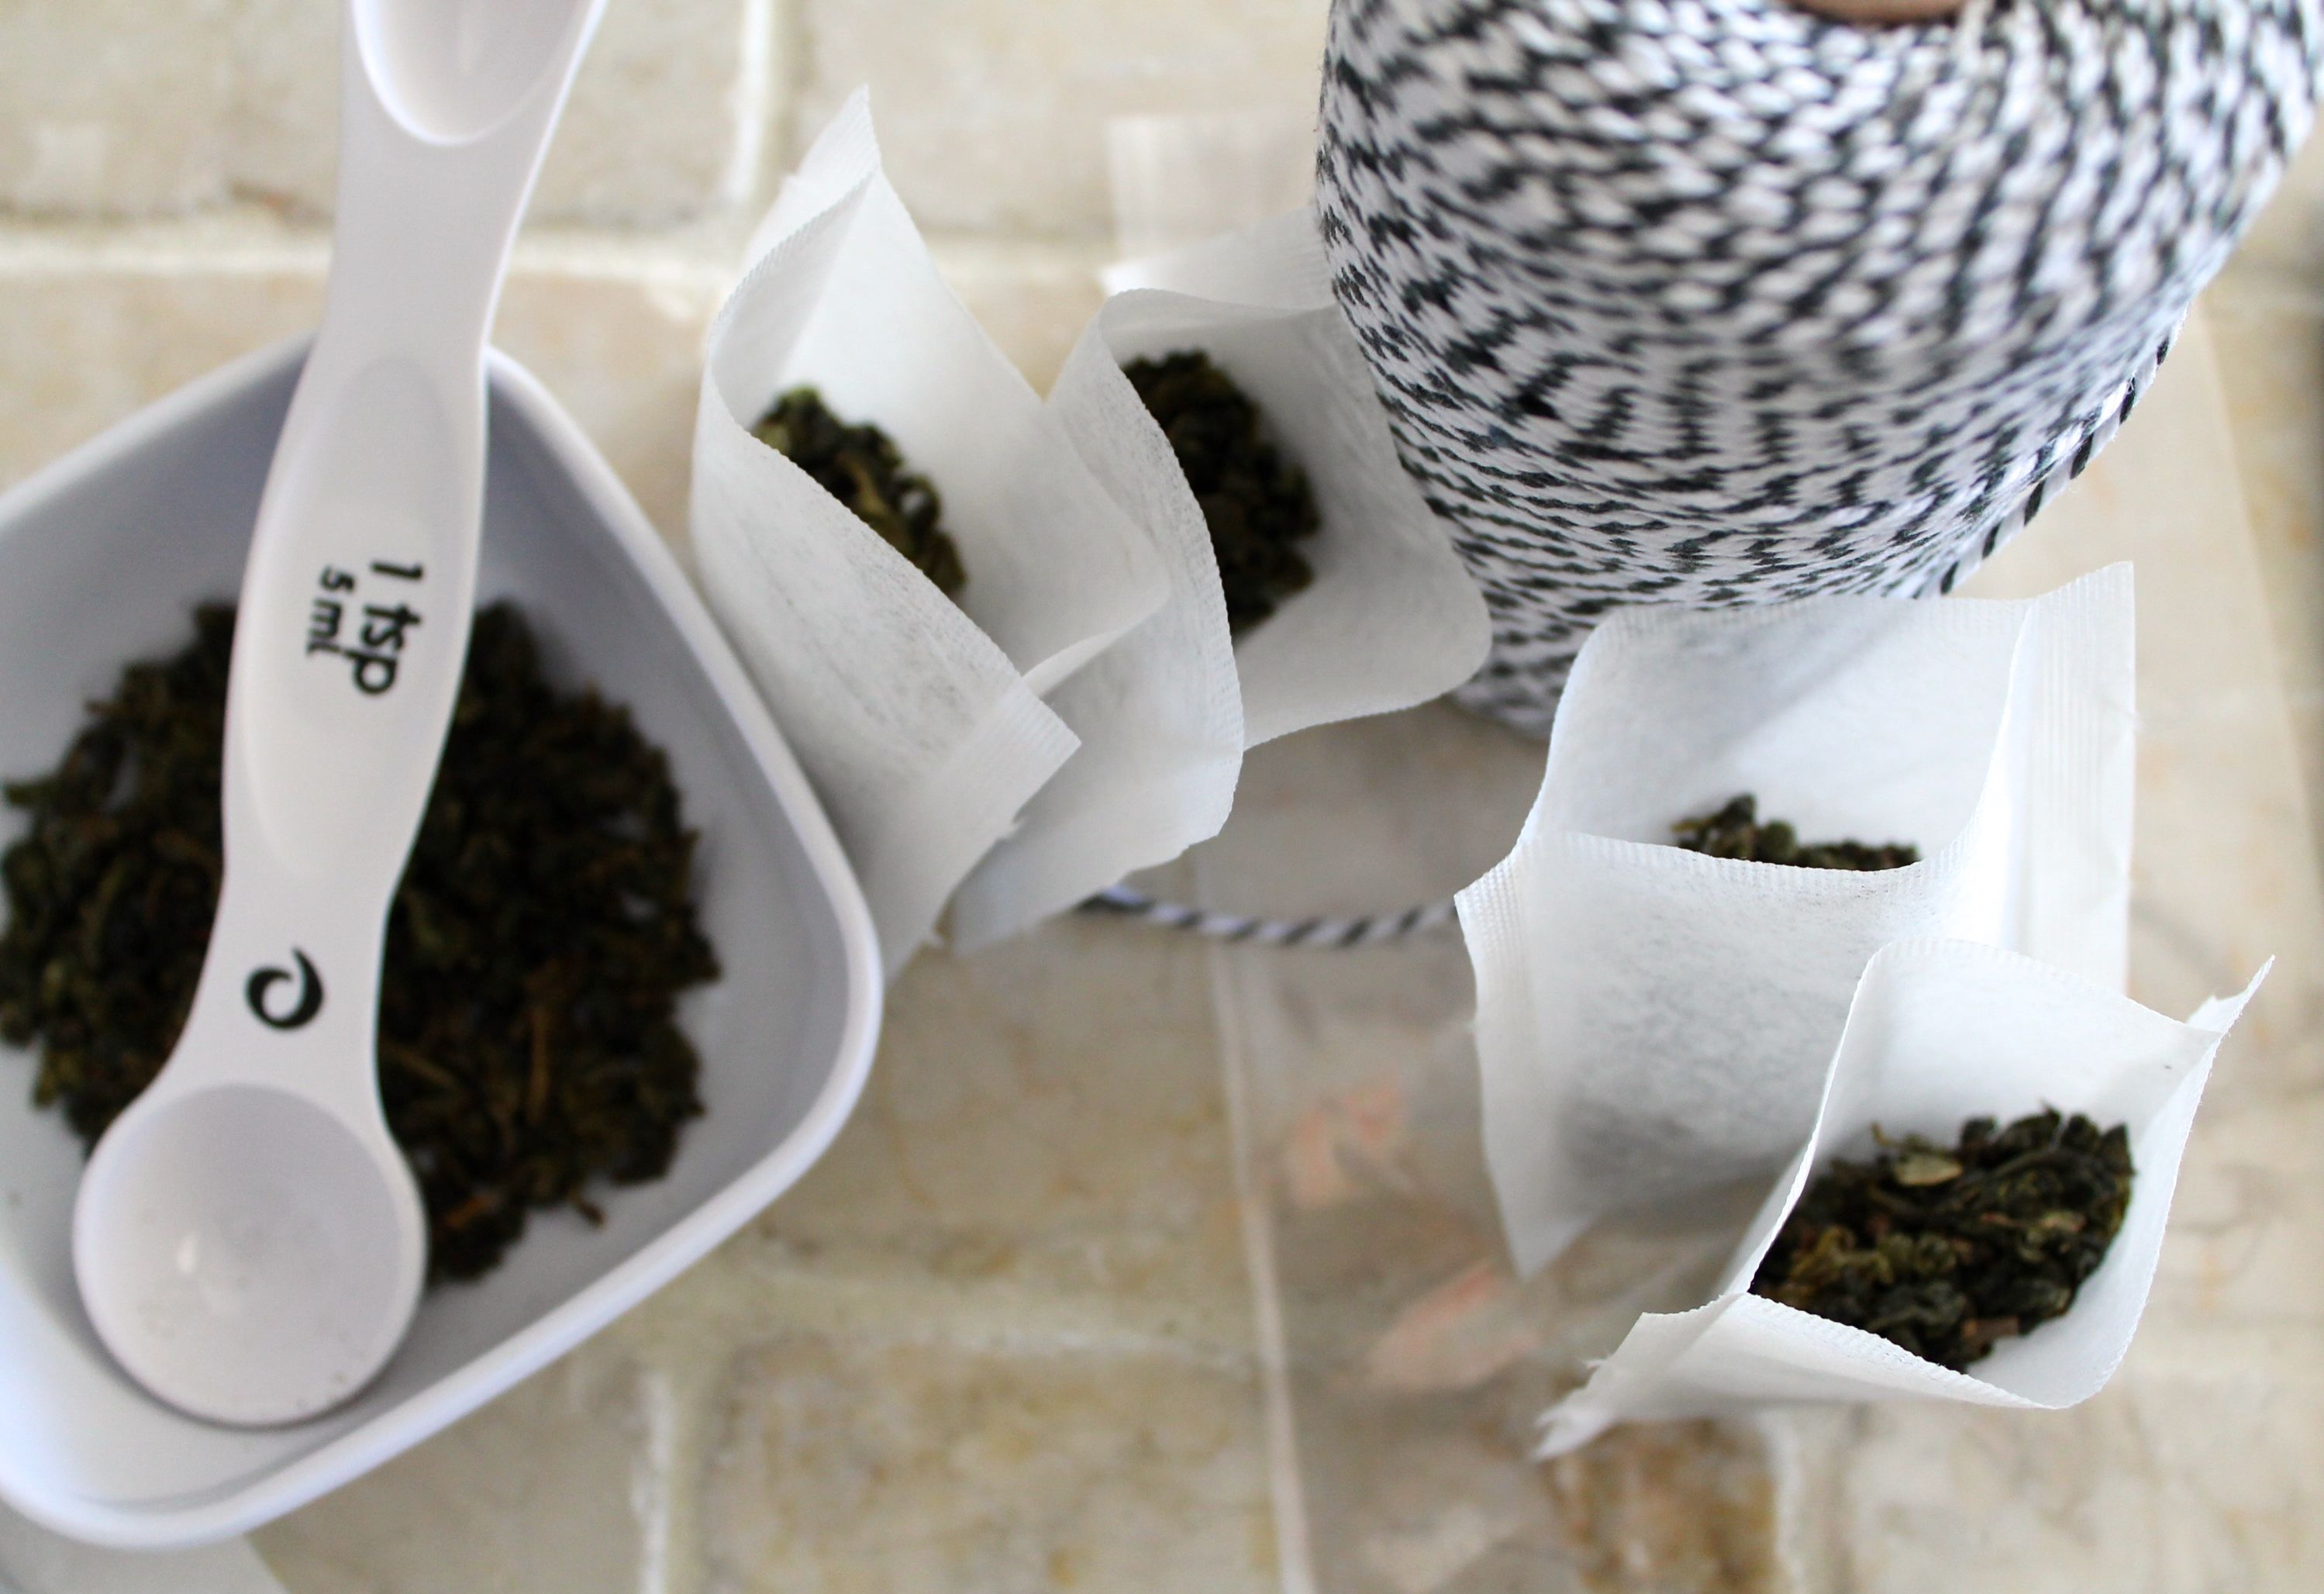
Now all you have to do is assemble! Read the notes that came with your tea purchase or just do a little googling to figure out how much tea to put in your tea bags. Each tea is different, and each tea drinker has their own preference. But a good general rule of thumb is a heaping teaspoon per six ounces of water. However, most Americans use coffee mugs rather than traditional tea cups, so they pour considerably more than six ounces, resulting in a pretty weak cup of tea. So for my tea bags, I went with two flat teaspoons per tea bag. Not too much, not too little, IMHO.

Looseleaf Tea

Seal your tea bags with an iron. I actually have a hair straightener that I have dedicated solely to crafting purposes, which is way more easy to handle than a big iron. My bags sealed within 5 seconds.

IMG_3120

I recommend placing your tea bags within a plastic bag to keep the tea airtight before placing in your gift bag. A zip-top bag would be fine. I put 5 tea bags in a 6×3.75″ clear treat bag that I picked up at AC Moore and sealed them shut with cute washi tape I got from Pick Your Plum.

IMG_3122

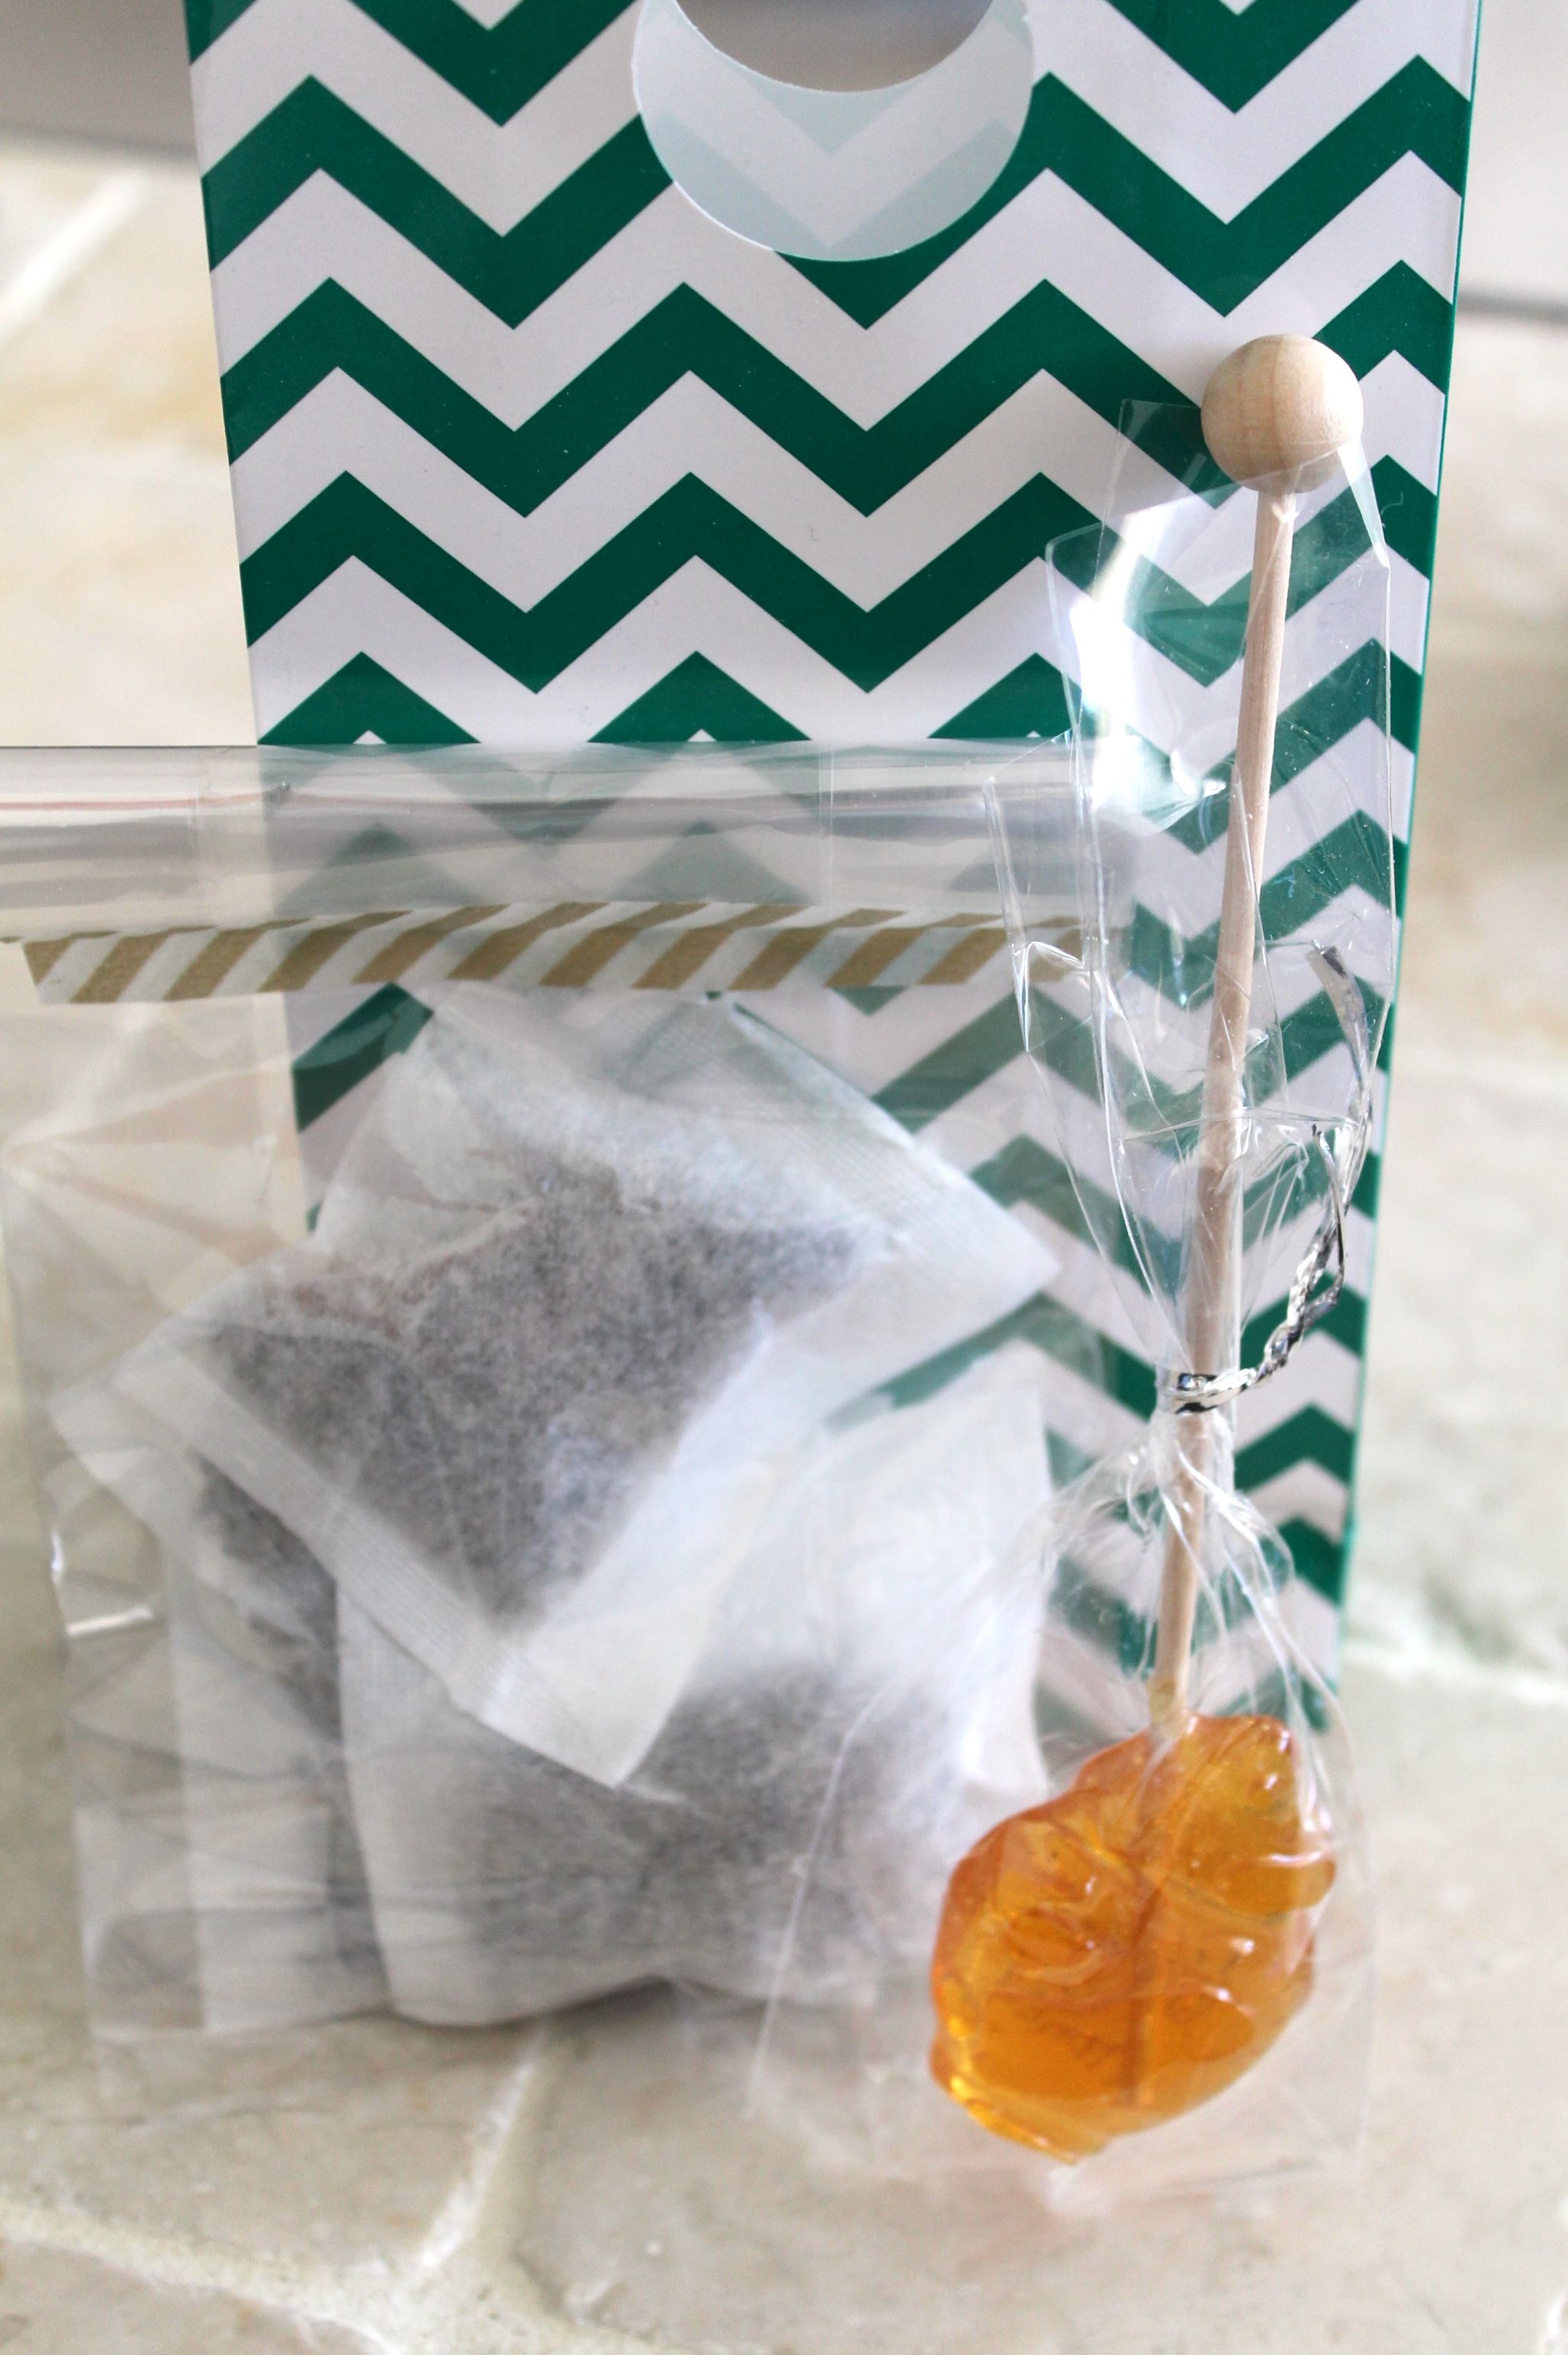
The bag of tea bags and the honey stick went into the gift bag, tied shut with baker’s twine. I didn’t get a picture of it, but I also wrote the name of the tea (including info about caf/decaf!) and instructions for steeping time on the blank side of a business-card-size piece of pretty scrapbook paper and added that to the gift set.

Tea & Honey Gift Set

Go forth and give! I think anyone would appreciate this lovely little gift set.

Linking Up With:

Let It Shine from Still Being Molly
Made by you Monday from Skip to my Lou
Create It Thursday from Lamberts Lately

DIY No-Sew Paper Dot Curtain

2 Apr

In a rare departure from food, I was inspired to share a DIY project with you all today. I made this for my wedding in September 2012, and this lovely curtain has been hanging on my living room wall ever since mostly because I really just don’t know what to do with it! Until I figure that out, it’s bringing a nice splash of color to our home.

The first thing I fell in love with when researching wedding decor was this sewn paper dot garland. I could make it fit perfectly with my shades-of-purple dots theme, and I decided that I would have to have it, no matter how long it took to make one myself.

I bought heavy two-sided scrapbook paper in a few different shades of purple and a metallic gold.

photo 2 (2)
I went to town with my circle punches. I punched SO MANY circles. Then my wonderful Aunt Darlene took over. Amazing — between work and wedding planning, I was running short on time! She’s a life saver.

Aunt Dar thought the curtain needed a little more sparkle, so she added in a strand of metallic gold and purple pailette sequins for every two paper circle strands.

photo 3

The curtain turned out amazing! We hung it behind the dessert table for a super awesome backdrop. In a venue with almost all white walls, it created a great focal point. Aunt Darlene also created a few extra strands NOT attached to the curtain, to hang from the ceiling over the dance floor.

Here’s a shot of our wedding cake and dessert table, where you can see the dots hanging in the background:

544885_10100982315678328_1942262979_n

And a neat black-and-white shot from our clever photographer:

Purple Dot Curtain

I won’t lie, this project took FOREVER. But I thought it turned out so well, and it was my favorite part of the decor. If you’d like to try this project on your own, go for it! Depending on your mood, you could spend some time on your own working on this mindlessly while watching TV and enjoying a glass of wine, you could invite your wedding attendants over and make a party of it, or you could delegate to someone wonderful in your life.

A few notes on the numbers I used, and then instructions to make your own!

  • I picked out coordinating colors of scrapbook paper (make sure it’s not white on one side). About 50% of the paper I purchased was a dark plum purple, which would be my main color. The other 50% was divided evenly between another dark purple color, a light lavender purple, and gold. I recommend buying extra paper and returning what you don’t use — I found it difficult to purchase additional paper in the same shade from our local stores.
  • The curtain rod is adjustable and ended up just over 7 feet wide. We wanted the length to be just under the length of the 8-foot table we were using it behind so that no strands would escape and risk being tugged on by people coming up to the dessert table.
  • There are 39 strands total, tied to the curtain rod about 2 inches apart. 26 strands use paper circles and 13 strands use metallic sequins.
  • For each paper circle strand, there are about 20 random circles, spaced 2-3 inches apart. For each metallic sequin strand, there are 28-30 circles, alternating purple and gold, spaced 2 inches apart.
    • If I was very careful about lining up my circle punches, I could get about 11 3″ circles and 14 1.5″ circles out of each 12×12 scrapbook page. I needed about 520 circles total, which would mean about 20 sheets of scrapbook paper. I bought 30 or more to accommodate error and to have extra strands to hang over the dance floor.
    • We needed about 400 sequins. We found packs of 250 at Hobby Lobby, so we needed just one of each color.
  • The overall length of the curtain is only about 5 1/2 feet. Since we were using it behind a table, it didn’t need to be long at all as it didn’t need to reach the floor. From where we hung it, the strands dropped a few inches below/behind the table.

photo 1Supplies:

Scrapbook paper in chosen colors
Fishing line
3” circle punch
1.5” circle punch
1/16″ pinpoint hole punch
Adjustable curtain rod
Tulle (optional)
Posterboard or construction paper
Tape

Instructions:

Punch out circles in varying sizes (3″ and 1.5″ circle punch suggested) from thick paper of varying colors. Punch the edge of each circle with the 1/16″ hole punch.

String the circles in random order along the fishing line, tying a knot through the pinpoint hole of each circle. Space the circles 2-3 inches apart. Continue on the same strand until you have about 6 feet in total (or whatever desired length). Leave an extra 12-18 inches of fishing line on the strand.

With the extra length of fishing line, tie the strand to the curtain rod. (I recommend leaving extra space between the rod and the beginning of the paper dots. It’s easy to roll all the strands up the curtain rod if it’s too long, and the extra length may come in handy depending on where/how you hang it.)

If you are planning on MOVING the curtain to another location at any point, DO NOT skip this step: Cut 4” or so wide strips of posterboard or construction paper. Tape them in a row to the fishing line, backing the paper dots. This will keep the dots from tangling with each other during transport. (I guarantee that if you don’t do this step and instead try to roll the dots around the curtain rod, it will take you about 40 hours to disentangle them. BTDT.)

Continue tying circles and creating strands until the length of the curtain rod is filled.

Optional: When the curtain is finished, wrap the length of the curtain rod in tulle, tying knots on each end. Roll the curtain rod so that all the strands wrap around the rod for a few inches, using the empty fishing line to secure the tulle more closely to the rod.


Linking Up With:

Funday Monday from Still Being Molly
Block Party from Hungry Happenings
Made by you Monday from Skip to my Lou
Inspiration Monday from Twelve O Eight
Time to Sparkle from Love Grows Wild
Wonderfully Creative Wednesday from All She Cooks
Create It Thursday from Lamberts Lately
Life of the Party from The Grant Life
All Things Pretty from Sparkles and a Stove
City of Links Party from City of Creative Dreams

DIY Bubblegum Valentines

4 Feb

Okay, I just spent the majority of my designated blog-post-writing time trying to think of some sort of pun to name these:

V Day Gum

As a self-proclaimed pun-lover, I’m ashamed. I’ve seen a million candy Valentine puns lately, and my mind is just drawing a blank on this one. Oh well. They’re still cute.

I won’t lie, I generally get pretty excited about seasonal decor. I even have a Valentine Pinterest board. But so far I’ve kept all that stuff mostly under wraps. I haven’t made any heart garland for Valentine’s Day, decorated gourds for Halloween, or red-white-and-blue centerpieces for July 4th. We didn’t even decorate for Christmas this year! I think maybe it’s because I feel like it’s a bit odd or a waste of time when it’s just me and the BF at home. Maybe one day when we have kids I’ll spend hours making adorable seasonal crafts with them.

In the meantime, I restrain myself to mostly food-oriented projects, and the little bit I do unleash is usually targeted at my coworkers. So I made these adorable little bubblegum valentines.

Yum Gum

I had a jar of bubblegum, so I pulled out all the Valentine colors — red, pink, and white. Four gum-balls in mixed colors went into bags I had leftover from making teal thank-you cookies. I cut a strip of white cardstock to fold over the top of the bag. I used my lace edge punch to create a lace border on the front and then stamped “you’re so sweet.” and two hearts in red ink. Fold the bag over, slip the paper on top, and staple shut.

you're so sweet.

Super easy and super cute. Making enough for my coworkers took about a half hour while I watched TV. I just hope they appreciate how hard I worked on these. ;)

Happy Valentine's Day!

Happy Valentine’s Day! And if you think of a good pun, let me know.

Linking up with:

Dolla Dolla Bills

30 Apr

I saw this cute idea on Pinterest for giving the gift of cash-ola. My little sister’s birthday was coming up, and what 17-year-old doesn’t prefer cash to… well… pretty much anything else?

I wrapped up an empty tissue box in super cute paper, folding the top edges into the original hole in the box. I used a lot of double-sided tape so it would be a little neater.

I taped 20 one-dollar bills together end-to-end. I rolled them up and stuffed them into the box, leaving the one on the end sticking out. I folded and taped a piece of coordinating paper over the first bill and used a permanent marker to write a birthday message. Because the hole was a little smaller than a bill, it actually stayed put, and I didn’t have to worry about it falling in there.

Tissue Box

I flattened the birthday message tag against the box and then tied a pretty coordinating ribbon over the whole box. Unfortunately I don’t have a picture of this part, probably due to my inability to use the camera on my phone. But overall, it was cute in a really pretty package. You’ll just have to believe me about how nice-looking it was.

The birthday girl pulled the first bill out and everyone was surprised to see more and more follow! She was excited to be rolling in the dough, so to speak. Though I think the best part was when my four-year-old nephew exclaimed, “That’s so much money, [enough] FOR A CAR!”

Dollars

DIY: Memory Game

13 Feb

Generally speaking, I’m not a sharer. Or a feeler. I have a hard time explaining my emotions in words. If I must, I prefer to convey my feelings by picking a somewhat expressive song and playing it loudly. Though according to the BF, after long silent treatments, I share my feelings “suddenly and without warning.” It’s true. It takes me a while to warm up to talking about my feelings, which is odd since I talk nonstop about everything else. But once I work up the guts to say whatever it is, I generally explode before I lose my nerve.

Like a few years back, when the BF and I were facing college graduation and hadn’t worked out any plans yet. Sitting in his Jeep, I was having trouble saying out loud that I loved him, and I’d really prefer us to move in together and not go our separate ways. I finally shouted, “LOOK, I just want you to change all your life plans and be with me, OKAY? GEEZ.” His response? He smiled real goofy and kissed me. I muttered, “oh god,” and walked away.

All this is just to explain to you that I really don’t do things like the project I’m about to show you. It’s not my style. This is just so freaking adorable, and I hate love hate being adorable. It’s so… barf-inducing sweet. I usually buy him some chocolate and maybe a shirt from the Gap. I’ve only done something cuter than this one time, and I’m certainly not going to tell you what that was.

Okay, enough stalling, this is what a made: A personal deck of Memory cards. Barf. But really, these are pretty amazing. They also took a loooong time, which I will be certain to convey upon presenting these to my beloved.

Funny part? I'm terrible at this game.

I took a deck of red playing cards and cut a whole bunch of coordinating scrapbook paper to cover up the number side. Then I cut a whole bunch of images from the interwebs. Of course, all in multiples of two so I’d have matching sets for my Memory game. I actually made way more than this picture shows, but you get a nice sample here.

B-t-dubs, I got most of the images from reusableart.com. It’s old stuff, which means there is no copyright. And it worked out pretty well for me since I was going for a vintage look.

I picked images that had meaning for us. For example, I picked this crane because that’s the BF’s spirit animal: balance, stability, and integrity. And by “that’s his spirit animal,” I mean that I spent ten minutes taking online quizzes on his behalf until I got an answer I liked and could find a good picture for.

BF's Spirit Animal: Crane

And I picked this cat riding a bicycle because that’s my spirit animal. Ha.

My Spirit Animal: Clumsy Cat on a Bike

I’ll admit, I made a few just because they were pretty, like this awesome owl:

I have some Christmas cards that say "Happy Owlidays." Lurve.

Last, I made a title card. I used a 1 1/2″ circle punch to cut a hole out of the center of some cardstock. I centered this over the Ace of Hearts and then stamped the title. I was pretty pleased that our initials rhyme with “memory.”

Every time I look at this, I say it to myself in measured syllables: "A and E. Mem-or-ee."

I got everything to stick together with liberal amounts of Mod Podge. I laid out my cards how I wanted them on top of some wax paper. A layer of Podge on the card, then paper, a layer on the paper, then picture, a layer over everything.

Prep

Podge

Stick

Once I got the final layer of Podge on there, I used an old gift card to spread it even. It removed brush strokes and also flattened any air bubbles out from under the paper. I folded my wax paper in half over top of them and loaded all my cookbooks on top to make sure they stayed flat while they dried.

Scrape

Cover & Flatten

And there you go! Tied up with a bit of string, it made a very adorable Valentine’s Day gift. But use your imagination! This project could be done with a million different themes for a million different occasions.

Deck of Love Cards