Oh, bittersweet day. The last film of the Harry Potter series will be released at midnight, and I am both incredibly excited, but also sad that after I see the film… well, that’s it. No more movies, no more books. A character — no, an entire universe — that I grew up with will come to an end.
When I say that my generation grew up with Harry Potter, I mean my generation. Harry Potter and the Sorceror’s Stone was released in 1997, 2 months after my 11th birthday; within the first few chapters, Harry celebrates his 11th birthday. I am the HP generation.
In my humble opinion, I am intense about Harry Potter, but I’m not insane about Harry Potter. I attended one midnight book release party once with my cousins, I think maybe for the 6th book. I’ve never been to a midnight movie release, but I have always seen the movies within a week of their release, and I own all the so-far released DVDs. I was briefly addicted to two different HP computer games. When Harry Potter and the Deathly Hallows, the final installment of the series, was released, I read the entire book in two days, which was may attempt to pace myself and savor it. And I dragged the BF to The Wizarding World of Harry Potter a couple months after it opened at Universal Studio’s Islands of Adventure. So… maybe a little crazy.
In honor of the end of an era, I have a few Harry Potter-themed recipes to share with you. I have planned entire HP-themed Halloween parties in the past, and trust me, if you need more HP recipes, there are plenty online. These three will get you started though. I’ll be taking these with me to an outdoor screening of Harry Potter and the Deathly Hallows: Part 1, which will set me up perfectly to see Part 2 in a few days. If you haven’t seen the Hogwarts Express tea trolley come by and you don’t have time to run over to Honeydukes, try out these recipes yourself. And if any Muggles ask you for the recipe, just tell them they were made with magic.
Cauldron Cakes
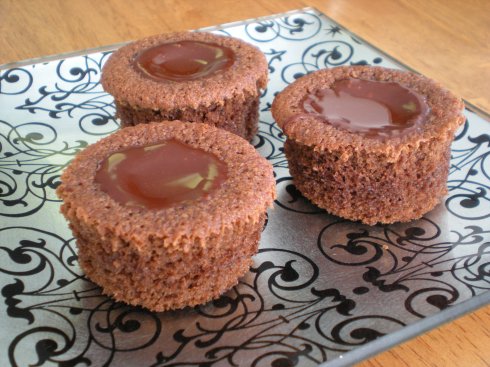
Chocolate cupcakes (cauldrons) filled with liquid chocolate are the simple concept behind these cakes. You can use whatever recipe you’d like, homemade or boxed. This recipe is for a basic chocolate cake.
I started by preheating the oven to 350 F and lining a cupcake pan with papers. Then I whisked together 1 1/4 cup flour, 1/2 cup cocoa powder, 1/2 tsp baking soda, 1/4 tsp baking powder, and 1/4 tsp salt.
In another bowl, I beat 1/2 cup (1 stick) softened butter with my hand mixer on medium for about 30 seconds. Then I gradually added 1 1/4 cup sugar, scraping the sides of the bowl, mixing for 2-3 minutes. I added 2 eggs, one at a time, beating after each one. Then I beat in 1 tsp vanilla. To finish the batter, I alternated adding the flour mixture and 1 cup milk, beating until well incorporated.
I filled cupcake tins not too full — I didn’t want a muffin top puffing out from the cupcakes. This batch made for about 20 cupcakes. I baked them for about 18-20 minutes, rotating halfway through.
I pulled the cupcakes out and let them cool in the pan for about 10 minutes. Then I removed them from the pan and let them cool completely. Now for the contents of the cauldron: chocolate ganache. My ganache recipe is a simple 2:1 ratio of chocolate to butter. So for this recipe, I melted 1 cup semisweet chocolate chips and 1/2 cup (1 stick) butter with my simple microwave technique: dump it in a microwave-safe bowl, and microwave it on 20-second intervals, stirring well after each round, until it’s smooth.
I used a cupcake corer to scoop a hole out of the middle of each cupcake. I spooned some ganache in and let it cool. The butter will allow it to firm up without getting hard. Abracadabra! A chocolate cauldron filled to the brim with liquid dark chocolate.
Cockroach Clusters
These are super easy and make a great addition to a Harry Potter or Halloween spread. Only 2 ingredients, and very few steps.
First start out by melting some chocolate — I used Ghiradelli semisweet chocolate chips. Same process as for the ganache above: microwave on 20-second intervals, stirring well after each round, until it’s smooth.
 Once I had smooth chocolate, I mixed in a handful of dried chow mein noodles. (You can use wheat or rice, either works fine).
 Don’t worry about specific measurements, just mix in what looks right. You want them to be sufficiently crunchy without any of the noodles sticking out too much. As I stirred them together, I used the spoon to crunch up some of the bigger pieces. Then I just scooped out spoonfuls and plopped them on a cookie sheet covered in wax paper and left them to harden. I had a tiny bit of chocolate left in the bottom of the bowl, so I added a few dollops to the clusters that looked like they could use some extra glue.
Licorice Wands
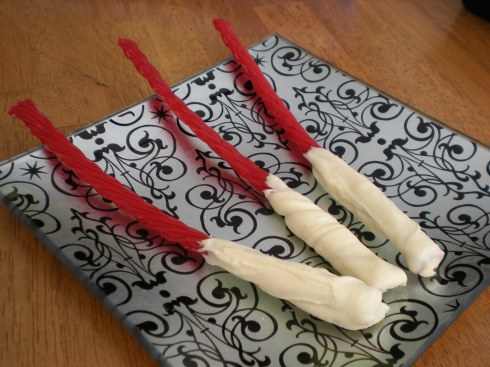
These are also super easy. With the same chocolate melting process, I melted some white chocolate chips: microwave on 20-second intervals, stirring well after each round, until it’s smooth. I seem to have more difficulty with white chocolate than regular chocolate, so make sure you’re doing shorter intervals and stirring a little more vigorously.
Then I coated one end of a piece of licorice, making sure it was quite thick so it would resemble a handle.
 Obviously these would look more convincing with black licorice, but I can’t stand the stuff, so I went with Twizzlers instead.
Now enjoy your cakes and candies, grab your wand, and practice your spells!


