Archive | Seasonal & Holiday RSS feed for this section

Cauldron Cakes, Cockroach Clusters, and Licorice Wands

14 Jul

Oh, bittersweet day. The last film of the Harry Potter series will be released at midnight, and I am both incredibly excited, but also sad that after I see the film… well, that’s it. No more movies, no more books. A character — no, an entire universe — that I grew up with will come to an end.

When I say that my generation grew up with Harry Potter, I mean my generation. Harry Potter and the Sorceror’s Stone was released in 1997, 2 months after my 11th birthday; within the first few chapters, Harry celebrates his 11th birthday. I am the HP generation.

In my humble opinion, I am intense about Harry Potter, but I’m not insane about Harry Potter. I attended one midnight book release party once with my cousins, I think maybe for the 6th book. I’ve never been to a midnight movie release, but I have always seen the movies within a week of their release, and I own all the so-far released DVDs. I was briefly addicted to two different HP computer games. When Harry Potter and the Deathly Hallows, the final installment of the series, was released, I read the entire book in two days, which was may attempt to pace myself and savor it. And I dragged the BF to The Wizarding World of Harry Potter a couple months after it opened at Universal Studio’s Islands of Adventure. So… maybe a little crazy.

In honor of the end of an era, I have a few Harry Potter-themed recipes to share with you. I have planned entire HP-themed Halloween parties in the past, and trust me, if you need more HP recipes, there are plenty online. These three will get you started though. I’ll be taking these with me to an outdoor screening of Harry Potter and the Deathly Hallows: Part 1, which will set me up perfectly to see Part 2 in a few days. If you haven’t seen the Hogwarts Express tea trolley come by and you don’t have time to run over to Honeydukes, try out these recipes yourself. And if any Muggles ask you for the recipe, just tell them they were made with magic.

Cauldron Cakes

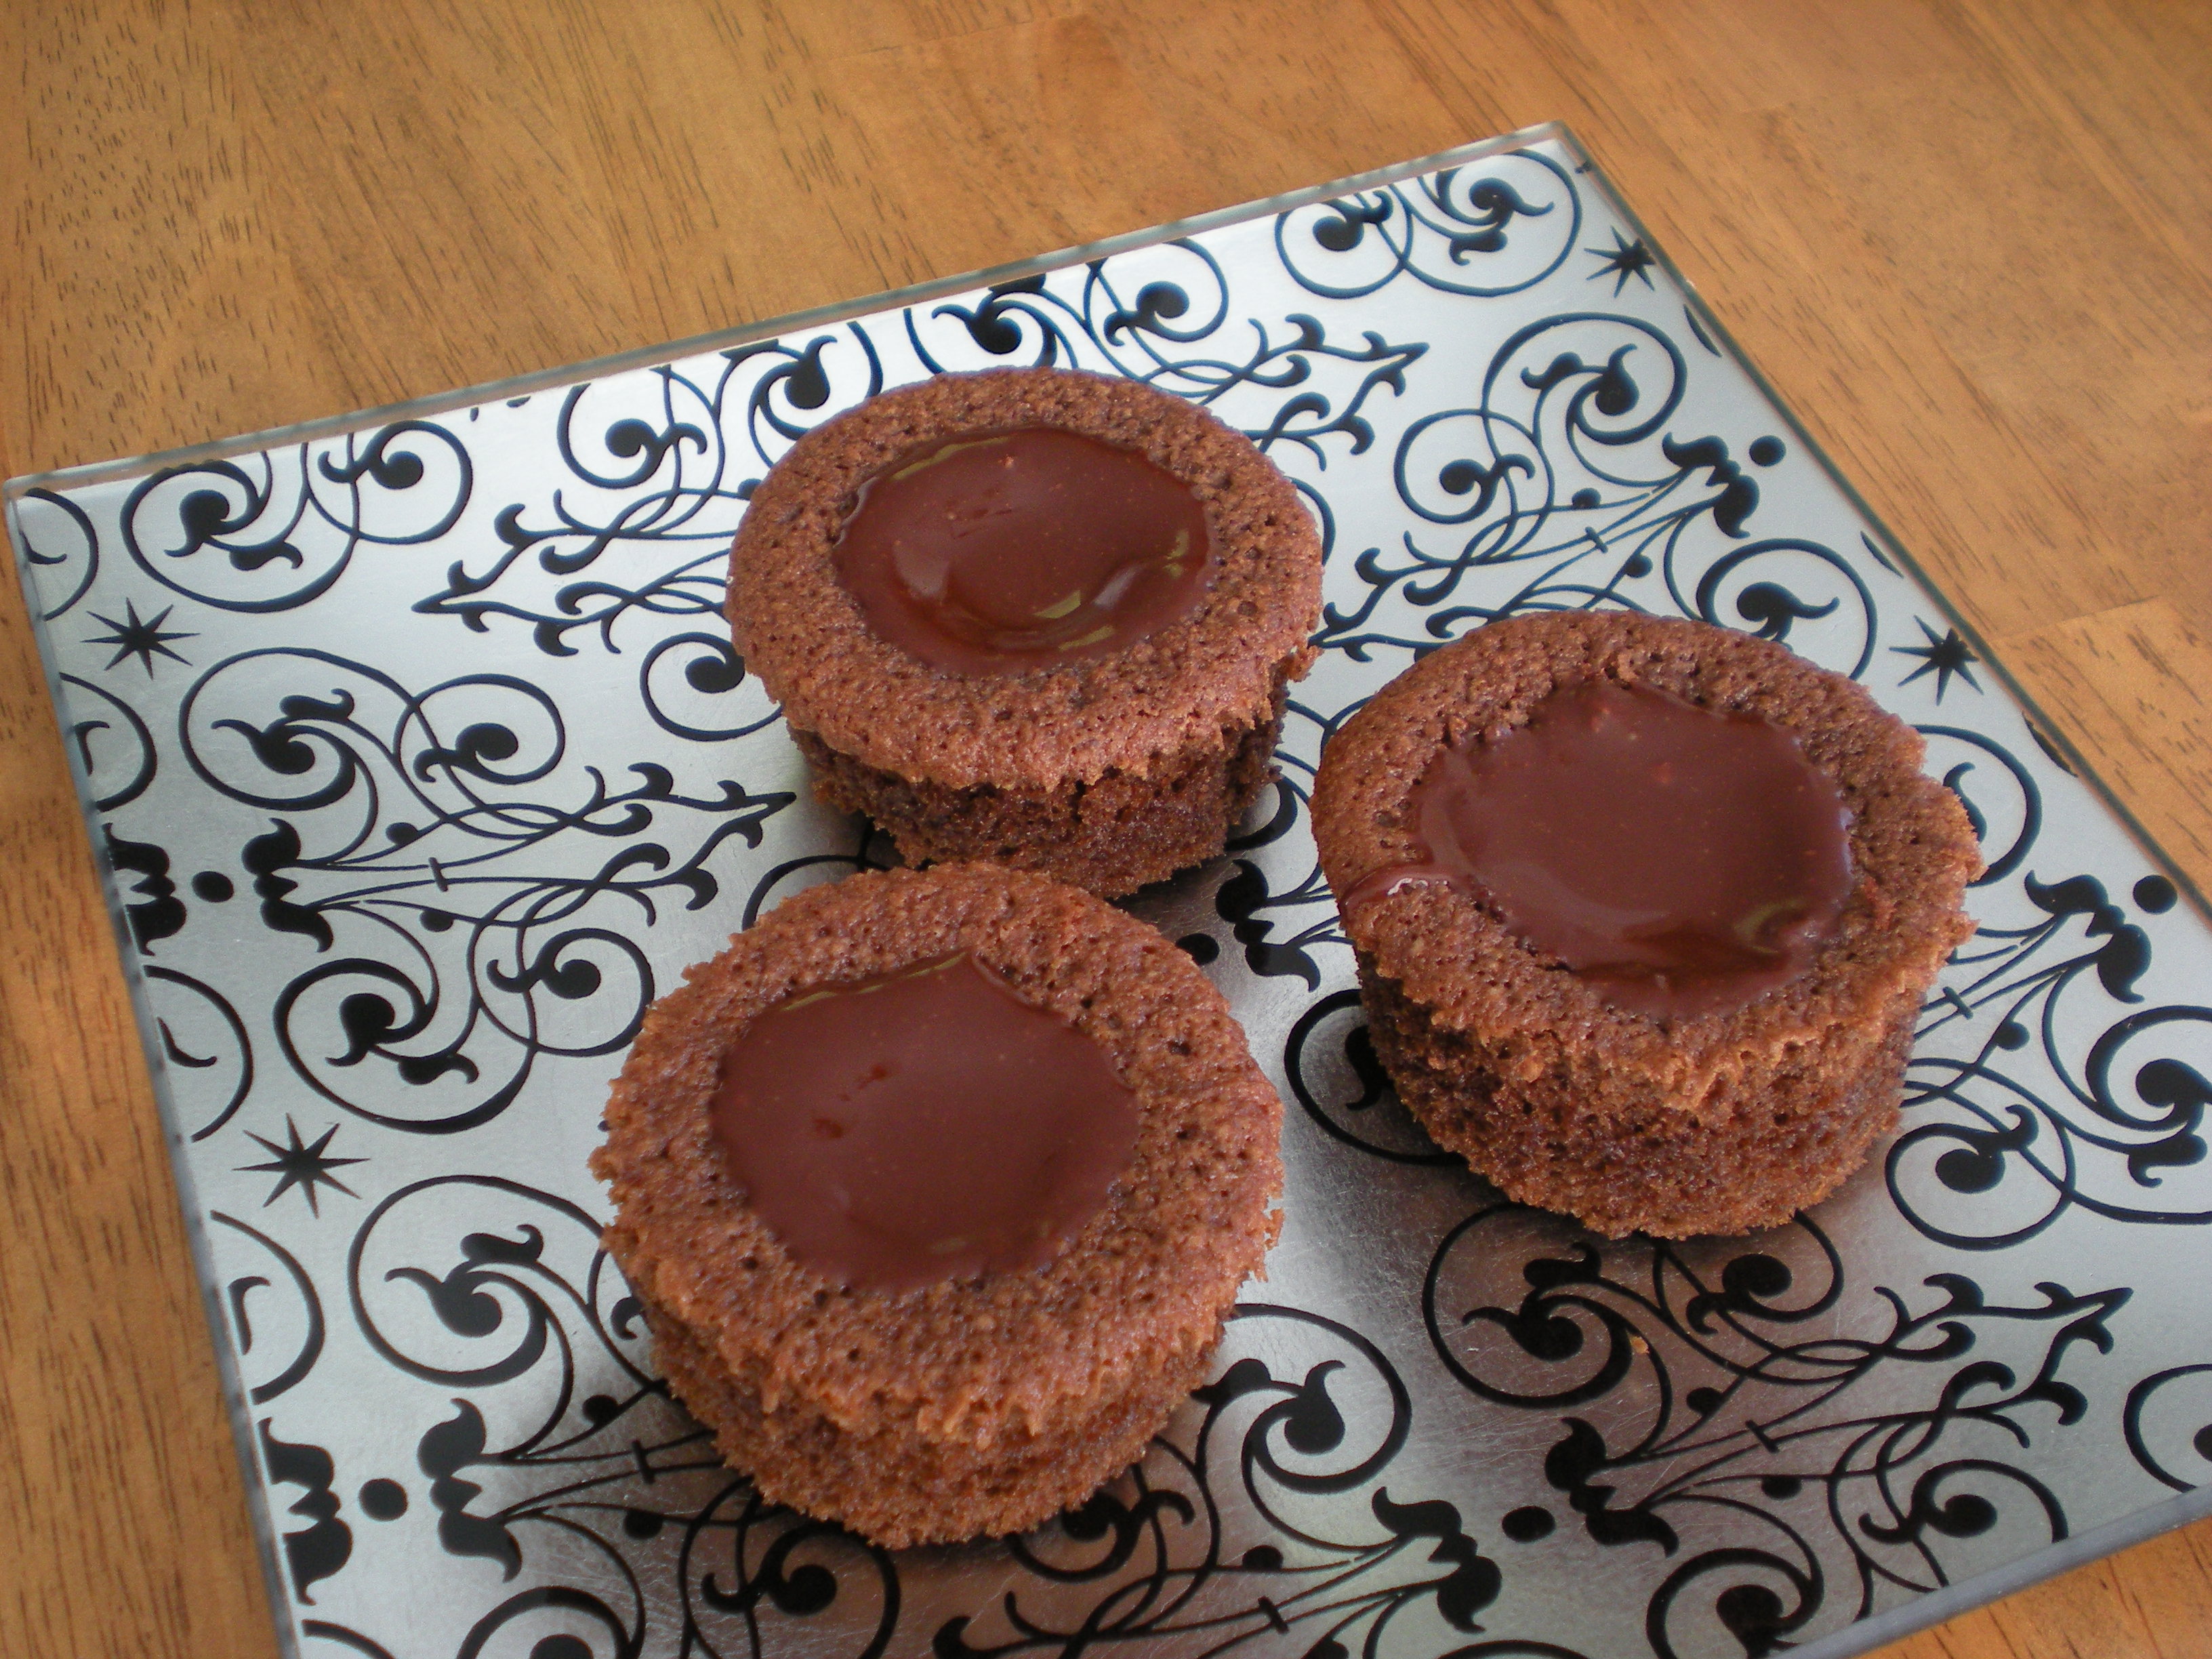
Chocolate cupcakes (cauldrons) filled with liquid chocolate are the simple concept behind these cakes. You can use whatever recipe you’d like, homemade or boxed. This recipe is for a basic chocolate cake. 

I started by preheating the oven to 350 F and lining a cupcake pan with papers. Then I whisked together 1 1/4 cup flour, 1/2 cup cocoa powder, 1/2 tsp baking soda, 1/4 tsp baking powder, and 1/4 tsp salt.

In another bowl, I beat 1/2 cup (1 stick) softened butter with my hand mixer on medium for about 30 seconds. Then I gradually added  1 1/4 cup sugar, scraping the sides of the bowl, mixing for 2-3 minutes. I added 2 eggs, one at a time, beating after each one. Then I beat in 1 tsp vanilla. To finish the batter, I alternated adding the flour mixture and 1 cup milk, beating until well incorporated. 

Cauldron Cake Batter

I filled cupcake tins not too full — I didn’t want a muffin top puffing out from the cupcakes. This batch made for about 20 cupcakes. I baked them for about 18-20 minutes, rotating halfway through.

I used my magic wand to fill these evenly and perfectly.

I pulled the cupcakes out and let them cool in the pan for about 10 minutes. Then I removed them from the pan and let them cool completely. Now for the contents of the cauldron: chocolate ganache. My ganache recipe is a simple 2:1 ratio of chocolate to butter. So for this recipe, I melted 1 cup semisweet chocolate chips and 1/2 cup (1 stick) butter with my simple microwave technique: dump it in a microwave-safe bowl, and microwave it on 20-second intervals, stirring well after each round, until it’s smooth.

I used a cupcake corer to scoop a hole out of the middle of each cupcake. I spooned some ganache in and let it cool. The butter will allow it to firm up without getting hard. Abracadabra! A chocolate cauldron filled to the brim with liquid dark chocolate.

You won't need a Vanishing Spell to clear out these Cauldron Cakes.


Cockroach Clusters

These are super easy and make a great addition to a Harry Potter or Halloween spread. Only 2 ingredients, and very few steps.

First start out by melting some chocolate — I used Ghiradelli semisweet chocolate chips. Same process as for the ganache above: microwave on 20-second intervals, stirring well after each round, until it’s smooth.

Melting some chocolateOnce I had smooth chocolate, I mixed in a handful of dried chow mein noodles. (You can use wheat or rice, either works fine).

The ingredients.Don’t worry about specific measurements, just mix in what looks right. You want them to be sufficiently crunchy without any of the noodles sticking out too much. As I stirred them together, I used the spoon to crunch up some of the bigger pieces. Then I just scooped out spoonfuls and plopped them on a cookie sheet covered in wax paper and left them to harden. I had a tiny bit of chocolate left in the bottom of the bowl, so I added a few dollops to the clusters that looked like they could use some extra glue.

Cockroach Clusters

Licorice Wands

These are also super easy. With the same chocolate melting process, I melted some white chocolate chips: microwave on 20-second intervals, stirring well after each round, until it’s smooth. I seem to have more difficulty with white chocolate than regular chocolate, so make sure you’re doing shorter intervals and stirring a little more vigorously.

Then I coated one end of a piece of licorice, making sure it was quite thick so it would resemble a handle.

Licorice WandsObviously these would look more convincing with black licorice, but I can’t stand the stuff, so I went with Twizzlers instead.

Safety first! Keep those wands pointed away from grabbing hands.

Now enjoy your cakes and candies, grab your wand, and practice your spells!

Chocolate Coconut Sandwich Cookies

4 Jan

I made these delicious sandwich cookies about a month ago and completely forgot to post them! They’re very classy – sure to impress. I took them to an office holiday party, and they completely disappeared. Here’s the basic plan: make some sugar cookies, shape them into balls, roll them in coconut, bake, then sandwich them together between melted chocolate. Yum!

I pre-heated the oven to 350 F. In a bowl, I whisked together 1 cups all-purpose flour, 1/2 teaspoon baking powder, and  1/2 teaspoon salt.

In another bowl, I beat together 1 1/2 sticks softened unsalted butter, 1/2 cup white sugar, and 1/2 cup packed brown sugar on medium for about 3 minutes. I then beat in 1 large egg and 1 teaspoon vanilla extract. I turned the mixer to low and gradually added in the flour mixture, mixing until just combined.

Batter Ingredients
Shredded Coconut

I popped the dough in the fridge for a little while to firm it up and prepared a plate of coconut flakes. After I pulled the dough out, I rolled little one-inch dough balls, rolled them in the coconut, and placed them about 2 inches apart on a cookie sheet lined with parchment paper.

Coconut Dough Balls

I baked them for about 10 or 12 minutes, rotating halfway through, until they were a light golden color around the edges. I moved them to a rack until they were cooled completely.

Coconut Cookies

I melted some milk chocolate and spread it on a quarter of the cookies, topping them with the other cookies to make milk chocolate coconut sandwiches. Then I melted some dark chocolate and spread it on the rest of the batch to make dark chocolate coconut sandwiches. The whole process took quite a while, baking multiple batches of cookies, waiting for them to cool, and then sandwiching the chocolate, but it was well worth it!

Cookie Sandwiches


How Sue Sees It:
– This recipe made about 20 sandwich cookies, with a couple extra coconut cookies that cracked or toasted a little too much. I served the milk chocolate and the dark chocolate separated on matching square platters. Classy!
– The coconut flavor was delicious, but not very strong. Next time, I would probably mix about a cup and a half of coconut into the batter. I’d still roll it in coconut, because it looks cool.
– To give this a more wintery, holiday vibe: Roll your dough balls a little smaller so that the final sandwich cookie is more of a round shape. Switch up the filling to white chocolate or vanilla buttercream filling (1 stick of butter, 1 cup confectioners sugar, and 1 teaspoon vanilla, blended on medium-high until pale and fluffy). Roll the final ball in coconut again so that you have fresh coconut sticking to the middle filling. Now you have a coconut snowball!

Rudolph Cupcakes

29 Dec

Breakaway cupcakes are all the rage these days, so here’s some Christmas-y ones for you. My cousin and one of my sisters made these, so I don’t have a recipe, but you don’t really need one.

They used yellow cake mix for all the cupcakes, baking them in red and green paper liners. For the face, they spread on canned chocolate icing. And for the antlers, they piped on canned vanilla icing in wide zig-zag lines. They added graham cracker crumbs on top of the antlers.

Rudolph Cupcakes

For the facial features: the eyes are two Double-Stuf Oreos painted with chocolate and white icing. The nose is another Double-Stuf Oreo painted with red icing. The mouth is black gel icing.

And that’s it! Super cute, and very festive!

Rudolph Cupcakes!

Merry Christmas!

Spice Cupcakes with Cream Cheese Icing

26 Dec

I recently made cupcakes for our Navidad Nacho Noche — our annual Christmas celebration over a nacho dinner with Betsy and a couple other friends. Betsy’s bf requested non-chocolate cupcakes, and in the spirit of Christmas, I decided a spice cake would be great, topped with – what else? – cream cheese icing.

For the cupcakes, I used the hand mixer to cream together 10 tablespoons of butter and 1 cup of packed brown sugar. I added 3 eggs one at a time and beat well after each one.

Ingredients

In another bowl, I whisked to combine the dry ingredients: 1 3/4 cups of all-purpose flour, 1 1/2 teaspoons of baking powder, 1/2 teaspoon of baking soda, 1 1/2 teaspoons of cinnamon, 1/2 teaspoon of ginger, 1/4 teaspoon of ground nutmeg, and 1/4 teaspoon of salt.

Batter

While mixing with the hand mixer, I alternated adding the dry ingredients and 3/4 cup of sour cream. I filled a dozen paper-lined cupcake pan cups. I added some chopped walnuts to the leftover batter and filled another cupcake pan – about 5 more cupcakes. (Some people in my group don’t like nuts, ahem ahem, Betsy.) If you want nuts in all your cupcakes, I’d suggest 1/4 cup of finely chopped nuts of your choice.

Cupcake BatterBaking Cupcakes in the Oven

I baked the cupcakes at 350 F for about 15 minutes — the toothpick I inserted came out clean.

Testing the Cupcakes

Cooling CupcakesI cooled them overnight and frosted them with cream cheese icing the next day.

Spice Cupcakes

How Sue Sees It:
– My friends said they really liked these, but I don’t know if they were just being nice. I actually didn’t like them very much. They were not very sweet, and I have something of a sweet tooth. The cream cheese icing was MUCH sweeter than the cupcake, so that made them worthwhile for me. If you like your desserts a little less sweet, you’ll probably like these. Though once I decided I could call them muffins and have them for breakfast, I liked them better.
– The cupcakes with nuts in them looked better than the ones without. They rose a little higher, while the nut-less cupcakes were flat and smooth on top. Weird.

Double Chocolate Cookies

19 Dec

What’s better than chocolate? More chocolate!  A good chocolate cookie is hard to come by, but these are pretty delicious.

I whisked to combine (you know I don’t sift) 1 cup of all-purpose flour, 1/2 cup of cocoa powder, 1/2 teaspoon of baking soda, and 1/2 teaspoon of salt. I set that aside and dumped 8 ounces of semisweet chocolate chips and 1 stick of butter into a glass bowl. I melted them in 30-second intervals, stirring in between, until smooth.

Dry Ingredients
I poured the chocolate and butter mixture in a large mixing bowl and added 1 1/2 cups of white sugar, 2 eggs, and 1 teaspoon of vanilla. I beat it with the hand mixer on medium until it was well combined. I switched it down to low speed and slowly mixed in the dry ingredients.

Chocolate Mixture
The batter was really runny and difficult to work with, so I put it in the fridge for a little while. I wanted uniform-sized cookies, so instead of spooning them onto the parchment-paper lined cookie sheet, I rolled the dough into balls and placed them about 2 inches apart. (An ice cream scoop would work great — I probably should get one of those.) I did have to bake them in multiple batches, and chill the dough again in between preparing trays.

Chocolate Dough Balls
I baked them for about 15 minutes, rotating halfway through. I pulled them out when they started to crack on top. They looked beautiful arranged in a circle on my red snowman platter, and judging from the number of tiny children who kept grabbing them off the table at the party I took them to, they tasted great too!

Double Chocolate Cookies

How Sue Sees It:
– If I make these again, I would melt only half the chocolate chips. I would leave the other half whole and stir them into the batter at the end to make chocolate-chocolate chip cookies.
– Tip: If you drop the batter when it’s room temperature or warm, the cookies will spread quickly while they bake and be thinner and more crunchy. If you chill or freeze the batter first, it won’t spread as much, and they will be thicker and less crunchy.
– These cookies are nice and flat, so they would be ideal for decorating. Try making a few stencils of holiday shapes and then sprinkling confectioners sugar on the cookie using a fine sieve. It would make for a cute snowman or Christmas tree outline.

Snowflake Cookies

16 Dec

It has been unusually cold in North Carolina, with temperatures in the 30s and snowfall in early December! Very strange, but also a perfect setting for these gorgeous snowflake sugar cookies.

Of course, after my notorious Cookie Fail, I relied heavily on Betsy’s cookie expertise for this batch of cookies. We started with a basic sugar cookie recipe.

After a lot of practice, we got in a good rhythm: Betsy is good at rolling and cutting, and I’m good peeling and placing on the pan. I usually am not big on purchasing specific kitchen tools that do fancy things because I think most baking can be accomplished with basic kitchen items, but I will say that the large spreader from Pampered Chef came in handy. It’s designed to be used to spread icing on large cakes, but it worked really well to slide delicate snowflake shapes off the counter top and get them to the baking pan. Just flour it a little and it works like a charm.

Sugar Snowflake Cookies
After baking and cooling about 6 dozen cookies (yes, it took forever), I set about with decorating (which took another forever).

We whipped up a batch of royal icing and added some whitening cream to make it extra-white, instead of kind of a dull, unappealing cream color. Betsy loaded it into an icing bag with a tiny tip for me, and I got to work. Royal icing hardens into a solid layer when it comes in contact with air. It takes a few hours for it to harden completely, but it gets difficult to spread evenly within minutes. So working relatively quickly, I did one cookie at a time. To make sure I got a neat overall cover, I first traced the snowflake outline and then filled it in. I held it still with a wooden skewer so I could move a little more quickly. Then, using a pair of tweezers, I added light blue sugar pearls. Play around with different patterns and get creative — it’s fun!

Tracing a snowflake outlineFilling in with icingAdding the pearl decorations

I made two different patterns with the white icing. Then we made another batch of royal icing and colored it with light blue dye and a little bit of whitening to lighten it to the right shade. I decorated another 2 dozen cookies with the same patterns as the white cookies, but with light blue icing and white sugar pearls.

While I worked on those, Betsy decorated the rest of the cookies with sugar sprinkles. For a dozen cookies, she used a paintbrush to coat each cookie with a layer of piping gel, which only looks disgusting. Then she poured silver pearlized sugar on top, and that’s it! Quite simple.

For another dozen cookies, we wanted them to be blue, but the blue pearlized sugar was way to bold next to the light blue royal icing. So Betsy mixed a little blue food coloring into the piping gel and then decorated it the same way — paint it on the cookie and then cover with silver sprinkles. It gave a very pale blue shine, almost like glass, underneath the silver sprinkles. Very subtle and beautiful!

After the white cookies hardened completely, Betsy used a large paintbrush (you could also use a blush brush or kabuki makeup brush) to dust on some silver pearl dust. It’s like using glitter makeup with a slight sparkle to it — it’s barely noticeable but adds a nice little sparkling sheen to the cookie.

Snowflake Cookies

So this was a relatively short post compared to the others, but don’t think this is a relatively short process. Cutting cookies takes longer than filling a bunch of cake or cupcake tins, and decorating cookies like this — especially with a complicated cookie shape — takes a long time. All in all, this took us about 6 or 7 hours. And that doesn’t count the packaging and presentation time.

When I got home, I loaded 6 cookies — one of each decoration type — into clear plastic bags I picked up at Michael’s, twisted the top closed, secured it with tape, and tied it with a blue ribbon. They made adorable gift bags!

Snowflake CookiesSnowflake Cookies

Royal Icing

15 Dec

Royal icing is that icing on top of sugar cookies that hardens to where it won’t smudge at all. But it’s great because it’s not like a plastic texture — it’s still chewable and not crunchy. It’s great to use for decorating and gifting cookies because as long as you give it a day to harden, nothing will harm your decorations. You can also use it as a glue to attach decorations.

Here’s a basic recipe for you:

In a medium bowl, we added 1 large egg white (Betsy separated it for me — I ain’t got skills like that). I added 1/4 tsp cream of tartar (look for it on the spice aisle). After Betsy sifted 1 cup confectioners sugar, I added a little at a time, beating the mixture with a hand mixer until it formed soft peaks.

The icing dries quickly once it comes into contact with air, so you really should use it immediately. If you can’t, cover it with a wet cloth and leave it on the counter (not the fridge) until you’re ready to use it. It will last up to 12 hours this way.

You can add food coloring to it to make whatever color you want. If you want it to be white, I definitely suggest adding whitening cream because when it’s plain, it’s a little too grossly cream-colored to make nice cookies. Just don’t add to much or it might get too watery and drip off your cookies.

Snowflake cookie with royal icing and blue sugar pearls

Happy decorating!

P.S. If raw eggs freak you out, there are a million other royal icing recipes on the web that use meringue powder and water instead. Just Google search it and you’ll find one!

Halloween Cake Pops

28 Oct

Last weekend we had two major baking projects going on at the same time, both of which were pretty messy. The kitchen was even more of a disaster than usual, and that’s saying something. While Betsy took the lead on Mini Mocha Cupcakes with Chocolate Glaze, I led the charge on these Halloween Cake Pops.

A word about the cake pops. This was our attempt to replicate Bakerella’s famous cake balls on a stick, and as the BF had a pumpkin carving party coming up at his work,  I decided to make pumpkins for him. The project took forever – upwards of 4 hours – but they were a HUGE hit. They disappeared so fast, people arriving late at the party were fresh out of luck. So if you have a whole day looking for something to do, try this. But if you need something for your kid’s class party tomorrow morning, just bake some cookies. As always, the recipe below is how we made them, which is not necessarily what the original recipe recommends.

Supplies:

  • baking stuff
  • 5″ lollipop sticks
  • orange (vanilla-flavored) candy melts
  • styrofoam
  • black gel food coloring
  • tiny paintbrush

The Process

First, we baked a cake. We used a prepared mix of extra moist devil’s food cake and baked according to package directions. (Trust us, this process is complicated enough, you will thank yourself for using a mix. There’s no need for scratch-made here.) Then we crumbled up the cake into a big mixing bowl (though a cookie sheet may have been better) and stuffed it in the fridge to help it cool faster. Once it was completely cooled, we mixed in about 3/4 of a can of buttercream icing. I may or may not have eaten the rest of the can after Betsy left.

Baking a Chocolate CakeAfter we got our hands in there and got the cake/icing mixture to a nice smooth consistency, we rolled the mixture into balls and placed them on wax-covered cookie sheets. Then I melted just a few orange candy melts (we bought them at A.C. Moore) and dipped the tip of the lollipop sticks (also A.C. Moore) in the orange candy, then speared the cake balls about 3/4 of the way through the ball. Bakerella recommends this little process of candy coating before spearing so that the stick stays put in the cake ball. The speared cake balls went in the fridge to firm up.

Spearing the balls with lollipop sticks

A few hours later, after driving to my sister’s for family dinner, I returned to finish the cake pops. I melted the rest of the orange candy melts and rolled each cake ball until they were completely coated. I thought it was easier to use the back of a spoon to make sure everything was covered instead of trying to actually roll them. If I got a little too much, a few soft taps on the side of the bowl got all the drips off. Then I added a chocolate sprinkle on top for a stem and stuck the pops into styrofoam to let them firm up. The orange candy hardens quickly enough that when the last pop was rolled, I could start painting the first pop.

Coating the cake pops with melted orange candy

I took the jar of Wilton’s black gel food coloring and put a bit into a small bowl. It turns out that black food coloring turns your fingers purple for a couple days and stains jeans, so I would suggest being careful here. I added a tiny splash of vodka until I achieved a good consistency. Then I dipped my paintbrush in and got to work. Vodka?! What?! Yep — this was Betsy’s idea, and it worked out fantastically. You need liquid to make the ink smooth enough to paint with, but water makes it runny. The vodka achieves the right consistency, and as it dries, the alcohol completely evaporates away, leaving the thick paint-like ink behind. Cool, huh?

Making jack-o-lanterns!

Ta-da! They’re done!

Spooky!Pumpkin Patch

How Sue Sees It:

  • Estimating for supplies was difficult. Of course batches will vary, but here’s some numbers that might help if you try to make some cake pops: The cake/icing mixture made 53 balls. One bag of orange candy melts covered 39 balls. I had to use chocolate – which I always keep on hand – to cover the rest. And I greatly underestimated the need for styrofoam. I used a 12″ by 9″ piece of greenHalloween Cake Balls styrofoam to make my pumpkin patch, and rested it on top of a cookie sheet. Spaced about 2″ apart, I only fit 24 pops. Because I was rushing to have them the next day, I didn’t go out for more supplies. Instead, I took the leftover orange and chocolate pops, let them harden, and then served them on a tray in paper mini muffin cups.Colanders come in handy!
  • And without styrofoam, I didn’t have anywhere to let them dry, so I turned a colander upside down and stuck the sticks through the biggest holes.
  • They are soooo delicious and soooo rich! Because the cake is rolled down into balls, it’s very dense. Pace yourself — it’s very easy to eat a few quickly and then regret it. One cake pop is like a whole slice of cake.