Tag Archives: Chocolate

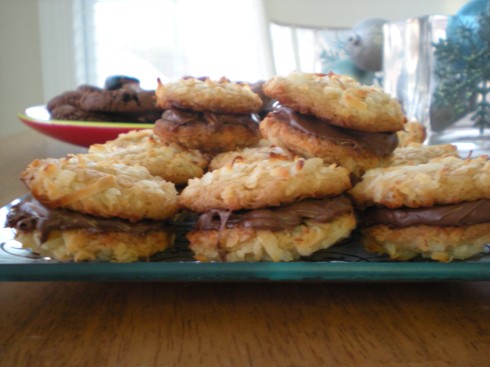
Chocolate Coconut Sandwich Cookies

4 Jan

I made these delicious sandwich cookies about a month ago and completely forgot to post them! They’re very classy – sure to impress. I took them to an office holiday party, and they completely disappeared. Here’s the basic plan: make some sugar cookies, shape them into balls, roll them in coconut, bake, then sandwich them together between melted chocolate. Yum!

I pre-heated the oven to 350 F. In a bowl, I whisked together 1 cups all-purpose flour, 1/2 teaspoon baking powder, and  1/2 teaspoon salt.

In another bowl, I beat together 1 1/2 sticks softened unsalted butter, 1/2 cup white sugar, and 1/2 cup packed brown sugar on medium for about 3 minutes. I then beat in 1 large egg and 1 teaspoon vanilla extract. I turned the mixer to low and gradually added in the flour mixture, mixing until just combined.

Batter Ingredients
Shredded Coconut

I popped the dough in the fridge for a little while to firm it up and prepared a plate of coconut flakes. After I pulled the dough out, I rolled little one-inch dough balls, rolled them in the coconut, and placed them about 2 inches apart on a cookie sheet lined with parchment paper.

Coconut Dough Balls

I baked them for about 10 or 12 minutes, rotating halfway through, until they were a light golden color around the edges. I moved them to a rack until they were cooled completely.

Coconut Cookies

I melted some milk chocolate and spread it on a quarter of the cookies, topping them with the other cookies to make milk chocolate coconut sandwiches. Then I melted some dark chocolate and spread it on the rest of the batch to make dark chocolate coconut sandwiches. The whole process took quite a while, baking multiple batches of cookies, waiting for them to cool, and then sandwiching the chocolate, but it was well worth it!

Cookie Sandwiches


How Sue Sees It:
– This recipe made about 20 sandwich cookies, with a couple extra coconut cookies that cracked or toasted a little too much. I served the milk chocolate and the dark chocolate separated on matching square platters. Classy!
– The coconut flavor was delicious, but not very strong. Next time, I would probably mix about a cup and a half of coconut into the batter. I’d still roll it in coconut, because it looks cool.
– To give this a more wintery, holiday vibe: Roll your dough balls a little smaller so that the final sandwich cookie is more of a round shape. Switch up the filling to white chocolate or vanilla buttercream filling (1 stick of butter, 1 cup confectioners sugar, and 1 teaspoon vanilla, blended on medium-high until pale and fluffy). Roll the final ball in coconut again so that you have fresh coconut sticking to the middle filling. Now you have a coconut snowball!

Rudolph Cupcakes

29 Dec

Breakaway cupcakes are all the rage these days, so here’s some Christmas-y ones for you. My cousin and one of my sisters made these, so I don’t have a recipe, but you don’t really need one.

They used yellow cake mix for all the cupcakes, baking them in red and green paper liners. For the face, they spread on canned chocolate icing. And for the antlers, they piped on canned vanilla icing in wide zig-zag lines. They added graham cracker crumbs on top of the antlers.

Rudolph Cupcakes

For the facial features: the eyes are two Double-Stuf Oreos painted with chocolate and white icing. The nose is another Double-Stuf Oreo painted with red icing. The mouth is black gel icing.

And that’s it! Super cute, and very festive!

Rudolph Cupcakes!

Merry Christmas!

Double Chocolate Cookies

19 Dec

What’s better than chocolate? More chocolate!  A good chocolate cookie is hard to come by, but these are pretty delicious.

I whisked to combine (you know I don’t sift) 1 cup of all-purpose flour, 1/2 cup of cocoa powder, 1/2 teaspoon of baking soda, and 1/2 teaspoon of salt. I set that aside and dumped 8 ounces of semisweet chocolate chips and 1 stick of butter into a glass bowl. I melted them in 30-second intervals, stirring in between, until smooth.

Dry Ingredients
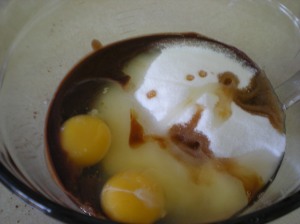
I poured the chocolate and butter mixture in a large mixing bowl and added 1 1/2 cups of white sugar, 2 eggs, and 1 teaspoon of vanilla. I beat it with the hand mixer on medium until it was well combined. I switched it down to low speed and slowly mixed in the dry ingredients.

Chocolate Mixture
The batter was really runny and difficult to work with, so I put it in the fridge for a little while. I wanted uniform-sized cookies, so instead of spooning them onto the parchment-paper lined cookie sheet, I rolled the dough into balls and placed them about 2 inches apart. (An ice cream scoop would work great — I probably should get one of those.) I did have to bake them in multiple batches, and chill the dough again in between preparing trays.

Chocolate Dough Balls
I baked them for about 15 minutes, rotating halfway through. I pulled them out when they started to crack on top. They looked beautiful arranged in a circle on my red snowman platter, and judging from the number of tiny children who kept grabbing them off the table at the party I took them to, they tasted great too!

Double Chocolate Cookies

How Sue Sees It:
– If I make these again, I would melt only half the chocolate chips. I would leave the other half whole and stir them into the batter at the end to make chocolate-chocolate chip cookies.
– Tip: If you drop the batter when it’s room temperature or warm, the cookies will spread quickly while they bake and be thinner and more crunchy. If you chill or freeze the batter first, it won’t spread as much, and they will be thicker and less crunchy.
– These cookies are nice and flat, so they would be ideal for decorating. Try making a few stencils of holiday shapes and then sprinkling confectioners sugar on the cookie using a fine sieve. It would make for a cute snowman or Christmas tree outline.

NCSU Cake Pops

19 Dec

My brother graduated from NC State this past weekend! We’re very proud of him, so my older sister and I made celebratory cake pops. (For a full recipe, see my original Halloween Cake Pops post.)

We used red velvet cake (from a cake mix) and cream cheese icing (homemade). I thought if I made the icing from scratch, I could reduce the amount of sugar and it wouldn’t be a diabetic shock on a stick. But then we got to talking, and I got distracted, and I just made the icing as usual. No big d — I like them super-sweet, and I’m the baker.

What was kind of a problem though — I was still talking, and did not think about the fact that a batch of homemade icing is much larger than what comes in the can, and I just dumped the entire thing in with the cake. It was a little much. We rolled the balls successfully and set them to chill for 15 or 20 minutes. But when we went to dip them in the candy coating, they kept falling off the stick — too much icing. We had to freeze them first in order to coat them without them completely falling apart. It worked well enough, and it saved the batch, but still not ideal. When I bit into one, the other half fell of the stick, so it was a little messy.

They looked and tasted amazing though! We took the red velvet/cream cheese cake pops and coated some in white chocolate, some in red candy coating, and some in dark chocolate. Once they were set, I painted black NCSU symbols on the red pops, and my sister painted red NCSU symbols on the white pops.


I had to hit the road before they were done, but she kindly finished up all the pops and arranged them in a great presentation! She chopped up a styrofoam block and arranged the chunks in a large, clear bowl. She poked the cake pops in there so it appeared like a large ball coming out of the bowl. To cover up the green styrofoam, she arranged red tissue paper in the bowl. It looked amazing!

NC State Cake Pops

How Sue Sees It:
– Everyone loved the cake pops, and the bowl arrangement looked like a fantastically tasty centerpiece on a red, white, and black Wolfpack table.
– Red velvet and cream cheese are always a great combo! Add the icing a little at a time until you achieve the proper consistency. You can always add more later if you need to.
– As much as I’m a Tar Heel born and bred, it was fun to try to figure out how to make a Wolfpack-themed cake pop. We actually tried to make a couple of wolves — Bakerella has a werewolf on her Trick or Treats post — but they looked awful. We gave up on those when my nephew asked me, “What’s that monster!?” If anyone manages to make a convincing wolf on a cake pop, please let me know how it’s done.

Guest Post: Mini Mocha Cupcakes with Chocolate Glaze

3 Nov

Today’s post comes from my BFF Lauren, a.k.a. Betsy Bundt. She’s a whiz in the kitchen, and she loves a challenge. so she’s going to show you how she made these amazing mini mocha cupcakes. 

While Susie continued to work on the Halloween Cake Pops, my half of the mess was Mini Mocha Cupcakes with Chocolate Glaze. It came from a Martha Stewart recipe I found online. The main cake recipe included a recipe for a coffee syrup, chocolate mousse, and chocolate glaze. Honestly, I didn’t use half the recipes, but instead took inspiration from them. I used a moist devil’s food cake mix because, let’s be honest, they are just as good as baking from scratch. I am of the opinion if you’re going to make something from scratch, like the mousse and glaze for this recipe, then you can cheat in other areas and it’s still practically homemade.

So I started with the cake mix, added the required eggs and liquids, poured into mini cupcake pans (yes, with an ice cream scoop), and popped them in the oven. While they were baking, I worked on the glaze, which was just a thin ganache (and by thin, I mean a thinner consistency than I would use for truffles) and the mousse. 

I was lazy and didn’t want to make the coffee syrup, plus in my experience, it can make the cake soggy, especially if you want them to last for a couple days. So you ask, “But Betsy, the syrup is where the coffee flavor comes from. Did you just make everything chocolate flavored?” No, I adjusted where the flavors came from slightly. I nixed the syrup and instead made the mousse mocha flavored. I added a packet of Starbucks Via instant coffee in extra bold Italian Roast. I added the powder to the cream before I whipped it, allowing it to dissolve as I was whipping. As the recipe continues, I added the melted chocolate and Voila: mocha mousse. It has a pretty strong coffee flavor, but the sweetness of the chocolate makes it really smooth. I popped that in the fridge to firm up a little and moved on to the glaze.

I followed the recipe which was for 92 mini cupcakes and I had about 48 or so because I was thinking, “Hey, you can never have too much ganache.” After the ganache was smooth, I set that aside to let it cool (I let it get close to room temperature).

Meanwhile the cupcakes were done baking and removed from the pans to cool.

After the cupcakes were cool, I cut the tops off to fill with mousse and dip in the glaze. I put the mousse in a pastry bag to easily fill each center. I filled with one hand and dipped the top with the other and assembled.

And the final product. Delicious and rich. I didn’t have any problem feeding them to people. Susie took some to a family function and I took some to work where they disappeared pretty quickly. I even got a compliment that I could take on a local bakery any day with this cupcake. Not too shabby.

Betsy Breaks It Down:

  • This was pretty time consuming, so make sure you have plenty of time when you begin this endeavor.
  • WAY WAY WAY TOO MUCH GANACHE. Even if I did have 92 cupcakes, it STILL would have been too much. Halve or quarter the recipe.
  • If you don’t like a strong coffee flavor, I would recommend a weaker instant coffee. The Italian Roast is really strong.
  • It’s ok to cheat on recipes and adjust for you. I used to have a compulsive need to follow the recipes, but I have loosened up my cooking style and try to experiment more.

Happy Baking!
BB

Halloween Cake Pops

28 Oct

Last weekend we had two major baking projects going on at the same time, both of which were pretty messy. The kitchen was even more of a disaster than usual, and that’s saying something. While Betsy took the lead on Mini Mocha Cupcakes with Chocolate Glaze, I led the charge on these Halloween Cake Pops.

A word about the cake pops. This was our attempt to replicate Bakerella’s famous cake balls on a stick, and as the BF had a pumpkin carving party coming up at his work,  I decided to make pumpkins for him. The project took forever – upwards of 4 hours – but they were a HUGE hit. They disappeared so fast, people arriving late at the party were fresh out of luck. So if you have a whole day looking for something to do, try this. But if you need something for your kid’s class party tomorrow morning, just bake some cookies. As always, the recipe below is how we made them, which is not necessarily what the original recipe recommends.

Supplies:

  • baking stuff
  • 5″ lollipop sticks
  • orange (vanilla-flavored) candy melts
  • styrofoam
  • black gel food coloring
  • tiny paintbrush

The Process

First, we baked a cake. We used a prepared mix of extra moist devil’s food cake and baked according to package directions. (Trust us, this process is complicated enough, you will thank yourself for using a mix. There’s no need for scratch-made here.) Then we crumbled up the cake into a big mixing bowl (though a cookie sheet may have been better) and stuffed it in the fridge to help it cool faster. Once it was completely cooled, we mixed in about 3/4 of a can of buttercream icing. I may or may not have eaten the rest of the can after Betsy left.

Baking a Chocolate CakeAfter we got our hands in there and got the cake/icing mixture to a nice smooth consistency, we rolled the mixture into balls and placed them on wax-covered cookie sheets. Then I melted just a few orange candy melts (we bought them at A.C. Moore) and dipped the tip of the lollipop sticks (also A.C. Moore) in the orange candy, then speared the cake balls about 3/4 of the way through the ball. Bakerella recommends this little process of candy coating before spearing so that the stick stays put in the cake ball. The speared cake balls went in the fridge to firm up.

Spearing the balls with lollipop sticks

A few hours later, after driving to my sister’s for family dinner, I returned to finish the cake pops. I melted the rest of the orange candy melts and rolled each cake ball until they were completely coated. I thought it was easier to use the back of a spoon to make sure everything was covered instead of trying to actually roll them. If I got a little too much, a few soft taps on the side of the bowl got all the drips off. Then I added a chocolate sprinkle on top for a stem and stuck the pops into styrofoam to let them firm up. The orange candy hardens quickly enough that when the last pop was rolled, I could start painting the first pop.

Coating the cake pops with melted orange candy

I took the jar of Wilton’s black gel food coloring and put a bit into a small bowl. It turns out that black food coloring turns your fingers purple for a couple days and stains jeans, so I would suggest being careful here. I added a tiny splash of vodka until I achieved a good consistency. Then I dipped my paintbrush in and got to work. Vodka?! What?! Yep — this was Betsy’s idea, and it worked out fantastically. You need liquid to make the ink smooth enough to paint with, but water makes it runny. The vodka achieves the right consistency, and as it dries, the alcohol completely evaporates away, leaving the thick paint-like ink behind. Cool, huh?

Making jack-o-lanterns!

Ta-da! They’re done!

Spooky!Pumpkin Patch

How Sue Sees It:

  • Estimating for supplies was difficult. Of course batches will vary, but here’s some numbers that might help if you try to make some cake pops: The cake/icing mixture made 53 balls. One bag of orange candy melts covered 39 balls. I had to use chocolate – which I always keep on hand – to cover the rest. And I greatly underestimated the need for styrofoam. I used a 12″ by 9″ piece of greenHalloween Cake Balls styrofoam to make my pumpkin patch, and rested it on top of a cookie sheet. Spaced about 2″ apart, I only fit 24 pops. Because I was rushing to have them the next day, I didn’t go out for more supplies. Instead, I took the leftover orange and chocolate pops, let them harden, and then served them on a tray in paper mini muffin cups.Colanders come in handy!
  • And without styrofoam, I didn’t have anywhere to let them dry, so I turned a colander upside down and stuck the sticks through the biggest holes.
  • They are soooo delicious and soooo rich! Because the cake is rolled down into balls, it’s very dense. Pace yourself — it’s very easy to eat a few quickly and then regret it. One cake pop is like a whole slice of cake.