Tag Archives: cake

Honey Apple Cake with Vanilla Glaze

9 Sep

Shanah Tovah! I guess I’m a little late with my new year’s greetings, but the sentiment still stands.

The BF and I had been planning a trip with friends to Gordonsville, Virginia, for months. One minute I was thinking about the trip, and the next I was baking a cake and wishing the BF a happy new year. He was confused. Maybe you are too. To illuminate, here was my thought process:

  • I should bake a dessert to take with us
  • I have a ton of leftover apples from the Apple Festival
  • Why are there so many Jewish blogs coming up when I search for apple cake recipes?
  • It’s Rosh Hashanah! My friends celebrate Rosh Hashanah!
  • What’s Rosh Hashanah?
  • Google says apples with honey are a traditional Rosh Hashanah food item
  • Apple honey cake!
  • Happy New Year!

I don’t always vocalize all those steps in between the first and last point, so sometimes people are confused what I’m talking about. At any rate, I was excited that so many pieces came together for this dessert to fit perfectly into our weekend trip.

Apple Honey Cake

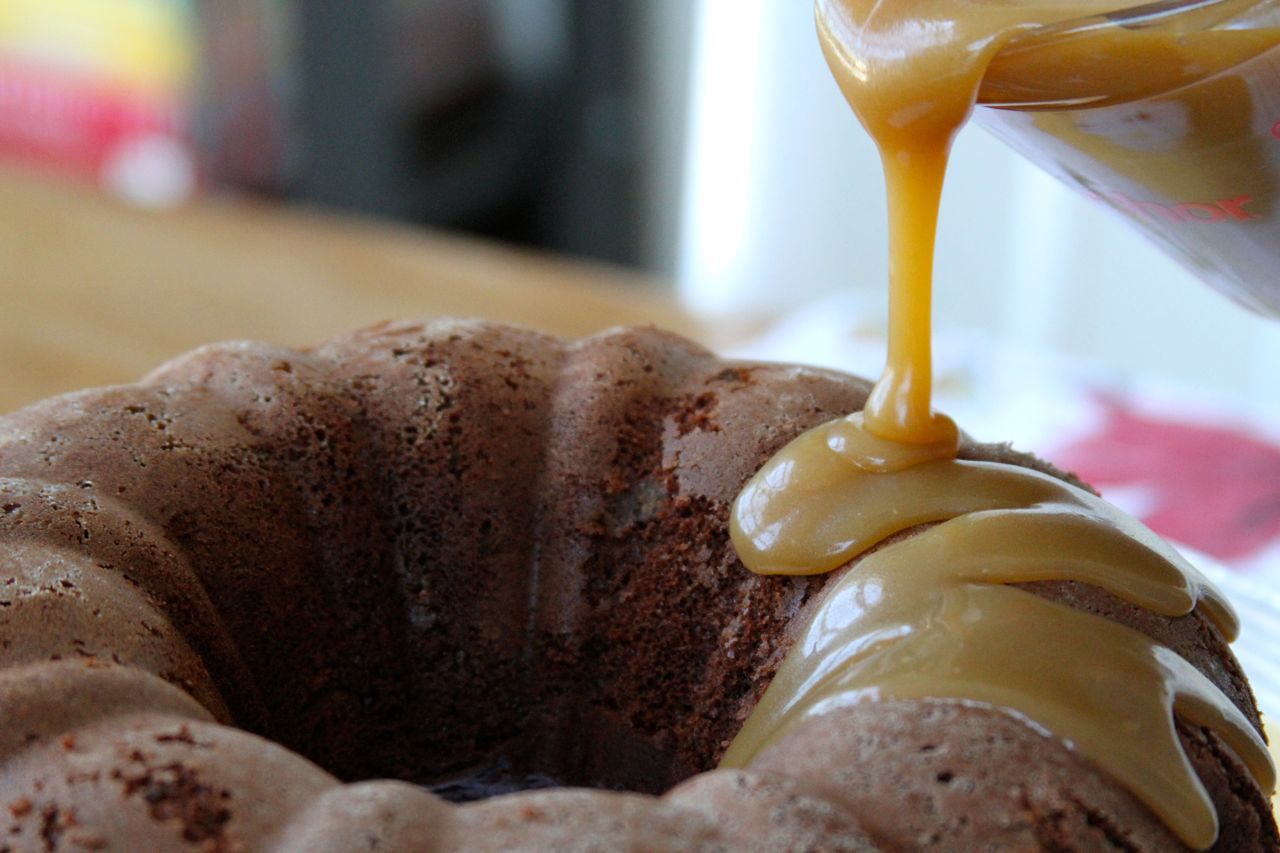
Even if you or your friends don’t celebrate Rosh Hashanah, this cake is amazing. And its delicious spice, honey, and apple flavors are really getting me in the mood for fall. I used the most delicious local wildflower honey for this, and the honey flavor was super intense. Apparently wildflower honey is stronger than clover honey, which is what most honey is in the States.

Shanah Tovah!

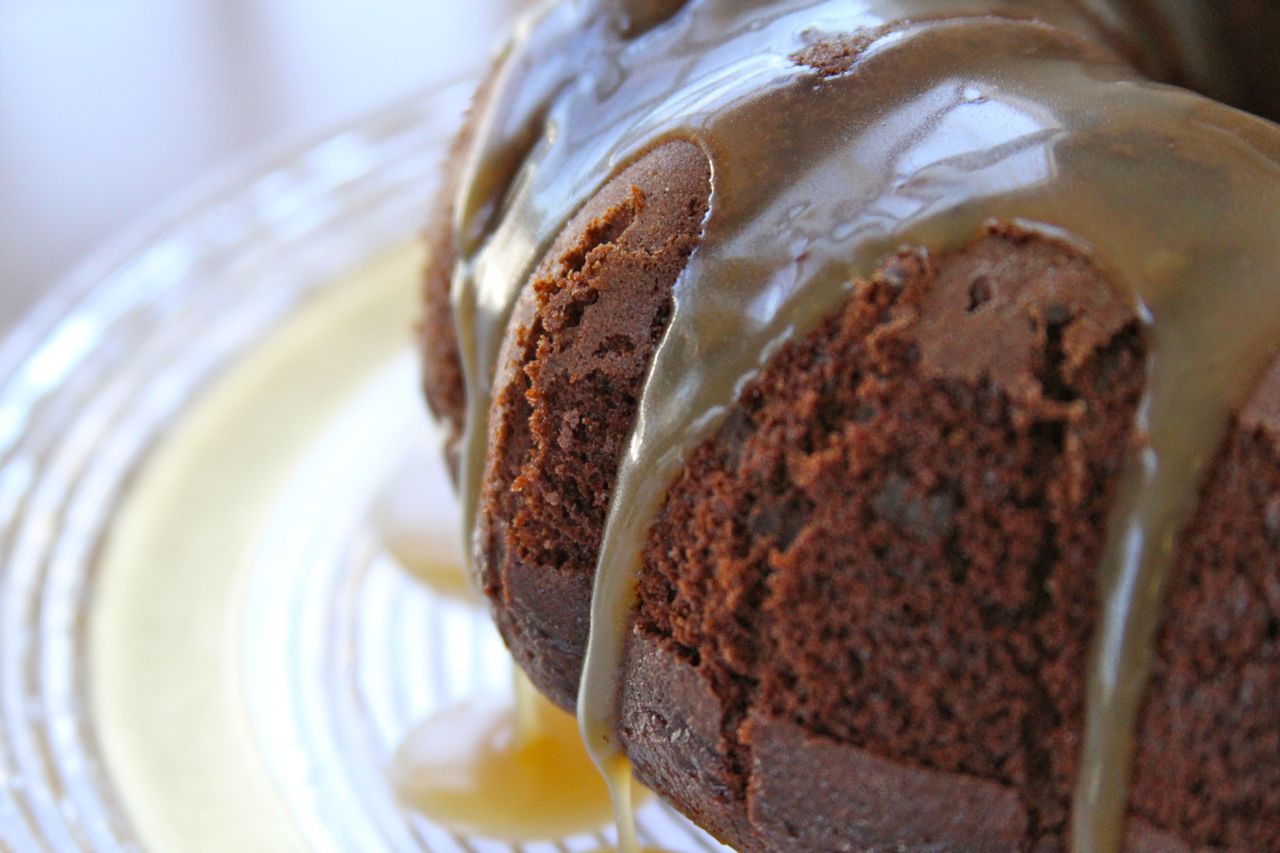
A small note on the recipe: the original recipe said to bake it for 75-90 minutes because the batter is so wet. I did not find this to be the case. I baked it for closer to 65-75 minutes, and I thought it turned out a little dry. I imagine it might depend on the quantity/type of apples you use, and maybe even on the type of honey you use, I’m not sure. So my warning to you is to just keep checking your cake with the toothpick test, and don’t freak out if it takes way shorter or way longer than the recipe says.

Honey Apple Cake adapted from The Shiksa in the Kitchen 

3 eggs
3/4 cup honey
1/2 cup white sugar
1/4 cup brown sugar
1 1/4 cup canola oil
2 teaspoons vanilla
3 cups flour
1 teaspoon baking powder
1 teaspoon baking soda
3/4 teaspoon salt
1 1/2 teaspoons cinnamon
1/4 teaspoon nutmeg
1/4 teaspoon ground cloves
4 Granny Smith apples — peeled, cored, and shredded

Apple Honey BatterPeel, core, and shred your apples. Preheat oven to 325 degrees.

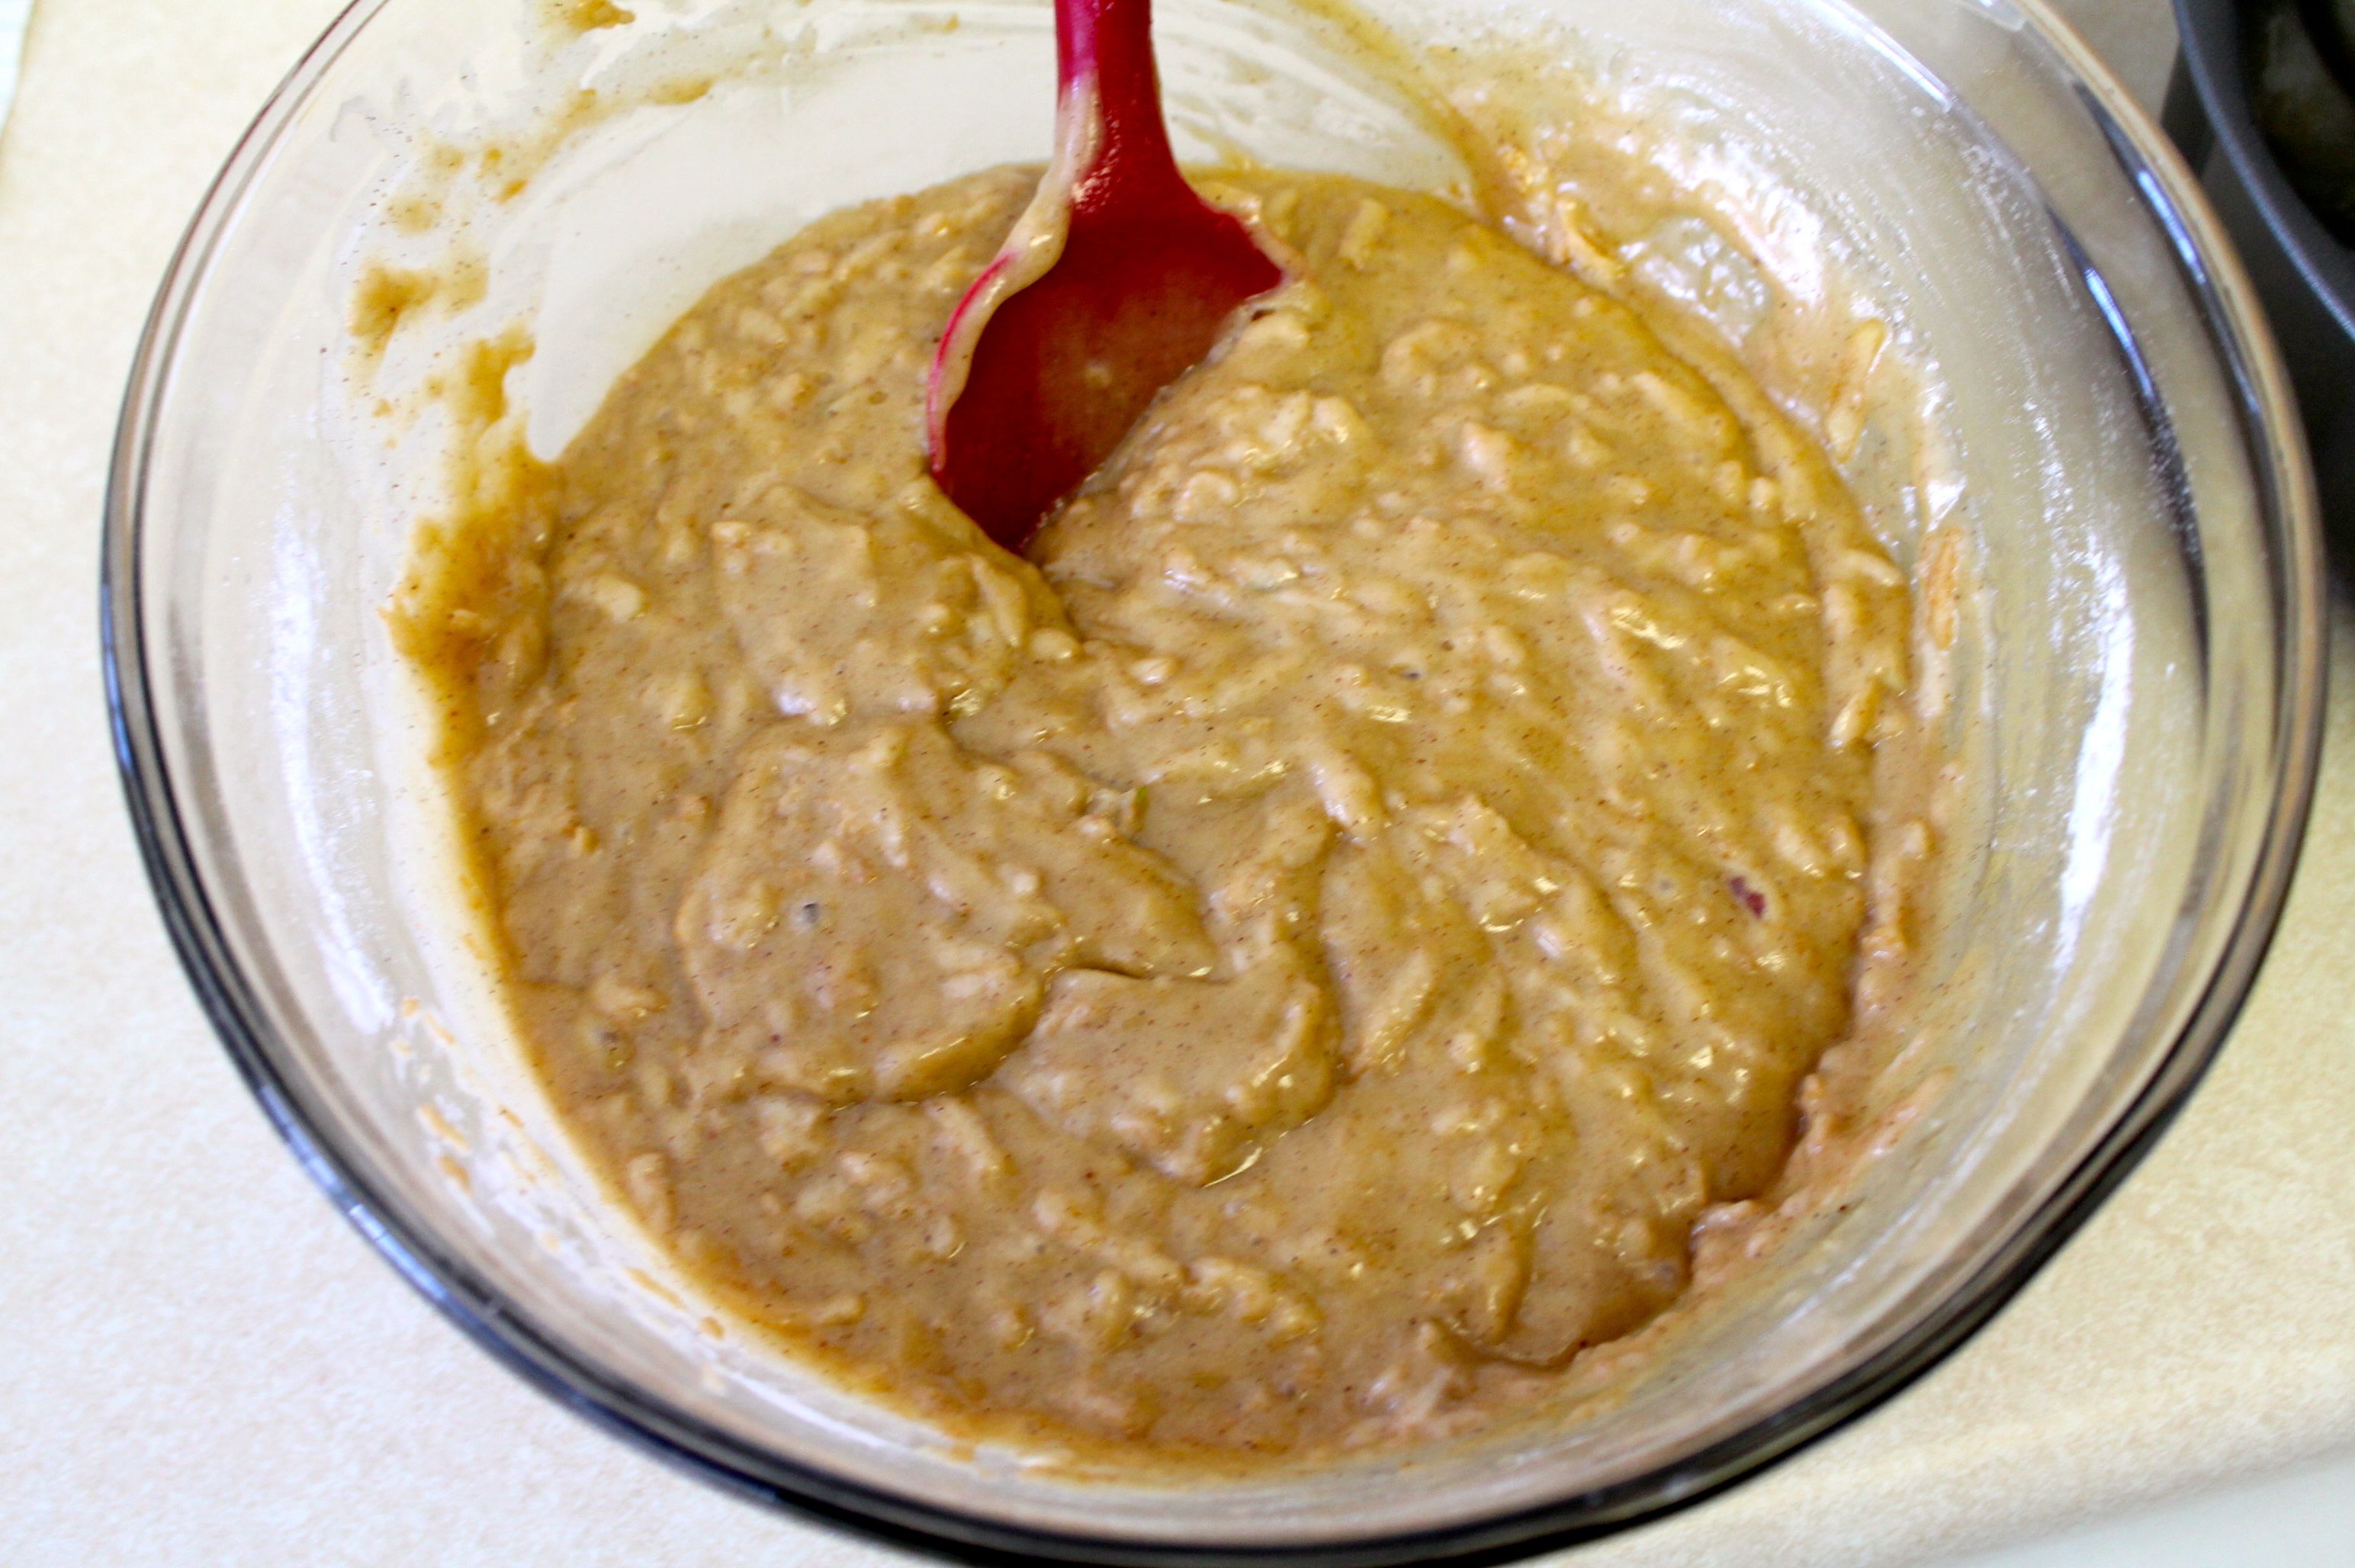
In a large mixing bowl, beat the eggs until they are frothy. Whisk in the honey, white sugar, brown sugar, oil, and vanilla.

In a separate medium mixing bowl, sift together the flour, baking powder, baking soda, salt, and spices. Incorporate the flour mixture into the liquid, and stir to blend. Fold in the shredded apples.

Grease a bundt pan, and pour the batter into the pan. Bake cake in preheated oven for 60-90 minutes. Check repeatedly with the toothpick test — when a toothpick or wooden skewer inserted into the thickest part of the cake comes out clean, it’s done.

Let the cake cool for about 10 minutes, then invert onto a wire rack. Allow cake to cool completely before frosting.

If you want to get super fancy, here’s how to decorate it: Place foil or pan on the counter, and then place the cake – still on wire rack – overtop the foil. Use a fine-mesh sieve or sifter to sprinkle a few tablespoons of powdered sugar overtop the cake. Fill a plastic baggie with the vanilla glaze and cut a tiny corner of the bag off. Drizzle the glaze in a zig-zag pattern over the top of the cake. Let stand at room temperature until glaze sets, about 15 minutes.

Vanilla Glaze from Bon Appetit

2/3 cup powdered sugar
4 teaspoons (or more) milk
1 teaspoon vanilla extract

Sift powdered sugar into a mixing bowl. Add milk and vanilla, and whisk to blend.

Add more milk by 1/4 teaspoons to thicken glaze if necessary.

Linking up With:

Funday Monday from Still Being Molly and Lipgloss and Crayons
Block Party from Sumo’s Sweet Stuff
Made by you Monday from Skip to my Lou
Time to Sparkle from Love Grows WildInside BruCrew LifeThe Recipe Critic, and The Gunny Sack
Create It Thursday from Lamberts Lately
All Things Pretty from Sparkles and a Stove and My Fashion Forward Blog

Advertisement

Homemade Caramel Sauce

14 Jan

I usually am a chocolate person, but lately, I’ve been really excited about caramel. I’ve liked it more and more as I’ve gotten older, but I think this particular obsession started with this year’s apples with caramel dip.

(While you’re here, like W&P on Facebook!)

My grandma lives in Hendersonville, home of the North Carolina Apple Festival. It’s an amazing little mountain arts & crafts festival held every year on Labor Day. We always go up, stay with the family, and spend hours walking through the festival. Grandma lives only a couple blocks from downtown, so we can walk up to Main Street whenever we get bored or need a snack. The apple theme pops up everywhere, from the food to the crafts for sale.

This year, as every year, we had apple slices with hot caramel dip. We also had apple pie, a frozen apple slushie, and apple cider. And we took a bag of apples home. Seriously, there’s no end to the apple shenanigans.

Since then, I’ve been all about apples and caramel, though not necessarily together. And when my BFF Lauren told me about the “best caramel sauce ever,” I had to check it out. And really, this is the best caramel sauce ever. It never hardens into that chewy or hard caramel, even when it cools. It’s always perfectly smooth. And it’s super easy!

Caramelly

When I first made this, I just whipped up a chocolate cake from a box mix to go with it. I’ve made it a couple times since then, including a big batch I jarred for my mom and gave her for Christmas. So far, I’ve had it on chocolate cake, as a dip for apples, as a dip for brownies, and as ice cream topping.

Caramel on Chocolate... doesn't get any better than that

My mom was super excited about Christmas this year. She received both a huge jar of caramel sauce and a cotton candy machine. By 7am, she was eating caramel by the spoonful and adding dollops of it to her breakfast oatmeal. And by 8am, she was handing out cones of fluffy pink cotton candy. That’s Christmas!

A jar of caramel sauce is way better than a jar of jam, IMHO

By the way, the sauce tends to absorb into the cake. If you decide to top a cake with it, wait till just before you serve it to drizzle the caramel sauce on top. You could put your caramel in a gravy boat or some such dish and get all fancy with your presentation.

Drizzle

Homemade Caramel Sauce from My Fabulous Recipes

3/4 cup sugar
1/4 cup brown sugar
1/4 cup butter
1 cup heavy cream
1/2 cup corn syrup
1/4 teaspoon vanilla

Heat all except vanilla in a saucepan over medium heat, and bring to a boil, stirring constantly. Once boiling, reduce to low and cook 20-30 minutes, stirring frequently until the sugar is completely dissolved and it has a caramel color. Stir in the vanilla and remove from heat. Can be served warm or chilled.

Beautiful

Linking up for:

YOLO Mondays from Still Being Molly and Lipgloss and Crayons
Monday Meet Ups from Covered in Grace
Made by you Monday from Skip to my Lou
Make Something Monday from Sarahndipities

Pumpkin Cake with Spiced Buttercream

29 Oct

It’s fall, and that means I’m craving all things pumpkin and chai. Or even pumpkin chai. (Ask for it at Starbucks. You’re welcome.) So after a few weeks of salivating over Pinterest pictures, I finally went out to buy some pumpkin and refill my flour and sugar stocks.

I whipped this up one afternoon before having dinner with some friends. I had already made some pumpkin brownies and had leftover pumpkin puree from that, so I needed to finish it off. Pumpkin cake it is. I mostly followed the recipe for Pumpkin Bread from NancyCreative, and topped it off with my own interpretation of Spiced Buttercream from Oh She Glows.

And oh my goodness it was so good. It was fall on a fork. Everyone had an extra slice, and then I sent them home with a little more. Our friend Jesse told me it was his favorite dessert I’d ever made him. So yeah, it was a hit.

Dig in!

The original recipe called for pumpkin puree, and I had accidentally bought pumpkin pie filling. But it made the cake that much sweeter, taking the recipe from a ‘bread’ to a ‘cake.’ And being originally designed as a loaf recipe, the cake was deliciously dense and moist. A little heavy, but I think that makes it perfect for a brisk fall evening on the porch.

Have I mentioned how much I love North Carolina in the fall? I’ve met my share of visitors who decided to put down roots in Chapel Hill after experiencing one of our lovely autumns. Beautiful leaves, beautiful weather. During the day, there’s that perfect Carolina blue sky. And then it gets just a slight chill in the evening, making it perfectly cozy for a sweater, a glass of wine, and a big slice of this cake.

"I'm ready for my close up."

So back to the cake, because surely you’ll want to know how to make it. It’s not hard — you can do it.

Pumpkin Spice Cake from NancyCreative.com

1 3/4 cups all-purpose flour
1 teaspoon ground cinnamon
1 teaspoon baking powder
1 teaspoon baking soda
1/2 teaspoon salt
2 large eggs
3/4 cup packed brown sugar (dark or light, doesn’t matter)
1/3 cup white sugar
1/2 cup canola oil
1 1/4 cups canned pumpkin pie filling*

(* If you only have pumpkin puree, you can easily use that instead. Open the can and reserve 2/3 cup of the pumpkin puree for another recipe. Then mix in 2/3 cup sugar, 1 tsp cinnamon, 1/2 tsp ginger, 1/4 tsp nutmeg, 1/4 tsp cloves and 1/2 tsp salt into the remaining pumpkin puree. Substitute this mixture in place of pumpkin pie filling.)

Preheat oven to 325 degrees. Spray a 9″ round pan (I used a springform) with cooking spray and set aside.

Combine flour, cinnamon, baking powder, baking soda, and salt in a medium bowl. Whisk until thoroughly combined, and set aside.

In another bowl, beat eggs on medium-high speed for a minute or so. Mix in the following ingredients one at a time: the brown sugar, then the white sugar, then the canola oil. Reduce speed to low and add the pumpkin pie filling. Add half the dry ingredients, mixing until incorporated, and then the other half, mixing just until incorporated.

Pour the batter into your prepared cake pan and bake for 50-60 minutes or until a toothpick inserted in center comes out clean. Cool in pan for 10-15 minutes, then remove and cool completely on a wire rack. While it cools, prepare the frosting.

Spiced Buttercream Frosting, with inspiration from Oh She Glows

1/2 cup (1 stick) softened butter
1 1/2 cup powdered sugar
1 tsp vanilla
1 1/2 tsp cinnamon
1/2 tsp nutmeg
1/2 tsp cloves
2 tsp milk (whole is best, but any milk will do)

Beat the butter in a bowl on medium until whipped. Add about half the powdered sugar, and mix well. Then add the vanilla and spices, and mix well. Add the rest of the sugar, and mix well. Add up to 1 tablespoon (3 teaspoons) of milk, as needed to achieve desired consistency.

As soon as the cake is cooled, add the frosting. If you want, top it off with some chopped walnuts. Mmm… yum.

1 Cake, 3 Ways

24 Feb

I promised a cake to a friend because of a competition we held at work, and when the time came around, she wouldn’t tell me what kind of cake she wanted. But I owed it to her, so I didn’t want to back out or forget. So since I didn’t know which cake to bake for her, I just baked three.

But I thought this through. Mixing up three different batters seemed like it would take up a lot of time. Obvi. So I made up a basic batter without any flavoring, divided it into three bowls, and then added separate flavorings to each one. And while the cakes were baking, I made up 3 different fillings for each cake. And then I made one vanilla buttercream frosting to top everything off. Game plan: coconut cake with coconut cream filling and vanilla buttercream frosting, lemon cake with lemon filling and vanilla buttercream frosting, and almond cake with chocolate filling and vanilla buttercream frosting. Hells yeah.

I started by mixing up the base. I sifted together 2 1/2 cups flour2 1/2 teaspoons baking powder, and 1/2 teaspoon salt. In a separate bowl, I mixed 2 cups white sugar3/4 cup butter, and 3 eggs with an electric mixer for about 1 minute. Then I alternately mixed in the flour mixture and 1 cup milk to the sugar mixture.

3 Cake Batters

I divided this base into 3 bowls.

  • Bowl 1: I added 1 teaspoon vanilla and 1/3 cup coconut flakes.
  • Bowl 2: I added 2 teaspoons fresh squeezed lemon juice and 1/2 teaspoon lemon zest.
  • Bowl 3: I added 2 teaspoons almond extract.

With my batters ready, I baked them at 350 F in batches, as my cake pans allowed. I used Wilton’s Mini Tasty-Fill Cake Pan Set. Sounds ridiculous, but it’s cool. It makes mini cake halves with a depression in the center of each one so that when you stack them, there’s a hollow center to add filling to. Of course, if you don’t have a smaller cake pan like this, you could make cupcakes and fill those. My small cakes baked 22 minutes or so. Cupcakes would probably take 18-20 minutes, but just keep checking with the toothpick test until they’re done.

3 Cakes Baking

While my cakes baked, I made the fillings.

  • For the coconut filling, I made up a half batch of the same filling that I used in my Simpler German Chocolate Cake, except I omitted the pecans.
  • For the lemon filling, I made a slightly different version of the original recipe I found here. In a saucepan, I mixed together 2 teaspoons lemon zest2 1/2 tablespoons lemon juice, and 1 teaspoon flour. I mixed that until it was smooth, and then I added 3 tablespoons unsalted butter and 3/4 cup sugar. While I brought that to a boil, I whisked 2 egg yolks in a bowl until smooth. I put a small bit of the lemon mixture into the eggs and stirred until smooth, then I added the egg mixture to the lemon mixture, stirring well. Do this part quickly so that the lemon mixture doesn’t boil for longer than a minute or so. Then I reduced the heat to low and stirred constantly for about 5 minutes. Then I removed it from the heat and let it cool. (Note: Don’t skip the step of stirring the eggs with a small amount of the lemon mixture first. That’s so you don’t cook egg chunks into your lemon filling.) (Other Note: I thought this was a little too thick. If I made this again, I would follow the original recipe more closely. I think I had too much sugar and not enough liquid.)
  • For the chocolate filling, I melted 1/2 stick (1/4 cup) unsalted butter and 1/2 cup of a broken up Hershey’s Bar with Almonds in the microwave, stirring well every 20-30 seconds until smooth.

While my fillings cooled, I made the frosting. You can find the original recipe for Vanilla Buttercream Frosting at savorysweetlife.com.

Then it was time for assembly. I matched the cakes to their fillings and filled the center of each one. After I sandwiched them together, I frosted them all with the Vanilla Buttercream Frosting.

So that the recipient would be able to tell what’s what, I topped each with something to represent what was inside. Coconut flakes on the coconut cake, chocolate bar bits on the almond-chocolate cake, and yellow and white sprinkles on the lemon cake. I stacked them all on one cake tray, and that was that. 1 cake batter 3 ways!

3 Cakes

Almond Cake with Chocolate Frosting

12 Feb

This is more of a concept than a recipe, but I’ll at least post enough for you to re-create it on your own, if you were so inclined.

I’d really like to work more on my presentation skills, but I’m pretty terrible at decorating. Any time I serve up a dessert that looks like a big ole delicious mess of chocolate, I typically huff and puff and said something like, ‘It doesn’t matter what it looks like, it only matter that it tastes delicious!’ But seriously, it’s time to step it up a notch. Though I do believe that taste is more important than looks, it also doesn’t hurt to look pretty.

I got this idea from a blog whose picture I saw on Pinterest. (Oh, Pinterest. You are responsible for my craftiest of urges.) The blog is in Swedish, but you’ll get the gist.

Here’s a side-by-side comparison so you can see how good mine looks compared to the original. Considering that’s a top-notch Swedish creation, I’m pretty proud of mine. I mean, Swedish and flawlessly executed design are practically synonymous. We’re talking about a people who have brought us Ikea, Volvos, and meatballs.

Not bad, huh?

When I saw that picture, I decided I needed to try out that frosting technique. And ever since I bought some almond extract, I’ve been meaning to use it for more than just the truffles that I messed up so badly I had to throw away. Enter almond cake with chocolate frosting.

I couldn’t find a recipe for almond cake that pleased me well enough, so essentially I just made a white cake and added almond extract instead of vanilla. So here’s the recipe: Use whatever cake recipe or mix you like, add some almond extract, and taste the batter until you like it. I baked it in a springform pan so the sides would be straight.

Then I whipped up some of my Best Chocolate Frosting Ever. I spread a liberal amount onto the finished almond cake and then loaded the rest into my decorating bag. I used a #32 tip because that’s the biggest one I had, but really, you could use any large decorating tip. Betsy helped me out with this one by piping big dollops in a line around the rim of the cake while I went behind her with a spoon to flatten the drops out and spin the cake. Handy with two people, but certainly do-able on your own.

Dollop!


Spooning.

We left the center of the cake flat, free of dollops. I could say it was for effect, but really, we ran out of frosting. Looks good, though, huh?

Voila

I toasted some sliced almonds and pressed them into the sides, and voila – finished! (Actually, that’s not true. I burnt the first batch of almonds, toasted a second batch, and then voila.)

Yum yum

Enjoy this fancy cake served up right on fancy china.


Rainbow Tie-Dye Cake!

2 Feb

I jumped on the rainbow wagon to make this delicious cake for a friend a couple months ago. (Yes, a couple months ago — sorry, I lost the pictures till now. Geez. Back off.)

My friend, Julia, gets super excited about rainbows and colors in general, so I surprised her. I figured it would be a lot of work, so I did cut one pretty big corner: I started with a white cake mix. I mixed the batter according to package directions, and then divided the batter into 6 bowls. Then I dyed each bowl with gel food coloring, mixing a healthy dollop into each bowl until it looked like the right color. (Use gel instead of regular dye — you won’t need to use as much, so it won’t water down your batter.) Though I’ve seen neon, which looks pretty cool, I went with traditional ROYGBIV colors. Except I combined indigo and violet into one color, since they’re pretty much the same anyway.

Working backwards... VBVBG VBGYVBGYOVBGYOR. Or... ROYGBV.

After I mixed each color, I poured each layer into a bundt pan one at a time. (And yes, I did it in rainbow order.) I tried to pour it relatively gently so that the layers wouldn’t mix. But I didn’t worry too much about it because I wanted them to swirl a little to get a tie-dye look.

Bundt layers: VGBY

Red

I set the cake to bake according to package directions, and while it was in the oven, I got started on the strawberry buttercream frosting.

The cake passed the toothpick test, so I pulled it out to cool for 10 minutes or so. Then I flipped it out of the pan. I noticed that it didn’t rise very much in the oven. I probably over-stirred it while trying to get the colors mixed well. So word of warning — stir the colors in, but try not to over-stir.

After I frosted it, I thought it looked a little plain for something so super fantastic as a tie dye rainbow cake, so I added rainbow sprinkles on top. DOUBLE RAINBOW.

Rainbow Cake!

ALL THE WAY.

Peace, dude.

I really love that the end on the right almost looks like a peace sign. I’ll just pretend I did that intentionally.

The frosting really takes the cake (ha), so if you didn’t want the hassle of a full rainbow, you could just use any white cake recipe you like. Enjoy!

Strawberry Buttercream Frosting

31 Jan

O. M. G. This is so good, and so worth the hassle. Bear in mind that since it calls for fresh strawberries, the quality of your strawberry is going to be really important. You may want to save this one for the summer time. But, one reason I wanted to post this now is because it’s pretty common for grocery stores to get shipments of decent quality strawberries for Valentine’s Day. So if you’re looking for a seasonally appropriate frosting, this may be a great pick.

First, set out a stick of butter to soften and prepare your strawberries. I first cup them up, discarding the stems and slicing the rest into manageable pieces.  My pieces measure up to about 1/2 cup strawberries. (I would buy at least a pint, but probably two, just to make sure you have enough.) Then I use the back of a spoon to push the strawberry chunks through a fine-mesh sieve. The strawberry goo that comes out the other side of the sieve is exactly what you’re looking for.

Start out with 1/2 cup (1 stick) softened butter. Add it to your mixing bowl with 2 teaspoons vanilla extract and a pinch of salt. Beat with a hand mixer until soft and creamy. Then alternately add 4 cups powdered sugar and the strawberry goo, using the hand mixer to incorporate the new additions. That should do it, but of course you could add extra sugar, strawberries, or vanilla to your taste preference.

The frosting is a beautiful light pink color, usually with some pink specks in it. But since you pressed the strawberries through the sieve, it’s nice and smooth.

I topped vanilla cupcakes with this frosting for a pink-themed bridal shower:

Strawberry and Coconut Cupcakes

And I topped my rainbow tie-dye cake with some strawberry frosting:

Rainbow Cake with Strawberry Frosting

Fresas deliciosas!

Simpler German Chocolate Cake

22 Jan

A couple months ago, I volunteered to bake my dad’s birthday cake. Probably his favorite dessert would be anything fruit-related, but he’s also a huge fan of German chocolate cake, which I’ve never attempted before. And he hasn’t had one for his birthday in years. According to my sister, who hates German chocolate cake, he requested it “every single year,” but I don’t remember this – must have been before I was around. I started researching recipes and wow were they complicated. Most included buttermilk and a complicated process, and I didn’t intend to go to the grocery store or work that hard. So maybe this isn’t an authentic German chocolate cake, maybe I took a few shortcuts, but it’s still pretty awesome.

I decided to save a little time by going with a cake mix but a scratch-made frosting and filling. I started by making a chocolate cake according to its package directions. I baked it in a 9″ springform pan so that the sides would be straight up and not slanted, easier for slicing and stacking into layers. Since I did the entire batch in one pan, it took about 40 minutes to bake. If you did two 8″ rounds, it would bake faster, and you wouldn’t have to worry about slicing. Just fyi.

While it baked, I worked on the frosting/filling. I separated the yolks of 3 eggs and added them to a medium saucepan. (I saved the whites for breakfast the next day.) I added in 1/2 cup white sugar1/2 cup packed brown sugar, 1/2 cup butter, 1 cup evaporated milk, and 1 teaspoon vanilla. I stirred everything up well and then turned on the stove to medium heat. I recommend stirring things well before you turn the heat on and continuing to stir well, because I had some issues with eggs cooking too fast. Egg chunks in frosting is not ideal. 

I let this cook, stirring almost continuously, until it was nice and thick. I removed the pot from the heat and stirred in 1 1/3 cup coconut flakes and 1 cup chopped pecans. I let it cool on the stove top for a while and then cooled it even more in the fridge, till it was a spreadable consistency.

Layer 1

Layer 2 on Standby

All that was left was to assemble. I sliced the cake in half to get two round layers. I spread a thick layer of the coconut-pecan mixture all around and then carefully set the top layer back onto the cake. Then I spread the coconut-pecan frosting all around the top. All that was left was the birthday candles.

Deutscher Schokoladenkuchen!

Mostly Organic Spinach Cupcakes

6 Apr

When I first started trying to figure out how to make leafy greens into a dessert, I thought of spinach. If you can make a carrot cake that doesn’t take like vegetables, why not a spinach cake? Thank goodness for the internet, because the only sweet spinach cake I could find was on this great blog about Turkish food. So I found Binnur’s original Spinach Cake (Ispanakli kek) recipe, adjusted it a little, and got to work.

I started with the spinach, which I bought organic since spinach is one of the Dirty Dozen vegetables. I bought 2 5-oz packages organic spinach, snapped the roots off, and pureed it all in the food processor. Side note: this was the first time I ever used a food processor, and it was amazing. I can’t wait to find other things to process.

BeforeAfter
I set the spinach aside so I could start the batter. First I preheated the oven to 375 F. In a large mixing bowl, I blended 3 organic eggs and 2 cups sugar with a hand mixer on low for about a minute. Then I added 1/2 cup vegetable oil, 2 tablespoons lemon juice, 1 tablespoon organic vanilla, and all the spinach and blended until it all incorporated.

IngredientsThen I slowly added 2 1/2 cups flour and 1 tsp baking powder. I blended that for about two minutes longer.

Batter

Cupcake Batter
Then I scooped the batter into paper-lined muffin cups. I popped them into the oven and baked for about 18 minutes, until it passed the toothpick test.

Muffin or Cupcake? Muffcake!

Spinach Cakes

I tasted one and it was actually pretty good! It smelled like spinach but tasted like cake. Though I will say, I kept some plain ones in a sealed plastic container for a couple days, and when I took the lid off, that was some strong spinach smell. I decided it could use some frosting, so I whipped up some vanilla buttercream.

I dropped 1 stick softened organic butter (1/2 cup) into a mixing bowl and blended it with a hand mixer for just 30 seconds or so till it was smooth. Then I added 1 1/2 cups confectioners sugar and blended on low until incorporated. Then I added 1 tablespoon organic vanilla, 1/4 teaspoon salt, and 2 tablespoons organic heavy cream. I blended on medium for about 2 minutes. Once it was the perfect texture, I frosted the cupcakes.

Spinach Cupcake!The vanilla buttercream balanced the spinach cake perfectly and made for a pretty light but sweet cake. And unusual too!

How Sue Sees It:
– You could probably serve these without the frosting and call them muffins, but they’re still pretty sweet. And they’re better with the frosting anyway.
– This is a great option for people who need to hide vegetables in food in order to get kids or spouses to eat them, a la Jessica Seinfeld.
– This would also be great to serve for a St. Patrick’s Day party!
– I took them to a party and was very hesitant and almost apologetic about serving spinach cupcakes. I explained what they were, and then went back outside to move my car to a more legal parking spot. By the time I got back 10 minutes later, there were only 3 left! I guess they were good.

Like hotcakes!

Chocolate, Chocolate, Chocolate Cake

20 Feb

This is my favorite cake ever. It has 3 different kinds of chocolate. And it may have more, depending on the variation you choose to make — I’ve had up to 5 before! And this cake is always a crowd pleaser, so if I’m heading somewhere new and not sure what people will appreciate, this is my go-to recipe. I’m a little worried about posting this one because it’s actually only semi-homemade, and I don’t want people to think I’m a slacker. But oh well — all my secrets shall be revealed here sooner or later. The pictures for this one are awesome, so I’m including quite a few more than usual. Compliments to the BF/amateur photographer. So feast your eyes, and I’ll go feast my belly.

I start off by moving the rack to the middle of the oven, pre-heating it to 350 F, and buttering a bundt pan. I like using a bundt for this particular cake for a few reasons: One, because it looks fancier without any extra effort. Two, it has a drizzle instead of a full icing, and I think that looks nicer on a bundt. And three, it’s pretty rich, and it’s easier to cut a bundt cake into smaller, neater slices than it is a round or sheet cake.

So after the prep, I dump almost all the ingredients rather unceremoniously into a large mixing bowl: 1 box devils food cake, 1 package chocolate instant pudding mix, 4 eggs, 1 cup sour cream, 1/2 cup warm water, and 1/2 cup vegetable oil.

Batter IngredientsI blend it with a hand-mixer on medium-low for 2-3 minutes. Then I fold in  1 1/2 cups semisweet chocolate chips, and once it’s well-mixed, pour it evenly into the bundt pan.

Mixing the BatterChips!Batter in the pan

I bake it for 45-50 minutes. The cake slightly pulls away from the sides of the pan, and it should pass the toothpick test. I let it cool it on a wire rack for about 20 minutes, and then remove it from the pan. If you don’t cool it long enough, it’s more likely to crack when you try to remove it. And if you’re having a hard time getting it to pop out of the pan, take a long wooden skewer and run it around the edge of the cake before flipping it over. This will loosen it up without cutting your cake or scratching your pan.

Plain cake
Once it’s completely cool, I add the ganache-y chocolate topping — the same one I put on top of the Banana Butterscotch-Chocolate Cake. The rule for this topping is a 2:1 ratio of chocolate to butter. So I melt about 1/2 cup semisweet chocolate chips and 1/4 cup (1/2 stick) of butter in 30-second intervals, stirring well in between. While it’s still warm and runny, I drizzle in back and forth over top the cake. As it cools, it will firm up but not harden.

DrizzleChocolate Chocolate Chocolate Cake

Not to toot my own horn or anything, but I just have to say it again: seriously, this is the best cake ever. The other reason I love this cake is because it’s sooo easy. There aren’t any silly rules about beating in eggs one at a time or anything like that. And aside from the sort-of long cooking time, it’s really quick and easy to throw together. Actually, I try to keep the ingredients for this on hand at all times in case I need a last-minute cake.

I also like that this cake is so versatile and easy to make your own. I’ve substituted the semisweet chips for milk chocolate chips. Once I did half semisweet and half white chocolate chips. You could get even more wild and crazy and use butterscotch or peanut butter chips, or maybe a caramel topping. I haven’t tried those yet, so if you do, let me know how it goes.

If you’re worried about it, it’s okay to swap light sour cream for regular sour cream. But if you’re honestly counting calories, that seems like a waste of time when it comes to this cake. I haven’t tried the whole swap your oil for applesauce thing, so I don’t know how that would work out with this particular recipe. If you try it, let me know!

Yum

Triple Chocolate Cake

Cake:

1 box devils foods cake mix
1 package instant chocolate pudding mix
4 eggs
1 cup sour cream
1/2 cup warm water
1/2 cup vegetable or canola oil
1 1/2 cups semisweet chocolate chips

Topping:

1/2 cup semisweet chocolate chips
1/4 cup (1/2 stick) unsalted butter

Instructions:

Preheat oven to 350 F. Spray a bundt pan with cooking spray and set aside.

Add all the cake ingredients to a large mixing bowl. Blend with a hand-mixer on medium-low for 2-3 minutes. Fold in 1 1/2 cups chocolate chips. Pour batter into prepared pan.

Bake for 45-50 minutes or until an inserted toothpick comes out clean and the sides spring away from the edges of the pan. Let cool for about 20 minutes before inverting onto a platter. Top with chocolate ganache topping.

For topping, place 1/2 cup chocolate chips in a medium bowl. Chop butter into rough chunks and add to bowl. Microwave in 30 second intervals, stirring well in between each interval. Do not over-cook. Once thoroughly melted without any chunks, pour over top the cooled bundt cake. Let cool.