Tag Archives: sugar

Chocolate Chip Pretzel Cookies

17 Feb

Alright, y’all. I have totally hopped on the sweet & salty train. It actually worked out really well for me because the salted caramel trend hit right at a time when I discovered I actually like sweet/salty combos. See, as a kid, I hated that. I didn’t like desserts that had nuts or peanut butter in it, because those things are supposed to be salty, and desserts should not have salt in it. My older sister always got all the Reese’s Peanut Butter Cups out of my Halloween haul.

But maybe my adult palate is becoming more adventurous. Whatever it is, I’ve been excited to experiment with salt on desserts. Last month I tried the salt-on-top method with my Salted Nutella & Caramel-Stuffed Chocolate Chocolate Chip Cookies. AMAZING. This time I tried the salt-baked-in method by adding pretzel pieces to chocolate chip cookies.

They were so tasty, and I really enjoyed them. My preference is for cookies to be slightly undercooked so that they’re super gooey and chewy. And with lots of extra chocolate. And straight out of the oven so it melts in your mouth.

These were really not that hard if I were making a normal batch. But I was making them for our local Meals on Wheels, and I needed SIX DOZEN, so it became a bit more of a project than I realized.

IMG_3080

A couple tips I learned while baking these:

  • The dough needs to be chilled when it goes in the oven. If it’s too warm, the cookies will spread a lot more while they bake, and you’ll end up with a thin cookie. So if you’re making a large amount of cookies and it’s taking a while to scoop them all out and rotate them in and out of the oven, periodically pop the dough back into the fridge to chill a bit.
  • Don’t drop an entire baking sheet of cookies on the floor because that is very frustrating when you need a certain amount of cookies and you’re almost out of flour.
  • Don’t turn off the oven when you meant to turn off the timer because then the cookies won’t bake enough and in your attempts to not waste that batch you might cook them a lot longer because you can’t tell when they’re done and then end up baking them to a crisp.

If you can find caramel chips in the store (I couldn’t, and I was in a hurry, so I didn’t look elsewhere) you should definitely consider adding them in, like the original recipe called for. I bet that’s tasty.

Cookies

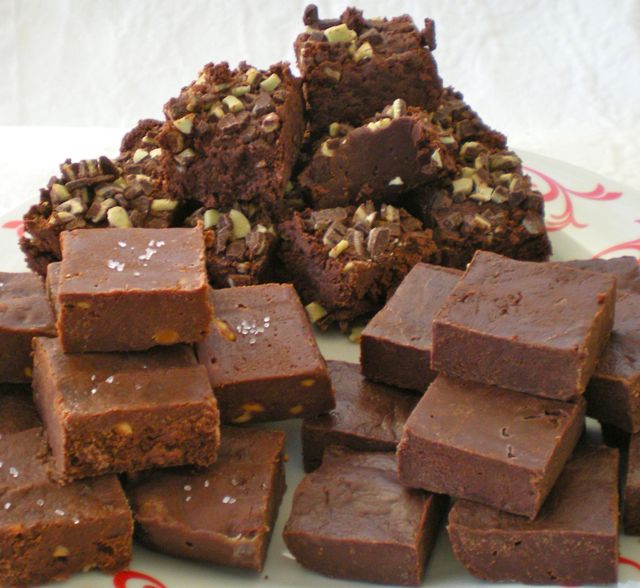
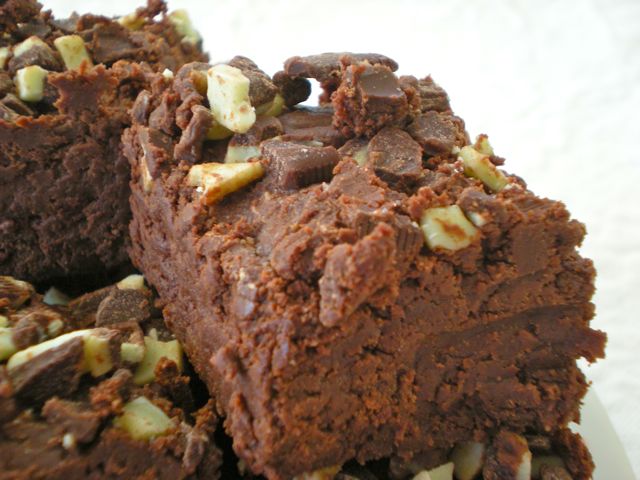
These were really good, but I won’t lie, they would probably be better with even more mix-ins — more chocolate chips, more pretzels, and those caramel chips. Feel free to play around with the mix-ins with your batch. This recipe should yield about 2 dozen cookies.

Chocolate Chip Pretzel Cookies adapted from By Stephanie Lynn

1 1/2 cups flour
1/2 teaspoon baking soda
1/2 teaspoon salt
2/3 cup butter
1/2 cup brown sugar, packed
1/2 cup white sugar
1 egg
2 teaspoons vanilla
1 1/3 cups semi-sweet chocolate chips
1/3 cup crushed pretzel pieces

In a medium bowl sift together the flour, baking soda, and salt. Set aside.

In a large bowl beat the butter, brown sugar and granulated sugar with an electric mixer on medium speed until light and fluffy. With the mixer on low speed, gradually add the eggs and vanilla. Mix well.

Slowly add the flour mixture and beat just until there are no streaks of flour showing. Stir in the chocolate chips, caramel chips and pretzel pieces.

Cover and chill the batter in the refrigerator for 15 minutes.

Preheat the oven to 350 F. Using a cookie scoop drop rounded tablespoon portions of the dough, about 2 inches apart, onto an un-greased baking sheet.

Bake 10 to 12 minutes or until lightly browned. Let the cookies cool on the baking sheet for 1 minute prior to moving to a wire rack to cool completely.

Linking Up With:

Funday Monday from Still Being Molly
Made by you Monday from Skip to my Lou
Inspiration Monday from Twelve O Eight
Wonderfully Creative Wednesday from All She Cooks
Create It Thursday from Lamberts Lately
Full Plate Thursday from Miz Helen’s Country Cottage
All Things Pretty from Sparkles and a Stove

Advertisement

Chocolate Lasagna

3 Jun

My coworkers and I had a great conversation about what I should call this amazing dessert. “Chocolate lasagna” was the name of the original recipe I found, which suited me just fine. They thought it sounded gross, since they immediately started thinking of noodles, cheese, chocolate, and tomato sauce, which I admit, sounds pretty disgusting altogether. But really, the ‘lasagna’ part of the name more just refers to the fact that it’s layered in a baking dish.

When I saw the picture with the list of ingredients, I thought it was a perfect dessert to make for my brother’s birthday. Like me, he’s a choc-aholic. Or I guess I’m like him, since he’s older than me. At any rate, neither of us can ever get enough chocolate, especially dark chocolate and mint chocolate.

He and his new wife joined me and my slightly-less-new husband for dinner at a German restaurant in Durham, Bavarian Brathaus, which was quite an experience. The live band consisted of a clarinet and tuba played by two very loud gentlemen who occasionally interrupted their playing to sing/shout quite boisterously. My brother’s favorite foods are chocolate (as noted), German (he lived in Germany while he was in the military), and Italian (isn’t that one of everyone’s favorites?). So following up a trip to a German restaurant with chocolate lasagna seemed appropriate.

Chocolate Lasagna

This recipe is really less about cooking than it is about assembling. I prefer to make dishes that require a little more cooking and far more whole and natural foods, but there is nothing wrong with a little boxed, pre-made sugary goodness every now and then. Plus, after a really long week, it was awesome to zone out, munch on some Double Stuf Oreos, and put this together pretty easily. (And no, I didn’t use the Double Stuf I already had for this recipe. The Double Stuf are for eating, the regular Oreos are for making crusts with. I don’t find it weird at all that I had two entire packages of different types of Oreos in my home, Judgy McJudgerson.)

Do you have any suggestions to name this dish? Since none of my coworkers could come up with a better name, Chocolate Lasagna it is… for now. If you have any brilliant ideas, let me know in the comments.

Someone got a little messy plating this giant serving. Still delicious with all the layers mixed together.

Someone got a little messy plating this giant serving. Still delicious with all the layers mixed together.

Chocolate Lasagna from Center Cut Cook

1 package regular Oreo cookies (not Double Stuf)
6 tablespoons butter, melted
1 8-oz package cream cheese, softened
1/4 cup sugar
2 tablespoons cold milk
1 12-oz tub Cool Whip, divided
2 3.9-oz packages instant chocolate pudding
3 1/4 cups cold milk
chocolate chips and Oreo crumbles for topping

Crush the entire package of Oreos into crumbles. Use a food processor, or place in a large sealed plastic bag and wail on ’em with a can of beans or a rolling pin or something. Reserve a handful of crumbs for the topping.

Transfer the rest of the crumbs to a 9×13″ baking dish, and spread evenly. Drizzle the melted butter over the top, and use a fork to incorporate the butter into the cookie crumbs. Press the crumbs into the bottom of the pan to create an even crust layer. Place the pan in the fridge.

In a large bowl, mix the cream cheese with a mixer until light and fluffy. Add 2 tablespoons milk and sugar. Mix well. Stir in about 1/3 of the Cool Whip. Spread the mixture evenly over the Oreo crust.

In a large bowl, combine the pudding with 3 1/4 cups cold milk. Whisk for several minutes until the pudding starts to thicken. Spread the mixture evenly over the cream cheese layer. Place in fridge and allow to sit for at least 5 minutes.

Spread the remaining Cool Whip over the pudding layer. Sprinkle chocolate chips and reserved Oreo crumbles evenly over the top. Place in the freezer for 1 hour, or the refrigerator for 4 hours before serving.

Chocolate Lasagna

Linking Up With:

YOLO Mondays from Still Being Molly and Lipgloss and Crayons
Market Yourself Monday from Sumo’s Sweet Stuff
Made by you Monday from Skip to my Lou
Anything and Everything Blog Hop from My Thrifty Chic
Time to Sparkle from Love Grows WildInside BruCrew LifeThe Recipe Critic, and The Gunny Sack
Create It Thursday from Lamberts Lately
All Things Pretty from Sparkles and a Stove and My Fashion Forward Blog

Homemade Caramel Sauce

14 Jan

I usually am a chocolate person, but lately, I’ve been really excited about caramel. I’ve liked it more and more as I’ve gotten older, but I think this particular obsession started with this year’s apples with caramel dip.

(While you’re here, like W&P on Facebook!)

My grandma lives in Hendersonville, home of the North Carolina Apple Festival. It’s an amazing little mountain arts & crafts festival held every year on Labor Day. We always go up, stay with the family, and spend hours walking through the festival. Grandma lives only a couple blocks from downtown, so we can walk up to Main Street whenever we get bored or need a snack. The apple theme pops up everywhere, from the food to the crafts for sale.

This year, as every year, we had apple slices with hot caramel dip. We also had apple pie, a frozen apple slushie, and apple cider. And we took a bag of apples home. Seriously, there’s no end to the apple shenanigans.

Since then, I’ve been all about apples and caramel, though not necessarily together. And when my BFF Lauren told me about the “best caramel sauce ever,” I had to check it out. And really, this is the best caramel sauce ever. It never hardens into that chewy or hard caramel, even when it cools. It’s always perfectly smooth. And it’s super easy!

Caramelly

When I first made this, I just whipped up a chocolate cake from a box mix to go with it. I’ve made it a couple times since then, including a big batch I jarred for my mom and gave her for Christmas. So far, I’ve had it on chocolate cake, as a dip for apples, as a dip for brownies, and as ice cream topping.

Caramel on Chocolate... doesn't get any better than that

My mom was super excited about Christmas this year. She received both a huge jar of caramel sauce and a cotton candy machine. By 7am, she was eating caramel by the spoonful and adding dollops of it to her breakfast oatmeal. And by 8am, she was handing out cones of fluffy pink cotton candy. That’s Christmas!

A jar of caramel sauce is way better than a jar of jam, IMHO

By the way, the sauce tends to absorb into the cake. If you decide to top a cake with it, wait till just before you serve it to drizzle the caramel sauce on top. You could put your caramel in a gravy boat or some such dish and get all fancy with your presentation.

Drizzle

Homemade Caramel Sauce from My Fabulous Recipes

3/4 cup sugar
1/4 cup brown sugar
1/4 cup butter
1 cup heavy cream
1/2 cup corn syrup
1/4 teaspoon vanilla

Heat all except vanilla in a saucepan over medium heat, and bring to a boil, stirring constantly. Once boiling, reduce to low and cook 20-30 minutes, stirring frequently until the sugar is completely dissolved and it has a caramel color. Stir in the vanilla and remove from heat. Can be served warm or chilled.

Beautiful

Linking up for:

YOLO Mondays from Still Being Molly and Lipgloss and Crayons
Monday Meet Ups from Covered in Grace
Made by you Monday from Skip to my Lou
Make Something Monday from Sarahndipities

Oh, Fudge!

7 Jan

Just before the holidays, my dear friend Hillary came over, and we spent an afternoon making fudge! We made huge delicious batches of chocolatey goodness to cut up and deliver to coworkers in cute little holiday packages.

I love making holiday treats for my office. I only have 9 coworkers, so it’s not that difficult to prepare for everyone, but some years, it just doesn’t happen. I have our huge annual fundraising event in early December, and it seems like by the time that’s over, I’m just wiped. I don’t have the energy for much.

But I had been thinking about it, and thought about possibly fudge. And the next day, Hillary called to say we should get together to make… fudge! So that seemed like a clear sign that it needed to happen. With a partner in the kitchen, who coincidentally was interested in the same project as I was, it was quite fun to whip these up. And, like all my favorite projects, it was super easy.

We set out to make 3 different flavors. Classic chocolate, salted chocolate peanut butter, and a double batch of mint chocolate chip. Yum!

And I may or may not have cracked myself up multiple times by muttering “Fudge!” when I screwed up or dropped something, and then realizing what I said. Ha.

FUDGE!

So here you go… 3 recipes in one post! It’s your lucky day.

Classic Chocolate Fudge adapted from Martha Stewart

2 tablespoons butter, cut into small pieces
3 cups semisweet chocolate chips
1 can (14-oz) sweetened condensed milk
1/2 teaspoon vanilla
1/8 teaspoon salt

Coat an 8-inch square pan with cooking spray and line with parchment paper, leaving extra paper on all sides.

Place the butter and chocolate chips in a medium heatproof bowl. Microwave for 30 seconds, then remove and stir well. Repeat, microwaving at 30-second intervals and stirring well between each time, until chocolate is melted.

Add condensed milk, vanilla, and salt. Stir well.

Pour immediately into prepared baking dish and spread evenly. Refrigerate until set, 2 hours or overnight (wrapped). Using the overhanging parchment paper, lift from pan and cut into squares.

Classic

Salted Chocolate Peanut Butter Fudge adapted from Martha Stewart

2 tablespoons butter, cut into small pieces
2 cups semisweet chocolate chips
1 can (14-oz) sweetened condensed milk
1 cup chunky peanut butter
1/2 teaspoon vanilla
Sea salt (optional)

Coat an 8-inch square pan with cooking spray and line with parchment paper, leaving extra paper on all sides.

Place the chocolate chips in a medium heatproof bowl. Microwave for 30 seconds, then remove and stir well. Repeat, microwaving at 30-second intervals and stirring well between each time, until chocolate is melted.

Add condensed milk, peanut butter, vanilla, and salt. Stir well.

Pour immediately into prepared baking dish and spread evenly. Refrigerate until set, 2 hours or overnight (wrapped). Using the overhanging parchment paper, lift from pan and cut into squares. Top with coarse sea salt.

Mmm... sweet & salty...

Mint Chocolate Chip Fudge adapted from Martha Stewart

2 tablespoons butter, cut into small pieces
3 cups semisweet chocolate chips
1 can (14-oz) sweetened condensed milk
1/4 teaspoon peppermint extract
Andes baking chips

Coat an 8-inch square pan with cooking spray and line with parchment paper, leaving extra paper on all sides.

Place the butter and chocolate chips in a medium heatproof bowl. Microwave for 30 seconds, then remove and stir well. Repeat, microwaving at 30-second intervals and stirring well between each time, until chocolate is melted.

Add condensed milk and peppermint. Stir well.

Pour immediately into prepared baking dish and spread evenly. Top with mint chips, as desired.

Refrigerate until set, 2 hours or overnight (wrapped). Using the overhanging parchment paper, lift from pan and cut into squares.

Mint Chip

Linking up for:

YOLO Mondays from Still Being Molly and Lipgloss and Crayons
Monday Meet Ups from Covered in Grace
Made by you Monday from Skip to my Lou
Make Something Monday from Sarahndipities

Chinese Chai Cookies

12 Dec

In my random internet roamings a couple months ago, I stumbled across the Great Food Blogger Cookie Swap. I was so excited to find it! The concept is very simple and right up my alley: I bake some cookies and mail them to 3 people. 3 different people bake some cookies and mail me a batch. We all have a chance to try delicious homemade treats and spread a little holiday cheer. How nice.

I knew that the shipping deadline was right around the time that I had a huge work event, so I even managed to get my cookies baked and shipped early. AMAZING. Seriously. Doing something before the last minute is a huge accomplishment for me.

I had a free afternoon a few weekends ago, so I started doing a little research. I narrowed it down to four recipe options and invited my BFF Lauren (a.k.a. Betsy Bundt) over to help. I was mostly concerned about durability — making sure the cookie could withstand shipping — and lasting freshness, since it would take a few days for me to bake, package, ship, and arrive across the country.

We found a delicious-sounding recipe for a Chai Spice Cookie. Based on preference and the ingredients I had on hand, we altered the recipe a bit and settled on a “Chinese Chai Cookie.” Chinese because instead of allspice, we included Chinese 5 Spice.

Chinese Chai Cookies

Chai is one of my favorite hot drinks, especially in the fall. As soon as fall season looks like it might be even just beginning, my car starts driving itself to Starbucks for chai lattes. This lasts until Christmas season, when my car knows that I really want peppermint hot chocolate. I make it through winter, and then I’m set. Until the next fall, anyway.

Tea & Cookies

These cookies were really good. They have a great texture and durability like a traditional sugar cookie. But they have an extra little flavor to them. They’re really not intense at all — the chai spice flavor is much more subtle than most chai lattes. But like a chai latte, they start out with a sweet flavor and finish with a warm spicy note on the back of your tongue. Amazing.

After we baked the cookies, I packaged them by rolling up a stack of cookies in clear cellophane wrap and tying the ends with a cute little bow.

Happy Holidays!

Really. I said a cute bow. See?

Tied with a bow

I hope you enjoy these! They make an excellent, sophisticated snack. Perfect for afternoon tea!

Chinese Chai Cookies, adapted from My Baking Addiction

2 3/4 cups flour
1 teaspoon baking soda
1/2 teaspoon baking powder
1/2 teaspoon salt
1 3/4 cups white sugar
2 teaspoon cinnamon
1 teaspoon ginger
1 1/2 teaspoons Chinese 5 Spice
1/2 teaspoon nutmeg
1/4 teaspoon black pepper
1 cup butter, at room temperature
1 egg
1/2 tablespoon vanilla

Preheat the oven to 350 degrees. Line a baking sheet with parchment paper and set aside.

In a medium bowl, whisk together the flour, baking soda, baking powder, and salt. Set aside.

In another bowl, combine the sugar, cinnamon, ginger, Chinese 5 Spice, nutmeg, and black pepper. Reserve 1/4 cup of this mixture; set aside to reserve for rolling cookies.

In a large bowl, beat the butter and remaining sugar-spice mixture on medium for about 3 minutes, or until light and fluffy. Beat in egg and vanilla; mix until incorporated.

Slowly blend in dry ingredients until just combined.

Using a small scoop, form into balls and then roll in the reserved sugar-spice mixture. Place dough balls on prepared baking sheet about 1 1/2 inches apart.

Bake in preheated oven for 8-10 minutes. Let stand 2 minutes, then remove to cool on wire racks.

Yield: Approx. 3 dozen cookies

Linking up for:

YOLO Mondays from Still Being Molly and Lipgloss and Crayons
Monday Meet Ups from Covered in Grace
Made by you Monday from Skip to my Lou
Make Something Monday from Sarahdipities

Secret Recipe Apple Pie

19 Nov

You should feel so honored right now. I’m about to share my secret recipe with you. Once you make this apple pie, all other pie will pale in comparison. You may be tempted to make other pies, and when you do, you’ll just be disappointed that it’s not this pie. That’s how good this pie is.

Mmm... Apple pie

The BF likes it so much that even he will roll up his sleeves and help. Which is awesome, because peeling and grating apples is a pain. And yes, I said grating. That’s the first secret: don’t slice or dice your apples, grate them. With a cheese grater. Be careful not to grate your knuckles. When you slice or dice apples, you get random textures and tastes with each bite. When you grate the apple, you get a nice, uniform taste and texture throughout the pie. No weird mush surprises.

a la mode-y

Photo credit to Emily of Voila! with Emily

The other secret… using the right apple. I like sweet, and I’m not the biggest fan of tart. So I use my favorite apple: gala. Preferably organic, and if you’re lucky enough to have a Trader Joe’s in your neighborhood, go there. They always have excellent organic gala apples.

The third secret: When you get a handful of grated apple, squeeze out the extra juice before adding it to the bowl. You’ll end up with a thicker, heartier pie instead of a sloppy, runny pie. And you’ll also end up with a glass of the most delicious apple juice you’ll ever drink.

I guess the last secret is the recipe, so here you go. Just in time for Thanksgiving.

Secret Recipe Apple Pie

1 1/2 cups flour
1/2 cup canola oil
2 tablespoons cold milk
1 1/2 teaspoons white sugar
1 teaspoon salt

6 medium-sized Gala apples
3/4 cup white sugar
3 tablespoons flour
1 1/2 teaspoons cinnamon
1 teaspoon ground nutmeg

1/2 cup flour
1/2 cup white sugar
1/2 cup butter

Preheat the oven to 350 degrees.

For the crust: Mix together 1 1/2 cups flour, oil, milk, 1 1/2 teaspoons sugar, and salt. Blend evenly. Spread mixture into a 9″ pie pan, pushing dough evenly across the bottom and up the sides.

Prepare the apples: Peel each apple. Grate the apples. Squeeze a handful of grated apple to reduce the amount of liquid. (Reserve juice if desired.) Add grated apple to a large bowl.

For the filling: To the apples, add 3/4 cup sugar, 3 tablespoons flour, cinnamon, and nutmeg. Toss to coat evenly. Spread in unbaked pie shell.

For the topping: In a shallow bowl or pan, add 1/2 cup flour, 1/2 cup sugar, and cold butter. Use a pastry cutter or pizza slicer to mix until evenly distributed and crumbly. (The butter should not melt or spread evenly, but will look like small balls or pearls mixed in among the flour and sugar.) Sprinkle mixture evenly over the apple mixture.

If desired, cover edges of pie with foil to prevent browning. Place pie in the oven on top of a cookie sheet to catch any juices that may spill over. Bake 45 minutes.

Classic

Linking up for:

Broccoli Brownies

20 May

Sounds disgusting, right? But much like the spinach cupcakes, they were actually pretty good! Since I committed to creating one meal and one dessert for each seasonal crop in North Carolina this year, I was again at a bit of a loss for broccoli. I Googled “broccoli dessert” and had very little success with fitting results. A search for “Broccoli cake” turned out a little better. My favorite result was this Broccoli Forest Cake, which I may have to try out one day. But from reading the recipes, I wasn’t quite convinced that any of my findings would be sweet enough if I truly focused on the broccoli.  So instead I decided to pull another Jessica Seinfeld and just hide that broccoli in a delicious dessert. Brownies it is.

Fresh Broccoli

I started off by pureeing fresh broccoli florets in my food processor (best kitchen purchase EVER). It resulted in a consistency kind of between powder and sand. I pureed enough to make 3/4 to 1 cup broccoli and set it aside. I preheated the oven to 350 F and got to work on my batter.

About to get processed

In a large bowl, I whisked together the dry ingredients: 3/4 cup flour, 1/2 cup cocoa, 1/2 teaspoon baking powder, and 1/4 teaspoon salt.

Dry Ingredients

In a separate bowl, I combined 1/4 cup (1/2 stick) melted butter, 1/2 cup sugar, 1/2 cup packed brown sugar, 2 eggs, and 1 teaspoon vanilla. I stirred it by hand till it was just blended.

Ew, Wet Ingredients

Then I slowly added the wet mixture to the dry mixture, stirring by hand till it was just blended. Last, I stirred in the chopped broccoli and 1/2 cup dark chocolate chips.

Broccoli & Chocolate

Broccoli Brownie Batter

I greased an 8×8 pan and poured the batter in evenly. I baked the brownies for about 25-30 minutes. When you poke it, the brownies should indent just slightly. I let it cool in the pan before I cut it into slices.

Broccoli Brownies

How Sue Sees It:

  • Since the broccoli was pureed super fine, these look like normal brownies. You can’t see any green at all, just chocolate. Perfect!
  • Everyone who actually tasted them really liked them. I’d say about half of my tasters thought they were good and didn’t have any comment at all. The other half thought they were good, but did ask something like, “Hmm… this is good, but what is that?” They couldn’t quite place what they were tasting, but they did like them.
  • For a couple people, including my 16-year-old drama queen of a sister, the thought of broccoli was too much of a barrier. She ate the first half of it just fine and told me it was delicious, but when I told her there was broccoli in there, she refused to eat the rest. My brother was a similar story. I think they were being babies, but it was a good lesson: just don’t mention the broccoli at all.
  • Definitely take the time to completely puree the broccoli. If you don’t have a food processor, go get one. I got mine at Walmart for 30 bucks. The broccoli is pureed so small that you can’t taste or see it. It barely alters the flavor, and it doesn’t affect the texture at all.
  • I thought they were very tasty, especially with the chocolate chips added in for good measure. I just tasted chocolate. But similar to the spinach cupcakes, though they tasted relatively normal, they did have a bit of a funky smell to them. Store them in an airtight container to keep them moist, but open the container and let them air out a bit for a few minutes before you serve them. If someone gets a whiff of these as soon as you open the container, they may not be willing to taste them.
  • A perfect dessert for picky kids and spouses who aren’t getting enough vegetables in their diet!
  • If you would rather incorporate zucchini instead of broccoli, follow the same method, but increase the amount of flour to 1 cup to balance out the extra water content.

Lemon-Glazed Ginger Cookies

19 Mar

I haven’t been baking much lately, even though I’m supposedly a “Bake-aholic,” so I decided to stop being lazy and try something new. The original recipe for these delicious cookies was in one of my Martha Stewart holiday cookie magazines. I edited it slightly, using fresh ginger rather than candied ginger, and I thought they came out great. They’re more of a cake-like cookie, and the cookie itself isn’t very sweet, but it meshes perfectly with the super-sweet lemon glaze.

First, I prepared my ginger, because I used fresh ginger, and I figured it would take a while. But trust me, fresh ginger is worth it! It’s not that it even tastes way better than ground ginger spice, it’s just totally different. I used a flat grater to grate about 1 1/2 tablespoons fresh ginger. Tip: Freeze your ginger first!! It will grate sooooo much more easily, it won’t be as messy, and you won’t lose any of the flavorful juice.

I whisked to combine 2 cups all-purpose flour, 1/2 teaspoon baking powder, and 3/4 teaspoon salt, and set it aside.

In a separate bowl, I combined 3/4 cup (1 1/2 sticks) softened butter and 1 cup packed dark-brown sugar. Then I beat it with the hand mixer on medium for about 3 minutes, until it was a bit fluffy. I added in all that ginger I grated up and beat the mixture for another 2 minutes. Then I beat in 1 egg and 2 tablespoons vanilla until well combined.

I Need 3 Hands
I reduced the speed of the mixer to low and added the flour mixture a little at a time, beating until just combined.

Cookie Batter
The dough was much stickier than I expected, so I divided into two sections, wrapped it in plastic wrap, and left it in the fridge overnight.

So the next day, I came back, set the oven to 350 F, and got to work on the dough. I wasn’t going to try to roll the dough out and use cookie cutters, because we all know what happens when I try that alone, so instead I rolled it into a log and sliced it into rounds. To do it this way, it actually works better to be almost frozen because then the knife doesn’t mush it while you’re trying to cut it. And I’ll be honest here: one of the dough sections wasn’t cold enough, it mushed like crazy, and I ended up molding little flattened balls of dough onto the parchment paper with very sticky hands. This dough is sticky enough that if I had one, I would probably use a mini ice cream scooper or a melon baller to drop rounds instead.

Cookie Dough Rounds
So once they were all lined up on a pan lined with parchment paper, I put them in the oven for about 14 minutes, rotating once halfway through. Once they were slightly golden around the edges, I pulled them out and let them cool completely on a wire rack.

Looking at cookies through the grimy window of my oven.Cooling the Cookies
While they were cooling, I mixed up the lemon glaze. This was so delicious that I followed it exactly like the original Martha Stewart recipe. First I cut a lemon in half and juiced one half of it to get about 1 teaspoon fresh lemon juice. Then I took that same half and grated the peel on the flat grater — just like I did for the ginger — to get about 1 tablespoon finely grated lemon zest.

Zesting a Lemon
I whisked to combine 2 cups confectioners’ sugar, the lemon juice and zest, 1 tablespoon honey, 2 1/2 tablespoons water, and a pinch of salt. It was pretty easy to get this nice and smooth, and ohmygosh it was so good. I was dipping my fingers in it the entire time I was baking. I will be putting this lemon glaze on everything.

Glaze IngredientsLemon Glaze
Then I just took my lemon glaze and put it on top of my cooled ginger cookies. The whole drizzling thing was just not working for me.

Drizzling Was Not Working
So instead I just spooned it on top in big blobs and let it run to cover the whole top of the cookie.

Glazing a CookieGlazing
For the second half of the batch, I set up a cookie sheet lined with parchment paper and then rested a wire rack on top of it. I set the cookies on the wire rack and glazed them there, so that the excess glaze could run off the sides and be caught by the pan below, instead of pooling unattractively around the cookie. This gave the cookie a really nice look. I was in a hurry (when am I not?), so I popped the cookies in the fridge so the glaze would set more quickly. But it would harden enough to be transportable in probably half an hour.

Lemon-Glazed Ginger Cookies


How Sue Sees It:
– I suggest storing these in an airtight container with wax paper between layers of cookies. Martha says they can be stored at room temperature in an airtight container for up to 2 days. I think throwing away cookies after only 2 days is ridiculous.
– I ran a little short on the lemon glaze near the end, and I tried to quickly whip up a second batch with some of that lemon juice that’s in the plastic lemon bottle. DO NOT DO THIS. It was disgusting and I threw it away.
– Line anything going into the oven with parchment paper and everything else with either parchment or wax paper. Then you can just throw away the mess.
– You can add food coloring to the glaze if you want. It looks kind of freakish and a bit less appetizing, but I dyed some of it green for St. Patrick’s Day.