Tag Archives: lemon

Citrus-Fennel Quinoa with Chickpeas

15 May

I made the healthiest dinner last night, and with all the citrus in there, it must have been jam-packed with vitamin C. And good thing – the BF was sick 2 weeks ago, then I was sick, and now he’s sick again. We apparently could both use a vitamin boost. As with most of my dinners, I found this original recipe online from thekitchn.com, and then I edited based on my own tastes. And also based on what I had on hand and what was cheapest at the grocery store. Instead of the original couscous, I swapped quinoa, since I already had some of that. And instead of lemon and orange, I went with lemon and lime, because those were on sale at the store. I made a couple other small edits here and there.

I started off with one lime and one lemon. I used a microplane to zest each of them and added that into a medium sauce pan. Then I juiced the lemon and one half of the lime into a large measuring cup. If you don’t have one, try this handy citrus press from Pampered Chef – it’s amazing. If you don’t have anything fancy to really get all the juice out, you may want to add another lime or lemon. I topped off the juices with enough water to make 1 1/2 cups liquid and added that to the sauce pan. I finished it with 1 tablespoon olive oil and about 1/2 teaspoon salt and cooked over high heat. Once it started boiling, I poured in 1 cup quinoa, covered the pan, and reduced the heat to a simmer. Keep an eye on it and make sure it doesn’t dry out.

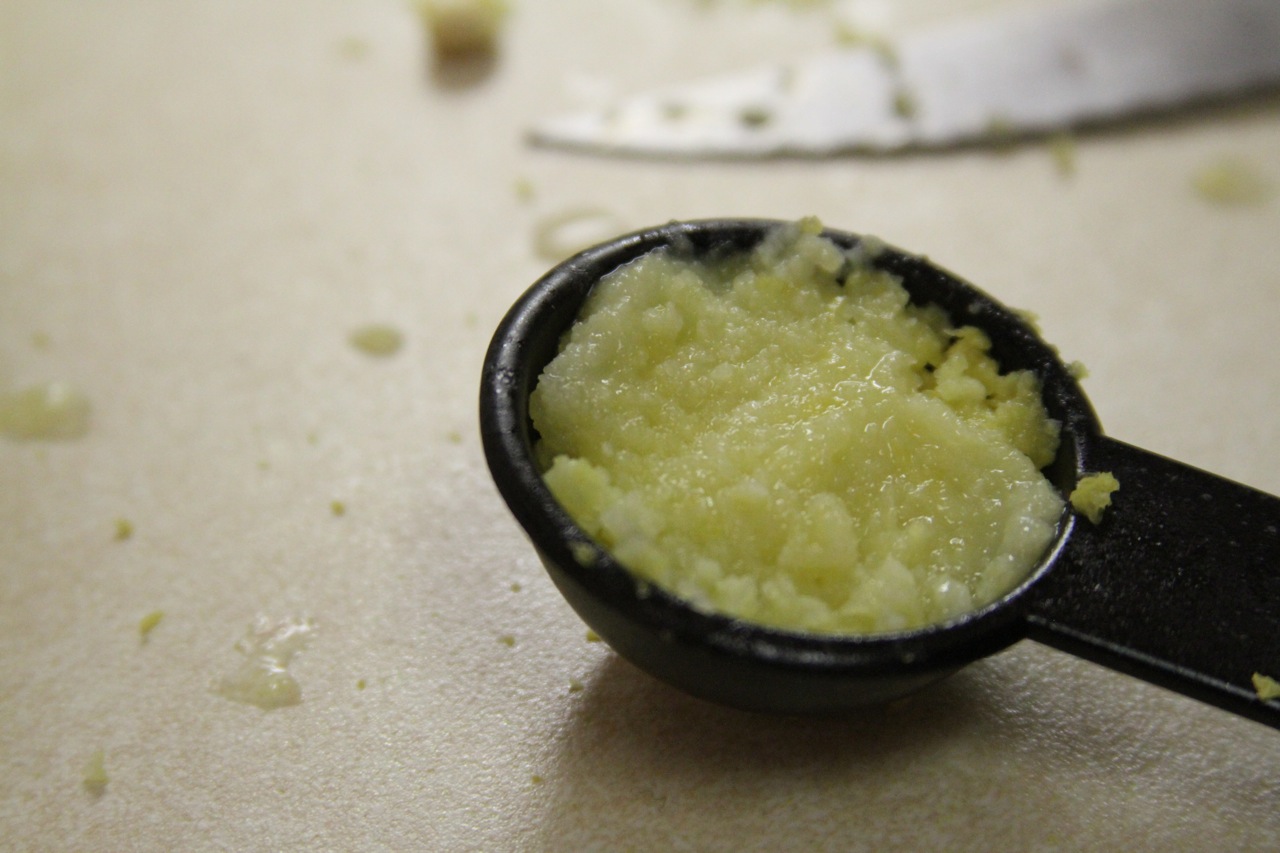
I heated 2 tablespoons olive oil in a large skillet over medium heat. I added 2 cloves minced garlic and 1 fennel bulb, cut into matchsticks (about 1 inch long, 1/4 inch thick). I cooked those about 10-15 minutes. Then I added 1 can (15 oz) drained chickpeas and the juice of half a lime. The original recipe calls for 1/2 teaspoon ground coriander, but I didn’t have any, so instead I added about 1/4 teaspoon “French herb blend” and 1/4 teaspoon lemon garlic blend. But just add whatever you have that sounds good. Last, I finished it off with a couple handfuls of baby spinach. As soon as the spinach cooks down, it’s ready!

What did the Garbanzo say to the waiter? "Chick, peas."

Similar to rice, the quinoa is ready when the water is absorbed. If you’re ready to serve and there’s too much water, let it cook for a few minutes with the lid off. I served the chickpea/fennel blend overtop the quinoa and it was subtly delicious. If you’re looking for a kick-in-the-mouth flavor, go somewhere else. But if you want to appreciate subtle flavors delicately balanced throughout your meal, this is it. Also, this is super healthy, unlike the block of cheddar cheese I’m currently snacking on.

Dinner time!

We enjoyed some tzatziki sauce and pita bread as a little side dish. As a side note, I figured out a super easy way to enjoy this Greek yogurt dip whenever I feel like it. I ordered tzatziki seasoning blend from Wildtree, a company that sells all-natural foods through a Pampered Chef-style set up. You only have to use a little at a time, so it lasts forever – well worth the price. Then I buy individual servings of plain Greek yogurt, like Oikos or Chobani, which is a perfect size for just two people. Before I start dinner, I cut up half a cucumber in tiny teeny pieces, mix it into the yogurt with a teaspoon or two of the seasoning blend, and then it’s ready. It’s delicious and it’s the perfect amount. A lot of the pre-made or store-bought versions are too big, and I usually don’t finish them before they go bad.

Gotta get some Vitamin C up in here

Anyway, the meal was great. I will probably add it to my list of stand-by meals. I thought it was pretty easy to whip up on a weeknight. Bon appetit!

Citrus-Fennel Quinoa with Chickpeas adapted from theKitchn

zest and juice of 2 limes, divided
zest and juice of 1 lemon
olive oil, divided
1 cup quinoa, rinsed well
2 cloves garlic, minced
1 fennel bulb, cut into matchsticks (~ 1″ long, 1/4″ thick)
1 can (15oz) chickpeas, drained
1/2 teaspoon ground coriander
2 handfuls baby spinach

Add the lime zest, lemon zest, 1 tablespoon olive oil, and 1/2 teaspoon salt to a medium sauce pot. In a large measuring cup, combine the juice of 1 lemon and the juice of 1 lime. Add enough water to make 2 cups total liquid. Pour the liquid into the pot and cook over high heat. Once boiling, add 1 cup quinoa, cover, and reduce to a simmer. Cook about 20 minutes; fluff with a fork and set aside.

Meanwhile, heat 2 tablespoons olive oil in a large skillet over medium heat. Add garlic and fennel; cook 10-15 minutes.

Add chickpeas, the juice of one lime, and coriander. Stir well. Add the spinach and cover, stirring occasionally. Cook 5-10 minutes, or until spinach is wilted.

Serve over quinoa.

Advertisement

1 Cake, 3 Ways

24 Feb

I promised a cake to a friend because of a competition we held at work, and when the time came around, she wouldn’t tell me what kind of cake she wanted. But I owed it to her, so I didn’t want to back out or forget. So since I didn’t know which cake to bake for her, I just baked three.

But I thought this through. Mixing up three different batters seemed like it would take up a lot of time. Obvi. So I made up a basic batter without any flavoring, divided it into three bowls, and then added separate flavorings to each one. And while the cakes were baking, I made up 3 different fillings for each cake. And then I made one vanilla buttercream frosting to top everything off. Game plan: coconut cake with coconut cream filling and vanilla buttercream frosting, lemon cake with lemon filling and vanilla buttercream frosting, and almond cake with chocolate filling and vanilla buttercream frosting. Hells yeah.

I started by mixing up the base. I sifted together 2 1/2 cups flour2 1/2 teaspoons baking powder, and 1/2 teaspoon salt. In a separate bowl, I mixed 2 cups white sugar3/4 cup butter, and 3 eggs with an electric mixer for about 1 minute. Then I alternately mixed in the flour mixture and 1 cup milk to the sugar mixture.

3 Cake Batters

I divided this base into 3 bowls.

  • Bowl 1: I added 1 teaspoon vanilla and 1/3 cup coconut flakes.
  • Bowl 2: I added 2 teaspoons fresh squeezed lemon juice and 1/2 teaspoon lemon zest.
  • Bowl 3: I added 2 teaspoons almond extract.

With my batters ready, I baked them at 350 F in batches, as my cake pans allowed. I used Wilton’s Mini Tasty-Fill Cake Pan Set. Sounds ridiculous, but it’s cool. It makes mini cake halves with a depression in the center of each one so that when you stack them, there’s a hollow center to add filling to. Of course, if you don’t have a smaller cake pan like this, you could make cupcakes and fill those. My small cakes baked 22 minutes or so. Cupcakes would probably take 18-20 minutes, but just keep checking with the toothpick test until they’re done.

3 Cakes Baking

While my cakes baked, I made the fillings.

  • For the coconut filling, I made up a half batch of the same filling that I used in my Simpler German Chocolate Cake, except I omitted the pecans.
  • For the lemon filling, I made a slightly different version of the original recipe I found here. In a saucepan, I mixed together 2 teaspoons lemon zest2 1/2 tablespoons lemon juice, and 1 teaspoon flour. I mixed that until it was smooth, and then I added 3 tablespoons unsalted butter and 3/4 cup sugar. While I brought that to a boil, I whisked 2 egg yolks in a bowl until smooth. I put a small bit of the lemon mixture into the eggs and stirred until smooth, then I added the egg mixture to the lemon mixture, stirring well. Do this part quickly so that the lemon mixture doesn’t boil for longer than a minute or so. Then I reduced the heat to low and stirred constantly for about 5 minutes. Then I removed it from the heat and let it cool. (Note: Don’t skip the step of stirring the eggs with a small amount of the lemon mixture first. That’s so you don’t cook egg chunks into your lemon filling.) (Other Note: I thought this was a little too thick. If I made this again, I would follow the original recipe more closely. I think I had too much sugar and not enough liquid.)
  • For the chocolate filling, I melted 1/2 stick (1/4 cup) unsalted butter and 1/2 cup of a broken up Hershey’s Bar with Almonds in the microwave, stirring well every 20-30 seconds until smooth.

While my fillings cooled, I made the frosting. You can find the original recipe for Vanilla Buttercream Frosting at savorysweetlife.com.

Then it was time for assembly. I matched the cakes to their fillings and filled the center of each one. After I sandwiched them together, I frosted them all with the Vanilla Buttercream Frosting.

So that the recipient would be able to tell what’s what, I topped each with something to represent what was inside. Coconut flakes on the coconut cake, chocolate bar bits on the almond-chocolate cake, and yellow and white sprinkles on the lemon cake. I stacked them all on one cake tray, and that was that. 1 cake batter 3 ways!

3 Cakes

Fresh Strawberry-Lemon Bars

11 Jun

I was joking in my last post about how I don’t really like strawberries, but I actually do. I was just joshin’, y’all. They’re just not my fave. But if I thought I didn’t like strawberries, this dessert would totally change my mind. It took a bit of time but was way worth it. I found the original recipe in an issue of Better Homes & Gardens, and it actually called for raspberries. But I thought, Hey, strawberries are in season, and they will probably work just as well. And damn was I right! These are good!

I started off by preheating the oven to 350 F and preparing my baking pan. I lined a 13×9 inch pan with aluminum foil, making sure I had enough to hang over the edges to make handles for later.

I threw 1 cup (2 sticks) unsalted organic butter into a large bowl, and then beat them with my hand mixer on medium about 30 seconds. Naturally, maybe because I forgot to cut them into chunks first, the butter got all stuck in the mixer and I had to push it all back into the bowl.

Then I added 1/4 cup packed light brown sugar and 1/4 teaspoon salt. I mixed that on low speed for another 30 seconds.

I added 2 cups all-purpose flour and beat on low speed until incorporated. Then I increased the speed to medium and continued mixing until it formed a dough. For a long time, it stayed really crumbly and seemed like it wasn’t going to form into a dough. I turned off the mixer and scraped the mixer and sides of the bowl. When I started mixing again, it came right together into the dough. I don’t know if it needed a break or if I just needed to keep going or what, but it worked. Since you want a bar crust and not just a crumble bottom, it’s better to over-mix then under-mix, so don’t stop too early.

Now there's a dough

Once I had a dough, I dropped it in chunks into the foil-lined baking pan. This made it easier to smooth it out into an even dough. I popped it in the oven for 20 minutes, which was the perfect amount of time to clean up and then chop 1 pint strawberries into quarters.

Dough chunksDough layer
Once the dough finished its 20 minutes, I let it cool for 5 minutes and then brushed the exposed foil with butter. Then I spread a small jar (10 oz? I don’t remember) strawberry jam evenly over the crust.

Jam layer

For the next layer, I spread the quartered strawberries evenly.

Strawberry layer

Now for the custard filling. In another large bowl, I mixed 4 oz. (1/2 package) cream cheese and 4 oz. goat cheese with a hand mixer on high for about 30 seconds. Then I added in  1/2 cup sugar, 1 tablespoon all-purpose flour, 1 egg, 1 egg yolk, the zest of one lemon, the juice of one lemon, and 1/2 teaspoon vanilla. Of course when I tried to get just the egg yolk, I accidentally poured the whole egg down the drain. But take two worked just fine. And then I beat the whole mixture on medium until smooth, about one minute.

Custard

A tip or two about lemon… To zest a lemon, use a flat grater to grate the lemon peel directly into the bowl. Grate the yellow, but stop when you see white — you don’t want to use that part. To juice a lemon, roll it around on the counter under your palm, putting a bit of weight into it. This will loosen up the juices a bit. Then cut it in half and squeeze each half directly into the bowl. If you have trouble keeping seeds out of your bowl, wrap a paper towel around the lemon and squeeze the juice through it. The paper towel will hold back the seeds and any pulp.

Custard Layer

I poured the lemon custard batter evenly over the strawberries and then baked it for about 30 minutes. After 30 minutes, I pulled them out and let them cool for about 10 minutes. I asked the BF to help me remove them from the pan — we each took an end of the foil and lifted it out, pulling it tight so it wouldn’t slide in on itself. Since I wanted to serve them for dessert and dinner was already halfway through, I stuffed them in the fridge to cool a little faster.

Strawberry Lemon Bars

When I was ready to serve, I cut them into bars and served a little piece to everyone, and omigod they were soooo good. Lots of strawberry, very lemony, really rich, and oh so sweet. But even though the goat cheese and cream cheese made it rich, the lemon also made for a pretty light, summery flavor. Deelish.

Strawberry Lemon Bar

Notes:

  • Wow, these are good. I am actually kind of surprised how much I like them considering they don’t have any chocolate.
  • I was a little skeptical that these would hold up as bars. I’m guessing I didn’t chill them long enough because they were a little runny at first. But when I chilled them again and sliced the other half the next day, they held up really well. And I figured that even if they didn’t, this would make just as delicious and satisfying a dessert if it were called a cobbler, crumble, or custard. Try them the first day with a spoonful warm out of the oven and a scoop of vanilla ice cream on top. Then refrigerate the rest, and after they’ve chilled, try them the next day as a firm, chilled bar. Both are pretty delicious!
  • This recipe could be made the exact same way but with a variety of fruits. I’d love to try raspberries, blueberries, peaches, anything really. Maybe I’ll try this again with other seasonal produce.

Lemon-Glazed Ginger Cookies

19 Mar

I haven’t been baking much lately, even though I’m supposedly a “Bake-aholic,” so I decided to stop being lazy and try something new. The original recipe for these delicious cookies was in one of my Martha Stewart holiday cookie magazines. I edited it slightly, using fresh ginger rather than candied ginger, and I thought they came out great. They’re more of a cake-like cookie, and the cookie itself isn’t very sweet, but it meshes perfectly with the super-sweet lemon glaze.

First, I prepared my ginger, because I used fresh ginger, and I figured it would take a while. But trust me, fresh ginger is worth it! It’s not that it even tastes way better than ground ginger spice, it’s just totally different. I used a flat grater to grate about 1 1/2 tablespoons fresh ginger. Tip: Freeze your ginger first!! It will grate sooooo much more easily, it won’t be as messy, and you won’t lose any of the flavorful juice.

I whisked to combine 2 cups all-purpose flour, 1/2 teaspoon baking powder, and 3/4 teaspoon salt, and set it aside.

In a separate bowl, I combined 3/4 cup (1 1/2 sticks) softened butter and 1 cup packed dark-brown sugar. Then I beat it with the hand mixer on medium for about 3 minutes, until it was a bit fluffy. I added in all that ginger I grated up and beat the mixture for another 2 minutes. Then I beat in 1 egg and 2 tablespoons vanilla until well combined.

I Need 3 Hands
I reduced the speed of the mixer to low and added the flour mixture a little at a time, beating until just combined.

Cookie Batter
The dough was much stickier than I expected, so I divided into two sections, wrapped it in plastic wrap, and left it in the fridge overnight.

So the next day, I came back, set the oven to 350 F, and got to work on the dough. I wasn’t going to try to roll the dough out and use cookie cutters, because we all know what happens when I try that alone, so instead I rolled it into a log and sliced it into rounds. To do it this way, it actually works better to be almost frozen because then the knife doesn’t mush it while you’re trying to cut it. And I’ll be honest here: one of the dough sections wasn’t cold enough, it mushed like crazy, and I ended up molding little flattened balls of dough onto the parchment paper with very sticky hands. This dough is sticky enough that if I had one, I would probably use a mini ice cream scooper or a melon baller to drop rounds instead.

Cookie Dough Rounds
So once they were all lined up on a pan lined with parchment paper, I put them in the oven for about 14 minutes, rotating once halfway through. Once they were slightly golden around the edges, I pulled them out and let them cool completely on a wire rack.

Looking at cookies through the grimy window of my oven.Cooling the Cookies
While they were cooling, I mixed up the lemon glaze. This was so delicious that I followed it exactly like the original Martha Stewart recipe. First I cut a lemon in half and juiced one half of it to get about 1 teaspoon fresh lemon juice. Then I took that same half and grated the peel on the flat grater — just like I did for the ginger — to get about 1 tablespoon finely grated lemon zest.

Zesting a Lemon
I whisked to combine 2 cups confectioners’ sugar, the lemon juice and zest, 1 tablespoon honey, 2 1/2 tablespoons water, and a pinch of salt. It was pretty easy to get this nice and smooth, and ohmygosh it was so good. I was dipping my fingers in it the entire time I was baking. I will be putting this lemon glaze on everything.

Glaze IngredientsLemon Glaze
Then I just took my lemon glaze and put it on top of my cooled ginger cookies. The whole drizzling thing was just not working for me.

Drizzling Was Not Working
So instead I just spooned it on top in big blobs and let it run to cover the whole top of the cookie.

Glazing a CookieGlazing
For the second half of the batch, I set up a cookie sheet lined with parchment paper and then rested a wire rack on top of it. I set the cookies on the wire rack and glazed them there, so that the excess glaze could run off the sides and be caught by the pan below, instead of pooling unattractively around the cookie. This gave the cookie a really nice look. I was in a hurry (when am I not?), so I popped the cookies in the fridge so the glaze would set more quickly. But it would harden enough to be transportable in probably half an hour.

Lemon-Glazed Ginger Cookies


How Sue Sees It:
– I suggest storing these in an airtight container with wax paper between layers of cookies. Martha says they can be stored at room temperature in an airtight container for up to 2 days. I think throwing away cookies after only 2 days is ridiculous.
– I ran a little short on the lemon glaze near the end, and I tried to quickly whip up a second batch with some of that lemon juice that’s in the plastic lemon bottle. DO NOT DO THIS. It was disgusting and I threw it away.
– Line anything going into the oven with parchment paper and everything else with either parchment or wax paper. Then you can just throw away the mess.
– You can add food coloring to the glaze if you want. It looks kind of freakish and a bit less appetizing, but I dyed some of it green for St. Patrick’s Day.