Archive | Desserts RSS feed for this section

Banana Fluffernutter Cupcakes

4 Mar

My mom is nuts for marshmallow fluff. Whenever I think of it, I picture her eating it straight off a spoon with a giant grin on her face. My mom is an excellent role model. She also demonstrated burping the alphabet and how she could squirt water through the gap between her two front teeth, both at the dinner table. The latter didn’t go well when my sister, who was about five years old at the time, attempted to do the same. She didn’t realize it wouldn’t quite work the same if you’re missing your four front teeth. That mess put an end to our water squirting at the dinner table, even if my dad was away on business.

Surprisingly, I never got on that much with marshmallow fluff. Maybe because I would always prefer to have chocolate. But this frosting changed my mind. I’ve never had a fluffernutter sandwich, but my mom always spoke of them fondly. To make a classic fluffernutter sandwich, you spread peanut butter and marshmallow fluff between two slices of soft white bread. I was thinking about this when dreaming up a new cupcake idea, and I decided that adding banana to the mix would be pretty awesome. Plus, I had some brown bananas I really needed to use. Thus, the concept for banana fluffernutter cupcakes was born: banana cupcake with peanut butter filling and marshmallow frosting. Unfortunately, these cupcakes disappeared before I could take one to my mom, but I might have to make another batch for her.

Cupcakes & Flowers

I started with a basic banana muffin. I thought something more muffin-like rather than cake-like would balance out the crazy sugar dose in the frosting.

I used applesauce instead of butter to be slightly healthier, and honestly, if you subtract the frosting, the banana/peanut butter portion of this recipe makes for an excellent and fairly healthy breakfast muffin. But if you wanted to go all out, by all means, use butter instead of applesauce.

A note about the applesauce: The first day, the paper completely stuck to the cupcake when I tried to peel it off. I recommend using butter or at least half butter and half applesauce. But if you do want to go applesauce all the way, not to worry. I took these to work on the third day after making them, and not only were they still moist, but also the paper peeled right off, no problems.

While they baked, I set out to make the marshmallow frosting. This stuff is SO GOOD. It’s just sugar with sugar, really.

After letting the cupcakes cool completely, I used my cupcake corer to remove the centers from each cupcake. This little guy is only 5 bucks and is seriously handy. You can get through a whole tray of cupcakes super fast. I definitely recommend it. But if you don’t have one, you can use a paring knife.

Not a happy day to be a cupcake.

Hardcored. Ha.

Instead of making a sugary peanut butter filling, I decided to fill them with plain peanut butter right out of the jar. I thought making a sweet filling might be too sweet when paired with the frosting. And most brands of peanut butter (like my favorite, crunchy Peter Pan) include a significant amount of sugar already. I used a little spoon to smush the peanut butter down in there.

Then I topped them with the marshmallow frosting, and there you go.

One Cupcake...

Super delicious. The blend of banana, peanut butter, and marshmallow is to die for. The flavors mingle so well together.

Two Cupcakes! Two! Ha Ah Ah. (Sorry. I just watched a video of The Count from Sesame Street. Don't ask.)


Banana Fluffernutter Cupcakes

1 1/2 cups flour
1 teaspoon baking powder
1 teaspoon baking soda
1/2 teaspoon salt
3 bananas, mashed
3/4 cup sugar
1 egg
1/2 cup (1 individual serving) applesauce (OR 1/3 cup butter)

Pre-heat oven to 350 F. Line a muffin pan with paper liners and set aside.

In a medium bowl, whisk together flour, baking powder, baking soda, and salt. Set aside.

In a large bowl, mash bananas with a fork. Add sugar, egg, and applesauce. Mix on low until just combined. Mix in flour mixture on low until just combined.

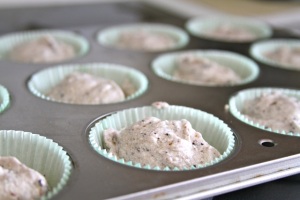
Pour the batter into the cupcake pan and bake for about 25-30 minutes. They should spring back slightly when tapped.

Let cool completely. Core each cupcake and fill with peanut butter. Top with marshmallow frosting.

Marshmallow Frosting

1 cup confectioners sugar
1 cup (2 sticks) butter, softened
1/2 teaspoon vanilla
1/2 tub (about 8 oz) marshmallow cream

Sift sugar and set aside.

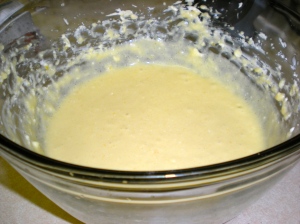
In a large mixing bowl, beat butter until creamy. Beat in 1/2 the sugar until combined. Add vanilla and the rest of the sugar and beat until combined.

Stir in marshmallow cream.


Aerial View

1 Cake, 3 Ways

24 Feb

I promised a cake to a friend because of a competition we held at work, and when the time came around, she wouldn’t tell me what kind of cake she wanted. But I owed it to her, so I didn’t want to back out or forget. So since I didn’t know which cake to bake for her, I just baked three.

But I thought this through. Mixing up three different batters seemed like it would take up a lot of time. Obvi. So I made up a basic batter without any flavoring, divided it into three bowls, and then added separate flavorings to each one. And while the cakes were baking, I made up 3 different fillings for each cake. And then I made one vanilla buttercream frosting to top everything off. Game plan: coconut cake with coconut cream filling and vanilla buttercream frosting, lemon cake with lemon filling and vanilla buttercream frosting, and almond cake with chocolate filling and vanilla buttercream frosting. Hells yeah.

I started by mixing up the base. I sifted together 2 1/2 cups flour2 1/2 teaspoons baking powder, and 1/2 teaspoon salt. In a separate bowl, I mixed 2 cups white sugar3/4 cup butter, and 3 eggs with an electric mixer for about 1 minute. Then I alternately mixed in the flour mixture and 1 cup milk to the sugar mixture.

3 Cake Batters

I divided this base into 3 bowls.

  • Bowl 1: I added 1 teaspoon vanilla and 1/3 cup coconut flakes.
  • Bowl 2: I added 2 teaspoons fresh squeezed lemon juice and 1/2 teaspoon lemon zest.
  • Bowl 3: I added 2 teaspoons almond extract.

With my batters ready, I baked them at 350 F in batches, as my cake pans allowed. I used Wilton’s Mini Tasty-Fill Cake Pan Set. Sounds ridiculous, but it’s cool. It makes mini cake halves with a depression in the center of each one so that when you stack them, there’s a hollow center to add filling to. Of course, if you don’t have a smaller cake pan like this, you could make cupcakes and fill those. My small cakes baked 22 minutes or so. Cupcakes would probably take 18-20 minutes, but just keep checking with the toothpick test until they’re done.

3 Cakes Baking

While my cakes baked, I made the fillings.

  • For the coconut filling, I made up a half batch of the same filling that I used in my Simpler German Chocolate Cake, except I omitted the pecans.
  • For the lemon filling, I made a slightly different version of the original recipe I found here. In a saucepan, I mixed together 2 teaspoons lemon zest2 1/2 tablespoons lemon juice, and 1 teaspoon flour. I mixed that until it was smooth, and then I added 3 tablespoons unsalted butter and 3/4 cup sugar. While I brought that to a boil, I whisked 2 egg yolks in a bowl until smooth. I put a small bit of the lemon mixture into the eggs and stirred until smooth, then I added the egg mixture to the lemon mixture, stirring well. Do this part quickly so that the lemon mixture doesn’t boil for longer than a minute or so. Then I reduced the heat to low and stirred constantly for about 5 minutes. Then I removed it from the heat and let it cool. (Note: Don’t skip the step of stirring the eggs with a small amount of the lemon mixture first. That’s so you don’t cook egg chunks into your lemon filling.) (Other Note: I thought this was a little too thick. If I made this again, I would follow the original recipe more closely. I think I had too much sugar and not enough liquid.)
  • For the chocolate filling, I melted 1/2 stick (1/4 cup) unsalted butter and 1/2 cup of a broken up Hershey’s Bar with Almonds in the microwave, stirring well every 20-30 seconds until smooth.

While my fillings cooled, I made the frosting. You can find the original recipe for Vanilla Buttercream Frosting at savorysweetlife.com.

Then it was time for assembly. I matched the cakes to their fillings and filled the center of each one. After I sandwiched them together, I frosted them all with the Vanilla Buttercream Frosting.

So that the recipient would be able to tell what’s what, I topped each with something to represent what was inside. Coconut flakes on the coconut cake, chocolate bar bits on the almond-chocolate cake, and yellow and white sprinkles on the lemon cake. I stacked them all on one cake tray, and that was that. 1 cake batter 3 ways!

3 Cakes

Almond Cake with Chocolate Frosting

12 Feb

This is more of a concept than a recipe, but I’ll at least post enough for you to re-create it on your own, if you were so inclined.

I’d really like to work more on my presentation skills, but I’m pretty terrible at decorating. Any time I serve up a dessert that looks like a big ole delicious mess of chocolate, I typically huff and puff and said something like, ‘It doesn’t matter what it looks like, it only matter that it tastes delicious!’ But seriously, it’s time to step it up a notch. Though I do believe that taste is more important than looks, it also doesn’t hurt to look pretty.

I got this idea from a blog whose picture I saw on Pinterest. (Oh, Pinterest. You are responsible for my craftiest of urges.) The blog is in Swedish, but you’ll get the gist.

Here’s a side-by-side comparison so you can see how good mine looks compared to the original. Considering that’s a top-notch Swedish creation, I’m pretty proud of mine. I mean, Swedish and flawlessly executed design are practically synonymous. We’re talking about a people who have brought us Ikea, Volvos, and meatballs.

Not bad, huh?

When I saw that picture, I decided I needed to try out that frosting technique. And ever since I bought some almond extract, I’ve been meaning to use it for more than just the truffles that I messed up so badly I had to throw away. Enter almond cake with chocolate frosting.

I couldn’t find a recipe for almond cake that pleased me well enough, so essentially I just made a white cake and added almond extract instead of vanilla. So here’s the recipe: Use whatever cake recipe or mix you like, add some almond extract, and taste the batter until you like it. I baked it in a springform pan so the sides would be straight.

Then I whipped up some of my Best Chocolate Frosting Ever. I spread a liberal amount onto the finished almond cake and then loaded the rest into my decorating bag. I used a #32 tip because that’s the biggest one I had, but really, you could use any large decorating tip. Betsy helped me out with this one by piping big dollops in a line around the rim of the cake while I went behind her with a spoon to flatten the drops out and spin the cake. Handy with two people, but certainly do-able on your own.

Dollop!


Spooning.

We left the center of the cake flat, free of dollops. I could say it was for effect, but really, we ran out of frosting. Looks good, though, huh?

Voila

I toasted some sliced almonds and pressed them into the sides, and voila – finished! (Actually, that’s not true. I burnt the first batch of almonds, toasted a second batch, and then voila.)

Yum yum

Enjoy this fancy cake served up right on fancy china.


Rainbow Tie-Dye Cake!

2 Feb

I jumped on the rainbow wagon to make this delicious cake for a friend a couple months ago. (Yes, a couple months ago — sorry, I lost the pictures till now. Geez. Back off.)

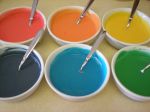
My friend, Julia, gets super excited about rainbows and colors in general, so I surprised her. I figured it would be a lot of work, so I did cut one pretty big corner: I started with a white cake mix. I mixed the batter according to package directions, and then divided the batter into 6 bowls. Then I dyed each bowl with gel food coloring, mixing a healthy dollop into each bowl until it looked like the right color. (Use gel instead of regular dye — you won’t need to use as much, so it won’t water down your batter.) Though I’ve seen neon, which looks pretty cool, I went with traditional ROYGBIV colors. Except I combined indigo and violet into one color, since they’re pretty much the same anyway.

Working backwards... VBVBG VBGYVBGYOVBGYOR. Or... ROYGBV.

After I mixed each color, I poured each layer into a bundt pan one at a time. (And yes, I did it in rainbow order.) I tried to pour it relatively gently so that the layers wouldn’t mix. But I didn’t worry too much about it because I wanted them to swirl a little to get a tie-dye look.

Bundt layers: VGBY

Red

I set the cake to bake according to package directions, and while it was in the oven, I got started on the strawberry buttercream frosting.

The cake passed the toothpick test, so I pulled it out to cool for 10 minutes or so. Then I flipped it out of the pan. I noticed that it didn’t rise very much in the oven. I probably over-stirred it while trying to get the colors mixed well. So word of warning — stir the colors in, but try not to over-stir.

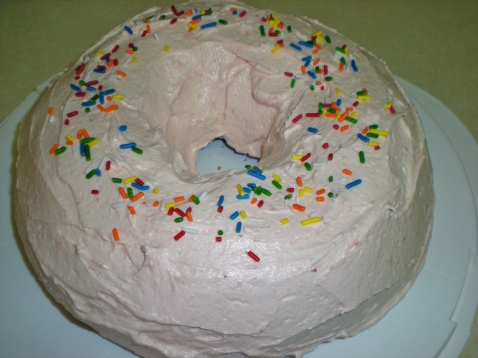
After I frosted it, I thought it looked a little plain for something so super fantastic as a tie dye rainbow cake, so I added rainbow sprinkles on top. DOUBLE RAINBOW.

Rainbow Cake!

ALL THE WAY.

Peace, dude.

I really love that the end on the right almost looks like a peace sign. I’ll just pretend I did that intentionally.

The frosting really takes the cake (ha), so if you didn’t want the hassle of a full rainbow, you could just use any white cake recipe you like. Enjoy!

Strawberry Buttercream Frosting

31 Jan

O. M. G. This is so good, and so worth the hassle. Bear in mind that since it calls for fresh strawberries, the quality of your strawberry is going to be really important. You may want to save this one for the summer time. But, one reason I wanted to post this now is because it’s pretty common for grocery stores to get shipments of decent quality strawberries for Valentine’s Day. So if you’re looking for a seasonally appropriate frosting, this may be a great pick.

First, set out a stick of butter to soften and prepare your strawberries. I first cup them up, discarding the stems and slicing the rest into manageable pieces.  My pieces measure up to about 1/2 cup strawberries. (I would buy at least a pint, but probably two, just to make sure you have enough.) Then I use the back of a spoon to push the strawberry chunks through a fine-mesh sieve. The strawberry goo that comes out the other side of the sieve is exactly what you’re looking for.

Start out with 1/2 cup (1 stick) softened butter. Add it to your mixing bowl with 2 teaspoons vanilla extract and a pinch of salt. Beat with a hand mixer until soft and creamy. Then alternately add 4 cups powdered sugar and the strawberry goo, using the hand mixer to incorporate the new additions. That should do it, but of course you could add extra sugar, strawberries, or vanilla to your taste preference.

The frosting is a beautiful light pink color, usually with some pink specks in it. But since you pressed the strawberries through the sieve, it’s nice and smooth.

I topped vanilla cupcakes with this frosting for a pink-themed bridal shower:

Strawberry and Coconut Cupcakes

And I topped my rainbow tie-dye cake with some strawberry frosting:

Rainbow Cake with Strawberry Frosting

Fresas deliciosas!

Simpler German Chocolate Cake

22 Jan

A couple months ago, I volunteered to bake my dad’s birthday cake. Probably his favorite dessert would be anything fruit-related, but he’s also a huge fan of German chocolate cake, which I’ve never attempted before. And he hasn’t had one for his birthday in years. According to my sister, who hates German chocolate cake, he requested it “every single year,” but I don’t remember this – must have been before I was around. I started researching recipes and wow were they complicated. Most included buttermilk and a complicated process, and I didn’t intend to go to the grocery store or work that hard. So maybe this isn’t an authentic German chocolate cake, maybe I took a few shortcuts, but it’s still pretty awesome.

I decided to save a little time by going with a cake mix but a scratch-made frosting and filling. I started by making a chocolate cake according to its package directions. I baked it in a 9″ springform pan so that the sides would be straight up and not slanted, easier for slicing and stacking into layers. Since I did the entire batch in one pan, it took about 40 minutes to bake. If you did two 8″ rounds, it would bake faster, and you wouldn’t have to worry about slicing. Just fyi.

While it baked, I worked on the frosting/filling. I separated the yolks of 3 eggs and added them to a medium saucepan. (I saved the whites for breakfast the next day.) I added in 1/2 cup white sugar1/2 cup packed brown sugar, 1/2 cup butter, 1 cup evaporated milk, and 1 teaspoon vanilla. I stirred everything up well and then turned on the stove to medium heat. I recommend stirring things well before you turn the heat on and continuing to stir well, because I had some issues with eggs cooking too fast. Egg chunks in frosting is not ideal. 

I let this cook, stirring almost continuously, until it was nice and thick. I removed the pot from the heat and stirred in 1 1/3 cup coconut flakes and 1 cup chopped pecans. I let it cool on the stove top for a while and then cooled it even more in the fridge, till it was a spreadable consistency.

Layer 1

Layer 2 on Standby

All that was left was to assemble. I sliced the cake in half to get two round layers. I spread a thick layer of the coconut-pecan mixture all around and then carefully set the top layer back onto the cake. Then I spread the coconut-pecan frosting all around the top. All that was left was the birthday candles.

Deutscher Schokoladenkuchen!

Brownie Caramel Cheesecake

13 Nov

I was recently invited to a friend’s birthday party, and the birthday lady requested to hang out with friends, play games, and eat cheese. Sounds like a perfect celebration to me. All the guests were asked to bring some dish to share that had cheese. Of course I wanted to bake something, which logically led to cheesecake. But then I heard that another party-goer was bringing baked goods. What? Excuse me? Does he have a baking-themed blog that he painstakingly updates every few months? I don’t think so. Clearly, I needed to up the ante. No more plain classic cheesecake. Enter… brownie caramel cheesecake. Perfect. (You can see the original recipe I found here.)

Betsy came over to help me out with this one, and we started off by preheating the oven to 350 F and greasing my 9″ springform pan. In a medium bowl, we mixed together 1 package brownie mix, 1 egg, and 1 tablespoon cold water. We spread that into the pan and baked it for 25 minutes.

That's not my arm!

While it baked, we worked on the caramel. We unwrapped a whole bag of individual caramels. This is where I deviated from the recipe a bit. It called for a 5-oz can of evaporated milk, which I didn’t have. So instead I mixed in about 5 tablespoons butter and a few spoonfuls of sweetened condensed milk to thin it up a bit. This worked out pretty well, except it was a bit tough, so I recommend testing out the evaporated milk route and see if that works better. Once everything was all melted together, we set aside about 1/3 cup of the caramel mixture in a bowl and got to work on the cheesecake part.

Mmm... melty caramel

In a large bowl, we beat 2 (8 oz) packages softened cream cheese, 1/2 cup white sugar, and 1 teaspoon of almond extract until smooth. I’ll be honest, the only reason I used almond is because I ran out of vanilla. We then added 2 eggs, one at a time, beating just slightly between each one. The key to a good cheesecake, as Betsy says, is to not beat it too much, which allows air to get into the batter, causing cracks when it bakes.

Cheesecake Batter

This was just in time to pull the brownie base out of the oven. I poured the caramel mixture into the pan, keeping that small amount I set aside for later. Then I poured the cream cheese mixture overtop the caramel, spreading evenly to the edges. We popped it into the oven.

Caramel LayerCheesecake Layer

The recipe says to bake it for 40 minutes. We baked it probably a total of 50 because the center looked like it wasn’t finishing. The problem was, the crust over-baked. Next time, I’ll bake the brownie crust for probably half the time. Anyway, the results were still amazing.

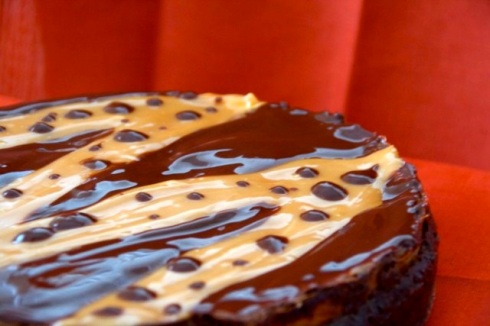
After we pulled the cheesecake out and popped the ring off the springform pan, we set out to top it with caramel and chocolate. Betsy poured the caramel in, but it was really thick, so we ended up with large globs instead of a pretty stream. No matter. I spread the caramel into wide zig-zap stripes. (If you use the evaporated milk instead of the butter like we did, your caramel may not be thick enough for this, but you should be able to pull off a nice drizzle.)

That caramel is not really pouring so well

Next I melted 1/4 cup chocolate chips and 2 tablespoons butter in the microwave on 30 second intervals, stirring in between, until it was perfectly smooth. Then I spooned chocolate on top of the cake in between the caramel zags. We made a few drips of chocolate — whoops! So to cover them up, we just decided to drip chocolate polka dots all over the caramel. Perfect. By the time we were done, the entire top of the cake was covered in either caramel or chocolate, and it looked simply amazing.

Brownie Caramel Cheesecake

And I must say, later that night, after the birthday lady blew out the candles, it tasted amazing. It was very rich, so everyone just needed a small slice, which really helped make such a small cake go a long way. And as I mentioned above, the crust was a little tough, but that’s easily remedied next time. Definitely a recipe I’ll be coming back to.

I'm ready for my close-up

Blueberry Cupcakes

19 Aug

I made these scrumptious blueberry cupcakes ages ago and forgot to post them, so hopefully I’ll remember everything. I have the recipe written down, so maybe that will jog my memory. These came about as the perfect solution to knocking out two birds with one stone: I wanted one more recipe for in-season blueberries (they were in season at the time, anyway) and I needed a treat for my dad for Father’s Day (I said it was ages ago).

Usually blueberries are found in more pastry-like desserts — pies, crumbles, cobblers, etc. I was intrigued by blueberries in cupcakes and thought it would be great to try out.

I started with 2 pints of blueberries. I’ll go ahead and say it now — I personally thought the blueberry-to-sugar ratio was excellent, but I would guess that a lot of blueberry fans would want way more blueberry flavor than this, maybe even double the amount. Your call. Anyway, for the batter…

I preheated the oven to 350 F and lined my cupcake tin. I thought a monochromatic look would be nice, so I used blue paper liners. In a food processor, I pureed a pint plus a little more of the blueberries, and set it aside.

I sing that to the tune of Raspberry Beret.

I sifted 3/4 cup all-purpose flour, 1/2 tsp baking powder, and a pinch of salt into a small bowl and set it aside.

Dry Ingredients

In another small bowl, I whisked together 2 T milk, 1/2 tsp vanilla, and the prepared blueberry puree.

Batter IngredientsNow that I had my dry and wet mixes ready, I pulled out a large mixing bowl. I mixed 1/2 stick (1/4 cup) softened butter on low, and added 1/2 cup sugar. I beat it for a few minutes, until it was light and fluffy. Then I added one eggand mixed on low until just combined.Batter UpI added half the flour mixture, mixed briefly, added the milk mixture, mixed briefly, and then scraped down the bowl and added the rest of the flour mixture, mixing until just combined. Then I poured the batter into the prepared cupcake tins.

Cupcake Batter

I baked them for about 20-22 minutes, until they passed the toothpick test. I let them cool a bit in the pan, and then transferred them out to cool completely.

I went ahead and got to work on the frosting because pureeing and straining the rest of the blueberries took some time. This time, I pureed the rest of the blueberries in the food processor, and then I pushed them through a fine mesh strainer. This took quite some time, but it took even longer to clean the damn thing afterward. I just used the back of a spoon to push the blueberry puree through. The result was a purple goo that was much smoother than the chunky mess that came out of the food processor. This worked out great because the cupcakes had a great speckled look to them, where you could see tiny blueberry chunks baked in, but the frosting had the ideal smooth frosting texture in a pretty light blue color.

Ignore the red polka dots and you can see a little blueberry goop down there.

In a large bowl, I beat 1/4 cup softened butter, 1 3/4 cup powdered sugar, and 1/4 teaspoon vanilla with my hand mixer on medium-low.

Adding Blueberry Puree

I added the blueberry puree a little at a time until I achieved the desired flavor and consistency — for me, that was all of it. Once the frosting was smooth and blue, it was ready! I spread it on top of the cupcakes and topped each one with a single fresh blueberry. Perfect!

Blueberry Cupcakes

Blueberry Cupcake, in all its monochromatic glory.

Chocolate Chip Zucchini Bread

20 Jun

What up, homeslice?Before I headed to my Grandma’s for Memorial Day weekend, I baked a couple loaves of chocolate chip zucchini bread. I toted them all the way to Asheville while we lunched and shopped downtown and the bread waited in the stifling hot car, and then the rest of the way to Hendersonville where the BF and I joined my family. By “my family,” by the way, I mean about 17 people. I just knew Grandma and my dad would love this bread, and I was so pleased to have thought about bringing such a delicious gift with me. As we left on Monday, I noticed my chocolate chip zucchini bread, on the counter, still whole and wrapped in my tasteful packaging of tin foil and a Ziploc bag. And damn if I was going to leave that loaf behind for a bunch of ungrateful relatives — none of those 17 people could even bother to taste my bread? Psh. So I took it home with me and enjoyed it myself for the rest of the week.

That afternoon I got a call from my mother, who got a call from Grandma, because she was upset. She knew no one else had tasted that bread, and apparently she was planning on enjoying it herself for the rest of the week, starting that day when she returned home from church. Too bad, Grandma. I got it.

Because I am a wonderful granddaughter, when she returned this weekend for my nephew’s 4th birthday party, I prepared another batch. I brought a mini loaf for her and a mini loaf for my dad. Both of them were so excited they each tried to keep both loaves for themselves. I intervened and decreed they each receive just one loaf. That was only Saturday, so I’ll give them a couple more days, but when I call, they better have enjoyed them.

Make this, and find out for yourself why people will fight over it. This batch will make 2 regular loaves or, in my case, 3 mini loaves plus 3 muffins.
First I set the oven to 325 F and greased and floured the pans: two loaf pans or 3 mini pans and a few paper-lined muffins. Then I set up the food processor and grated 2 1/2 zucchinis, until I got 2 cups grated zucchini

Zucchini is GRATE for you.

In a large bowl, I beat 3 eggs with the hand mixer until they were a light yellow color and frothy. Then I mixed in 1 cup vegetable oil and 2 cups sugar. I stirred in the grated zucchini and  2 teaspoons vanilla

Zucchini in the batter

In another bowl, I whisked to combine 3 cups all-purpose flour, 3 teaspoons cinnamon, 1 teaspoon baking soda, 1/4 teaspoon baking powder, 1 teaspoon salt, and about 1 cup semisweet chocolate chips. Once they were well mixed, I slowly stirred the flour mixture into the egg mixture.

Zucchini Bread Batter

I evenly divided the batter into the two prepared loaf pans, and then I baked them for about an hour.

Into the oven!

Gorgeous, delicious, and easy.

Just loafin' around

Fresh Strawberry-Lemon Bars

11 Jun

I was joking in my last post about how I don’t really like strawberries, but I actually do. I was just joshin’, y’all. They’re just not my fave. But if I thought I didn’t like strawberries, this dessert would totally change my mind. It took a bit of time but was way worth it. I found the original recipe in an issue of Better Homes & Gardens, and it actually called for raspberries. But I thought, Hey, strawberries are in season, and they will probably work just as well. And damn was I right! These are good!

I started off by preheating the oven to 350 F and preparing my baking pan. I lined a 13×9 inch pan with aluminum foil, making sure I had enough to hang over the edges to make handles for later.

I threw 1 cup (2 sticks) unsalted organic butter into a large bowl, and then beat them with my hand mixer on medium about 30 seconds. Naturally, maybe because I forgot to cut them into chunks first, the butter got all stuck in the mixer and I had to push it all back into the bowl.

Then I added 1/4 cup packed light brown sugar and 1/4 teaspoon salt. I mixed that on low speed for another 30 seconds.

I added 2 cups all-purpose flour and beat on low speed until incorporated. Then I increased the speed to medium and continued mixing until it formed a dough. For a long time, it stayed really crumbly and seemed like it wasn’t going to form into a dough. I turned off the mixer and scraped the mixer and sides of the bowl. When I started mixing again, it came right together into the dough. I don’t know if it needed a break or if I just needed to keep going or what, but it worked. Since you want a bar crust and not just a crumble bottom, it’s better to over-mix then under-mix, so don’t stop too early.

Now there's a dough

Once I had a dough, I dropped it in chunks into the foil-lined baking pan. This made it easier to smooth it out into an even dough. I popped it in the oven for 20 minutes, which was the perfect amount of time to clean up and then chop 1 pint strawberries into quarters.

Dough chunksDough layer
Once the dough finished its 20 minutes, I let it cool for 5 minutes and then brushed the exposed foil with butter. Then I spread a small jar (10 oz? I don’t remember) strawberry jam evenly over the crust.

Jam layer

For the next layer, I spread the quartered strawberries evenly.

Strawberry layer

Now for the custard filling. In another large bowl, I mixed 4 oz. (1/2 package) cream cheese and 4 oz. goat cheese with a hand mixer on high for about 30 seconds. Then I added in  1/2 cup sugar, 1 tablespoon all-purpose flour, 1 egg, 1 egg yolk, the zest of one lemon, the juice of one lemon, and 1/2 teaspoon vanilla. Of course when I tried to get just the egg yolk, I accidentally poured the whole egg down the drain. But take two worked just fine. And then I beat the whole mixture on medium until smooth, about one minute.

Custard

A tip or two about lemon… To zest a lemon, use a flat grater to grate the lemon peel directly into the bowl. Grate the yellow, but stop when you see white — you don’t want to use that part. To juice a lemon, roll it around on the counter under your palm, putting a bit of weight into it. This will loosen up the juices a bit. Then cut it in half and squeeze each half directly into the bowl. If you have trouble keeping seeds out of your bowl, wrap a paper towel around the lemon and squeeze the juice through it. The paper towel will hold back the seeds and any pulp.

Custard Layer

I poured the lemon custard batter evenly over the strawberries and then baked it for about 30 minutes. After 30 minutes, I pulled them out and let them cool for about 10 minutes. I asked the BF to help me remove them from the pan — we each took an end of the foil and lifted it out, pulling it tight so it wouldn’t slide in on itself. Since I wanted to serve them for dessert and dinner was already halfway through, I stuffed them in the fridge to cool a little faster.

Strawberry Lemon Bars

When I was ready to serve, I cut them into bars and served a little piece to everyone, and omigod they were soooo good. Lots of strawberry, very lemony, really rich, and oh so sweet. But even though the goat cheese and cream cheese made it rich, the lemon also made for a pretty light, summery flavor. Deelish.

Strawberry Lemon Bar

Notes:

  • Wow, these are good. I am actually kind of surprised how much I like them considering they don’t have any chocolate.
  • I was a little skeptical that these would hold up as bars. I’m guessing I didn’t chill them long enough because they were a little runny at first. But when I chilled them again and sliced the other half the next day, they held up really well. And I figured that even if they didn’t, this would make just as delicious and satisfying a dessert if it were called a cobbler, crumble, or custard. Try them the first day with a spoonful warm out of the oven and a scoop of vanilla ice cream on top. Then refrigerate the rest, and after they’ve chilled, try them the next day as a firm, chilled bar. Both are pretty delicious!
  • This recipe could be made the exact same way but with a variety of fruits. I’d love to try raspberries, blueberries, peaches, anything really. Maybe I’ll try this again with other seasonal produce.