Tag Archives: Cheese

Baked Eggs with Mushrooms & Greens

21 Feb

One weekend last month, we had a lazy Sunday at home, reading books, watching movies, and relaxing. The only time I left the house was to take a pleasant walk to Starbucks in the suddenly mild, sunny weather with the BF. It was glorious. It also reminds me of how much I miss nice weather, now that we’re setting record low temps here in North Carolina: 7° yesterday!

Since I was ignoring the dirty bathrooms and the Christmas tree still standing in the corner (un-decorated, at least – I did manage to get the lights and ornaments put away only a couple weeks after Christmas), I thought I could at least cook a decent meal for us. I was enjoying my book and tea too much to get off the couch at breakfast time, so I made this for lunch.

My friend Emily made this for brunch a few weeks ago, and I’ve been wanting to re-create it since then. Mine wasn’t as good as hers, but it was still pretty tasty. I’m sure I’ll make it again and see what I can do to improve it – I’m thinking of adding cheese into the mix, maybe something deliciously creamy like gruyere.

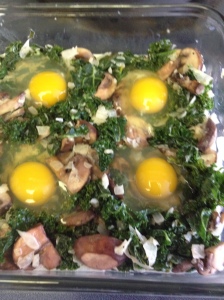
It’s pretty simple: cook up the greens, onions, and mushrooms. Pour that into a baking dish. Then crack the eggs right on top.

eewwww

Looks kinda gross, doesn’t it? But it turns out pretty delicious in the end.

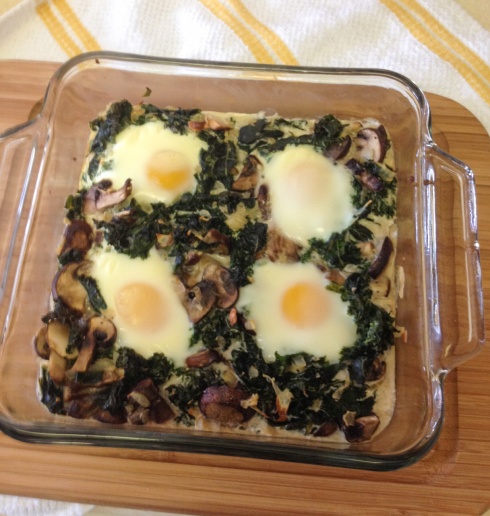
egg bake 1

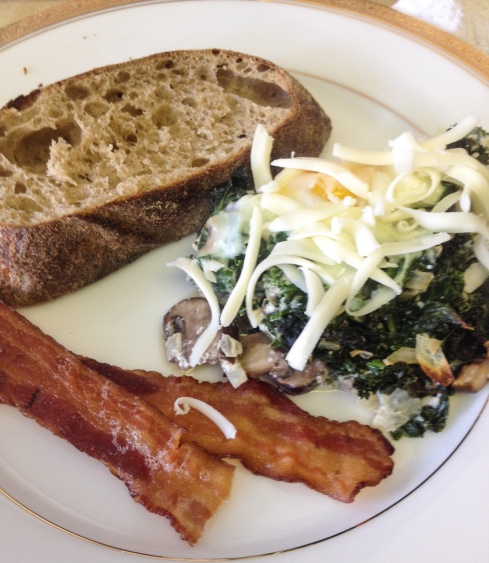
With a side of toast and bacon, this became a substantial and delicious lunch. I think it would be great for any meal of the day, actually, but I’m weird like that. I used half kale and half spinach, which I really liked, though the original recipe called for just spinach. Use what you like!

egg breakfast 2

Baked Eggs with Mushrooms & Greens, adapted from Smitten Kitchen

3 oz (about 2 handfuls) kale, de-stemmed and roughly chopped
3 oz (about 1 handful) spinach
2 garlic cloves, finely chopped
1/2 onion, finely chopped
2 T unsalted butter
5 oz (about 1 cups) mushrooms, sliced
1/3 cup half and half
salt, pepper, and nutmeg to taste
4 large eggs
1/4 cup of shredded mozzarella

Preheat the oven to 450 F.

Bring 1/2″ of water to a boil in a large skillet. Add the kale and cook, covered, until it begins to wilt, about 2 minutes. Add the spinach and cook over medium-high heat, covered, until all the greens are wilted, about 1-2 minutes. If there’s any water left in the pan, drain in a colander, then transfer to an 8×8 baking dish.

Wipe the skillet dry, then add the butter and melt over medium heat. Add the onions and garlic, and cook until fragrant, about 2-3 minutes. Add mushrooms and cook, stirring, until mushrooms are soft, about 3 minutes. Stir in half and half; a dash each of salt, pepper, and nutmeg; and bring to a simmer. Add the mushroom mixture to the baking pan and stir well to incorporate greens.

Make 4 indentations in the greens-and-mushroom mixture. Break an egg into each indentation and bake, uncovered, until eggs are set as desired. (7-10 minutes will have set egg whites with runny yolks; I cooked it 12-15 minutes so the yolks were also set.)

Lightly season with salt and pepper; sprinkle with shredded cheese.

Spinach Artichoke Quiche

3 Mar

I love me a good quiche. Generally people give me a hard time about eating things at inappropriate times, like pasta for breakfast and whatnot. And while I generally feel like those people can build a bridge and get over it (what is this, Alyson, 1998?), it’s also nice sometimes to just not have my culinary choices questioned. (But I mean, really people, why are you limiting yourselves!?)

The thing about quiche is that it’s totally an anytime food. Breakfast, lunch, snack, dinner — no one cares. Eat it whenever! I guess most people would put it in a breakfast or brunch category by default, and I’m even okay with that, because quiche doesn’t taste like a breakfast food. It’s not too sweet like waffles and it’s not too heavy like eggs and sausage. It’s just perfect, breakfast or not.

Spinach Artichoke Quiche

And it’s customizable! You can put anything you want in a quiche! Everyone wins! And it’s really hard to mess up a quiche, y’all. Like, grab a recipe, dump a bunch of cheese in there, and you’re good. Take it to any sort of potluck and it’s great to share, no matter what time of day and no matter how fancy the event. People will be so impressed with a quiche.

Okay, I might have just convinced myself in the process of writing this that quiche is the best dish ever. This may not look like the best thing ever, but I assure you, this spinach artichoke quiche is amazing. Cheesy, spinachy, artichokey. Yum. And I used the same crust as the one for my super amazing to-die-for tomato pie. Next potluck, try this one. You won’t regret it.

IMG_3097

Spinach Artichoke Quiche

Crust:

1 1/4 cups all-purpose flour, plus extra for rolling
1/2 teaspoon salt
1/2 teaspoon sugar
1/2 cup (1 stick) unsalted butter, cold, cut into 1/4″ cubes
3 tablespoons cold water

Preheat the oven to 375 F.

Combine all ingredients in a large bowl. Mix well with your hands, kind of like kneading, until all ingredients are incorporated. Shape dough into a ball.

Flour your working surface and turn out dough with a floured rolling pin, making a large circle. Transfer crust to a pie pan and press evenly into the dish.

Bake the pie crust for about 8-10 minutes.

Quiche: 

1 tablespoon butter
2 garlic cloves, chopped
1/2 onion, chopped
6 ounces (1 bag) fresh spinach
7 ounces (a little more than 1/2 the can) canned artichoke hearts, chopped
1/4 teaspoon salt
1/4 teaspoon pepper
1/4 teaspoon red chili pepper flakes
3 eggs
1 1/2 cups half & half
3/4 cup cheese of your choice, grated (I used colby jack. Mozzarella, asiago, or white cheddar would be delicious!)
1/4 cup parmigiano-reggiano cheese, grated

Melt the butter over medium heat in a large pan. Add garlic and onion. Cook 1-2 minutes. Add the spinach and sauté until wilted.

Add chopped artichokes and seasonings. Stir well and remove from heat. Pour into a large bowl to cool.

In a large bowl, scramble the eggs. Add the half & half and cheese, and mix well. Once cooled, add the spinach and artichoke mixture, and mix well.

Pour the filling into the prepared pie shell. Bake 45 minutes to 1 hour or until set.

IMG_3092

Linking Up With:

Funday Monday from Still Being Molly
Block Party from Hungry Happenings
Made by you Monday from Skip to my Lou
Inspiration Monday from Twelve O Eight
Time to Sparkle from Love Grows Wild
Wonderfully Creative Wednesday from All She Cooks
Create It Thursday from Lamberts Lately
Full Plate Thursday from Miz Helen’s Country Cottage
All Things Pretty from Sparkles and a Stove

Cheesy Spinach Tomato Pie + A Giveaway!

2 Dec

I won’t lie, I occasionally listen to Christmas music throughout the year. So it would be incorrect to say that now that Thanksgiving has past, I’m finally getting to listen to my fave holiday jams. What would be more correct is to say that I am finally getting to listen to my fave holiday jams without hiding it. I can put on my Happy Christmas! playlist in the car, and the BF will (somewhat reluctantly) allow it. It’s a very exciting time of year for me.

My dear friend Eleanor gave me my Christmas present already: this beautiful pie pan. She knew I would be baking for Thanksgiving, so she gave it to me early!

Pie PanI’ve already used it for my Secret Recipe Apple Pie and this oh-so-amazing, super delicious, completely to-die-for tomato pie. I’m not kidding: this is one of the best meals I’ve ever made. Our dinner conversation primarily revolved around how delicious it was and how this will definitely be a dish to serve for casual dinner party guests. The BF and I each had thirds, which is amazing for us light eaters. And I may or may not have had some for breakfast the next day.

Here are the star players: Ingredients

It’s really not complicated, though maybe a little time consuming, but totally worth it. After the crust is ready, just add your layers… sliced tomato, fresh basil and sauteed spinach, and then cheese!

Layers

I edited a more classic recipe a bit to include spinach (I figured I needed something healthy to counter all that cheese) and to substitute Greek yogurt for mayonnaise (I’m not a fan of mayo, so we never have any in the house). I tried to squeeze extra water from both the tomatoes and spinach, and it still came out a bit soupy, so maybe I’ll use my cheesecloth next time and try a bit harder. But not to worry — even a little runny, it didn’t stop us from enjoying our third helpings!

Cheesy Spinach Tomato Pie

And in the spirit of Christmas and delicious cheesy tomato pies, here’s my first-ever Giveaway! Enter to win this cute little Clinique gift set.

Clinique Gift Set

Gift set includes:

  • 7-Day Scrub Cream Rinse-Off Formula
  • Dramatically Different Moisturizing Lotion
  • Clinique Eye & Cheek Colour Compact: Colour Surge Eye Shadow Duo in Pink Slate, Soft-Pressed Powder Blusher in New Clover, and True Bronze Pressed Powder Bronzer in Sunkissed
  • Long Last Lipstick in Bamboo Pink
  • Brush Set
  • Matching large and mini cosmetics bag

* Does not include mascara shown in picture

There are a few ways to enter – the more ways you enter, the better the chance you have at winning – so make sure you comment once for each of the following things you do:

  • Favorite the new Wine & Plum Etsy shop! Favorite 1 item in the Wine & Plum Etsy shop, and comment below to share which item you would like to give or receive for Christmas!
  • Bonus: Follow Wine & Plum on Pinterest! Pin your favorite Wine & Plum recipe or Etsy shop item to one of your Pinterest boards, and share the link to your pin in a comment below.
  • Bonus: Follow Wine & Plum on Instagram and tag 3 friends on my Instagram giveaway post.
  • Bonus: Follow Wine & Plum on Twitter, and tweet about this giveaway: Excited about this delicious Cheesy Tomato Pie #recipe plus an awesome #Clinique #giveaway from @wineandplum! http://bit.ly/1fYGSw8
  • Bonus: Like Wine & Plum on Facebook, and share any post from the W&P Facebook page.

Don’t forget to leave a comment for those bonus submissions!

Now, here’s the recipe for the Tomato Pie! If you make it, come back and let us know how you liked it!

Mmm... cheesy

Cheesy Spinach Tomato Pie adapted from Simply Recipes

Crust:

1 1/4 cups all-purpose flour, plus extra for rolling
1/2 teaspoon salt
1/2 teaspoon sugar
1/2 cup (1 stick) unsalted butter, cold, cut into 1/4″ cubes
3 tablespoons cold water

Preheat the oven to 350 F.

Combine all ingredients in a large bowl. Mix well with your hands, kind of like kneading, until all ingredients are incorporated. Shape dough into a ball.

Flour your working surface and turn out dough with a floured rolling pin, making a large circle. Transfer crust to a pie pan and press evenly into the dish.

Bake the pie crust for about 8-10 minutes.

Pie:

1 tablespoon olive oil
2 garlic cloves, chopped
3-4 tomatoes, sliced
2 large handfuls spinach
1/4 cup sliced basil (about 7-8 leaves)
2 cups grated cheese (Any combination of your favorite cheese; I suggest mozzarella and cheddar. In ours, we ran out of mozz so substituted havarti, which was delicious)
3/4 cup plain Greek yogurt
Salt and pepper

Place the tomato slices in a colander and sprinkle some salt over them; allow to drain while preparing the rest of your ingredients.

In a large bowl, mix together the cheeses and yogurt; set aside.

Heat the olive oil in a large skillet. Add the garlic and cook until fragrant, about 3 minutes. Add the spinach and stir well, coating leaves with olive oil. Cook until spinach is wilted, only 3-4 minutes. Set aside.

Once the pie crust has baked for about 8-10 minutes, remove from oven and assemble pie. Pressing each slice between paper towels to remove excess liquid before placing, arrange tomato slices in a circle in the bottom of the pie pan. Sprinkle the basil on top of the tomatoes. Squeeze spinach in paper towels or cheesecloth to remove excess liquid and then arrange evenly in the pan. Last, spread the cheese mixture evenly over top of the entire pie.

Bake until the top of the pie is golden brown, anywhere from 25-45 minutes.

Linking Up With:

Funday Monday from Still Being Molly
Block Party from Sumo’s Sweet Stuff
Made by you Monday from Skip to my Lou
Inspiration Monday from Twelve O Eight
Time to Sparkle from Love Grows Wild
Wonderful Food Wednesday from All She Cooks
Create It Thursday from Lamberts Lately
Full Plate Thursday from Miz Helen’s Country Cottage
All Things Pretty from Sparkles and a Stove
Foodie Friday from Simple Living & Eating

Classic Potato Soup

4 Nov

I feel like all I’m posting lately are soups and desserts. But that’s pretty much all I’m cooking, so I guess that’s about right. I’m not sure how long my soup obsession will last — it’s a relatively new thing, so I’m not sure if it will stick around. And of course I’ve always been obsessed with chocolate and sweets, so that seems like a permanent thing.

At any rate, I wanted to share this one with you now because it is so tasty and warm and filling and comforting. So if the time change has got you down — and I know I’m pretty down when I get home from work and it’s already completely dark — then this is the soup for you. It’s delicious and super unhealthy and it will warm you from the inside out. And it’s definitely hearty enough to be a complete meal. Though maybe you could balance it out with a nice salad or something.

Typically I try to give you options for vegetarian/vegan alternatives, and I am usually inclined to take that route myself. And I guess here you could go with vegetable broth and facon if you so desire. But really, if I’m talking comfort food, I’m talking about real bacon. I highly recommend it.

Potato Soup

Potato Soup from The Pioneer Woman

2-3 slices bacon
1/2 onion, diced
2 carrots, diced
2 stalks celery, diced
4 whole small potatoes, peeled and diced
1/2 teaspoon salt
black pepper, to taste
1/2 teaspoon cajun spice mix
4 cups (free-range, organic, low sodium) chicken broth
1 1/2 tablespoons flour
1/2 cup milk
1/4 cup heavy cream
1/2 cup cheddar, grated

Cook bacon in a large soup pot over medium heat until bacon is crisp and fat is rendered. Remove the bacon from the pot and set it aside. Pour off most of the grease, but do not clean the pot.

Return the hot to medium-high heat. Add the onions, carrots, and celery. Stir and cook for 2 minutes or so, then add the diced potatoes. Cook for 5 minutes, seasoning with salt, pepper, and Cajun spice.

Pour in the broth and bring it to a gentle boil. Cook for about 10 minutes, until the potatoes are starting to get tender. In a small bowl, whisk together the flour and the milk, then pour into the soup and allow the soup to cook for another 5 minutes.

Remove about 2/3 of the soup, and blend in a blender or food processor until completely smooth. Pour it back into the soup pot and stir to combine. Stir in cream. Check for spices, salt, pepper, and temperature, adjusting as needed.

Serve in bowls garnished with grated cheese and crumbled bacon.

IMG_2718

Linking Up With:

Funday Monday from Still Being Molly
Block Party from Sumo’s Sweet Stuff
Made by you Monday from Skip to my Lou
Inspiration Monday from Twelve O Eight
Melt In Your Mouth Monday from Make Ahead Meals for Busy Moms
Time to Sparkle from Love Grows Wild
Wonderful Food Wednesday from All She Cooks
Create It Thursday from Lamberts Lately
Full Plate Thursday from Miz Helen’s Country Cottage
All Things Pretty from Sparkles and a Stove
Foodie Friday from Simple Living & Eating

ABC (Apple-Bacon-Cheddar) Sandwiches

16 Sep

OMG these sandwiches are so good. The BF and I have enjoyed them multiple times in the past few weeks, as we’ve tried to use up all the apples from the Apple Festival. This was actually the first apple recipe we made.

I’ve mentioned before how much I love grilled cheese. It’s a life-long love affair. Cheese is essentially a food group for me.

Cheesy & Appley

My favorite cheese sandwiches right now:

  • The BAM (Bacon, apple, mushroom + gruyere on sourdough) from Sandwhich, one of my favorite lunch spots in Chapel Hill.
  • The Orchard (apple, ham, cheddar, and rosemary on country white) from American Meltdown, my favorite grilled cheese food truck. The BF and I regularly track down the big orange truck in Durham and elsewhere around the Triangle.
  • The Guacamole Grilled Cheese I posted a couple months ago.
  • The ABC (apple, bacon, cheddar on country white), recipe below.

Served up on a super thick slice of country loaf from Bread & Butter and soaked in butter, this may not have been the most healthy dinner, but it sure was tasty. Need a grilled cheese fix? Try this out. You won’t regret it.

Here’s a recipe. I didn’t really use amounts because sandwiches are one of those things where you should just put however much you want to on the bread.

ABC... easy as 123

ABC Sandwich

2 slices of bread
thin slices of apple (Granny Smith if you like tart; Gala if you like sweet)
bacon slices
cheddar slices
butter

Slice everything up. Arrange slices of cheddar cheese on the surface of both slices of bread. Broil or toast until the cheese is melted and the bread is slightly crispy.

While the bread is toasting, fry up a couple slices of bacon in a skillet. When finished, rest bacon on a paper towel.

Melt 1/2 tablespoon butter in a pan over medium heat. Transfer a slice of cheesy bread to the pan, layer on the apple and bacon. Sandwich the other slice of cheesy bread on top. Flip the sandwich when the bread is golden brown, only a couple minutes on each side.

ABC with Sweet Potato Fries

Linking up With:

Funday Monday from Still Being Molly and Lipgloss and Crayons
Block Party from Sumo’s Sweet Stuff
Made by you Monday from Skip to my Lou
Time to Sparkle from Love Grows WildInside BruCrew LifeThe Recipe Critic, and The Gunny Sack
Create It Thursday from Lamberts Lately
All Things Pretty from Sparkles and a Stove and My Fashion Forward Blog

Stuffed Acorn Squash

5 Aug

This was so easy and so delish, I’m about to go out and find me some more acorn squash. The acorn made a terrific bowl that both held tasty fillings and also made for good eating. Like a tasty bread bowl for soup expect it doesn’t get soggy and mushy.

As we ate this for dinner last week, we brainstormed all the amazing ways we could prepare it. Italian style with sausage, tomatoes, mozzarella, and herbs. Greek style with lamb, tomatoes, olives, and feta. Mexican style with beef, tomatoes, cheese, and taco seasoning. There are loads of all-veggie options too.

Mmm cheesy goodness

This is such a versatile recipe. If you try it, you should definitely experiment and make it your own. Think up what flavors you’re in the mood for, and run with it. And if you don’t have a veggie on the ingredient list, no worries. Just leave it out or substitute it for something else. No big deal. It will still be delicious.

Better yet, prepare this on a night when you have guests over. The presentation is pretty amazing. They will think you’re a secret top chef.

This recipe was enough for the BF and me, but we’re pretty light eaters, so one half of a filled squash was enough for each of us. I’d recommend getting two squashes and doubling the recipe.

For me, the key to this recipe is to chop everything really small — that way, you can cram more into your squash bowl.

Beautiful Squash

Stuffed Acorn Squash adapted from TheKitchn

1 medium acorn squash
1 tablespoon olive oil
1 clove garlic, minced
1/4 bell pepper, chopped small
handful cherry tomatoes, chopped small
1 large sausage link or vegetarian substitute, diced small (I used sweet apple chicken sausage)
1/2 teaspoon French or Italian herb mix
1/2 teaspoon red pepper flakes
1 cup baby spinach
Salt and pepper as needed
Bread crumbs (I used crushed-up seasoned croutons — they gave a little extra flavor!)
1/4 cup parmesan, finely grated

Wash the squash and halve it. Scrape the insides and seeds out of the squash. Place the squash in a shallow dish with about half an inch of water. Microwave on high for 7-10 minutes or until tender. Leave in microwave until ready to use.

Heat the olive oil in a large saute pan over medium heat. Add the garlic, bell pepper, tomatoes, and sausage. If using uncooked sausage, cook until sausage is almost cooked through. If using pre-cooked sausage, cook until the garlic starts to smell.

Add the spices and stir well. Add the spinach and cook, covered, until wilted. Add salt and pepper as needed. Remove from heat.

Place squash halves on a lightly greased baking sheet. Spoon the filling into squash halves, and sprinkle with salt and pepper. Add one tablespoon of water to each squash. Coat the filled squash with breadcrumbs. Sprinkle with a thick layer of grated cheese. Broil just until cheese is lightly browned.

Dig In!

Linking Up With:

Funday Monday from Still Being Molly and Lipgloss and Crayons
Market Yourself Monday from Sumo’s Sweet Stuff
Made by you Monday from Skip to my Lou
Time to Sparkle from Love Grows WildInside BruCrew LifeThe Recipe Critic, and The Gunny Sack
Link Party Wednesday from Lil’ Luna
Create It Thursday from Lamberts Lately
All Things Pretty from Sparkles and a Stove and My Fashion Forward Blog

Spinach, Corn & Black Bean Enchiladas

5 Aug

OMG I want to eat these for dinner every night. They were good the first time, and they were just as good reheated. The BF had some and we decided they are restaurant good (though I’m sure, much healthier). These are excellent for serving to dinner guests — they can be completely finished and in the oven, so you have time to clean the kitchen before they arrive and then enjoy a glass of wine with your guests. And, if you’re looking for recipes to introduce skeptics to vegetarian dishes, this is it. It’s so delicious and filling, they won’t miss the meat at all. I very slightly edited the original recipe from Sweet Happy Life, just small things for the sake of convenience.

I actually only made the sauce at first. I spooned a little on top of lunchtime veggie & rice bowls for a few days. It wasn’t until later in the week that I got around to making the enchiladas. So fyi — make a ton, freeze it, and then you can use it for enchiladas (the best option) or to add a little flavor to pretty much any Mexican-style dish.

Enchilada Sauce

FYI, I think the enchilada sauce on its own is kinda spicy, but is not spicy at all when baked on top of the enchiladas. I guess the bread and cheese and veggies balance it out. If you’d like a bit more heat, just add the whole chipotle chili instead of the half, and add another teaspoon of adobo sauce.

The original recipe also said to use an immersion blender to puree the sauce. I thought that was totally unnecessary and therefore a waste of my time (especially since I don’t have an immersion blender, which would mean using my food processor, which is a pain to clean, and the BF wasn’t home to clean it for me). But, you know, to each her own.

These make EXCELLENT freezer meals. I doubled the sauce, and after using what I needed for dinner that night, froze the rest in a couple ice cube trays. (After they froze completely, I dumped them out of the tray to store in a large zipper bag.) For the tortilla rolls, I rolled individual enchiladas up in foil and then froze them in a large zipper bag. For lunch, I grab one foil-wrapped roll, a few sauce cubes, and I’m good to go. I sit my lunch box on my desk so it thaws throughout the morning, then unwrap and heat it up in the microwave. Presto lunch-o.

Enchilada sauce (adapted from Sweet Happy Life)

1 tablespoon olive oil
1/2 an onion, diced
2 cloves garlic
1 tablespoon brown sugar
2 1/2 tablespoons ground cumin
1 tablespoon oregano (I used Wildtree Hearty Spaghetti Sauce Blend ’cause that’s what I had)
1 cup cooking sherry
1/2 diced chipotle chili
1 teaspoon adobo sauce
1 14-ounce can crushed tomatoes
1 cup vegetable (or chicken or beef) stock

Heat olive oil over medium heat. Saute onion and garlic for 4-5 minutes.

Add brown sugar, cumin, and oregano. Stir and cook for 1 minute.

Add sherry, chili, adobo sauce, tomatoes, and stock. Mix well and reduce heat to low. Simmer until desired consistency (20-25 minutes if you plan to pour it over the enchiladas and bake, where it will thicken; 40-45 minutes if you plan to use it as a condiment.)

BONUS RECIPE!

For dinner that night, I stir-friend some extra firm tofu, about 5-6 minutes on each side in olive oil, added some zucchini slices and corn sliced off the cob. I cooked up some brown rice, mixed all that together in a bowl, and topped it with a little of the sauce and some cheddar cheese. Delicious and easy.

Rice & Veggie Enchilada Bowl

A couple nights later, I invited a couple friends over for dinner, and decided to make the full recipe. I had been craving enchiladas since I had made the sauce.

Assembling the Enchiladas

Enchiladas (adapted from Sweet Happy Life)

1 package frozen spinach, thawed and drained
1 15-oz can black beans, rinsed and drained
1 14.5-oz can corn, rinsed and drained
1/2 tsp ground cumin
salt and pepper
1 package tortillas (I used 8-10 whole wheat flour tortillas)
Shredded cheese of your choice (I used a combo of cheddar and monterey jack)

Make sure your spinach is well drained. Squeeze out excess water. Mix well in a large bowl with the beans and corn. Add cumin, a dash of salt, and a dash of pepper, and mix well.

Spoon a little enchilada sauce on the bottom of a greased baking dish.

On each tortilla, spread a few spoonfuls of the filling, and add shredded cheese on top. Roll tightly, tucking the ends in, and lay seam-down in the pan.

Add more sauce on top of all the enchiladas. Cover with foil and baked at 350 F for about 35 minutes.

Enchilada Dinner

Enjoy!

Really, these were so good. Just writing this makes me want to make more. We spent lunch today discussing what other things we could put inside these enchiladas. We decided we can’t wait till fall to try sweet potatoes and black beans… Mmm.

I know I didn’t get too detailed on the amounts when I talked about assembly, but all that is really up to you and your personal preference. This made about 8 enchiladas. I would guess that kids and people with light appetites such as myself would eat just one, but adults with normal to hearty appetites would probably eat two. I served these with brown rice, salsa, and guacamole. Chips and queso wouldn’t hurt either.

Deliciousness

Halfway through (approximately 15 seconds after beginning).

Dee Dee’s Broccoli Casserole

8 May

My mom is affectionately known as Aunt Dee Dee or just Dee Dee to all of her nieces and nephews. She is the fun, crazy aunt who not only lets you throw a ball in the house, but is often the one to initiate and participate in said indoors throwing game. I was jealous of my cousins as a teenager because at that age, I thought my mom was a way cooler aunt than mom. But now I have a little more perspective (and a little less attitude), and I more remember all the fun and crazy projects my mom cooked up over the years, which now loom much larger than the fights and arguments we were having when I was in high school. For example, my Double Dare birthday party was the coolest party of the 4th grade, complete with pie-throwing contests, tricycle races, and a relay race that involved massive amounts of butter, popcorn, Jell-o, and a Slip ‘N’ Slide.

My mom is also a pretty amazing chef, and it’s humbling to think back over the years at how she taught herself new skills in the kitchen. When my siblings were very young (before I was around) and our family didn’t have a lot of money, they ate a lot of casseroles, soups, and one-pot meals. They were classic, homey meals that were cheap and easy to put together, perfect for a mom working crazy hours with 2 small kids. But by the time I came along, my parents were a little more settled. My mom left work to stay at home with us, and our meals became more complex, fresh, and nutritious. By the time my little sisters were in the picture, the family was eating ethnic foods like Indian and Japanese, and our meals had a lot more fresh produce and a lot less cream of mushroom soup.

I think this trend is very interesting from a sociological standpoint, but I also think that from a personal view, I became very used to learning about food and trying new things. Now my mom and I swap ideas for new foods, new recipes, and how to use the massive quantities of rosemary she gets from the rosemary bush in her backyard big enough to hide two toddlers in (speaking from experience). I regularly call her for advice (“Mom, 10 people are showing up for dinner in 20 minutes, and I ran out of ___. What should I do!?” or “Mom, this chicken I just cooked is, like, gray… If I eat it, will it kill me?”), and I give her tips I pick up from health food nuts and farmers’ markets in my more liberal small town. My goal one day is to be able to take a quick glance into a pantry or refrigerator and put together a dinner plan, just like I’ve seen her do a million times. I’m not that comfortable or familiar yet with food, ingredients, and recipes, but I think I’m getting there.

When I was staring at the broccoli – this month’s seasonal produce – and trying to figure out what to do with it, I could not stop thinking about broccoli casserole. This is a huge throwback dish, something my mom made relatively regularly when I was a kid. I loved it so much, I think I even requested it as part of my birthday dinner one year. But as I explained above, our family has trended over time toward more nutritious foods, so this is a dish that my mom no longer makes or eats. It’s very unhealthy, especially since I only want it if she agrees to my request for extra cheese. Every year at Thanksgiving she proposes leaving it out, and every year my siblings, cousins, and I demand that we have it. It’s a Thanksgiving staple that I generally only have once a year. So she agrees to its presence at our Thanksgiving table, but one of us has to make it ourselves. It’s a very simple recipe that can be made in 15 minutes or less. So here it is… Dee Dee’s Broccoli Casserole.

Start with 1 bag frozen broccoli. Thaw it completely (on the counter or in the microwave) and chop it into bite-sized pieces. Spread it in the bottom of a glass casserole dish. Top with a layer of grated extra sharp cheddar cheese.

Broccoli and cheeseSpread a layer of cream of mushroom soup over top the cheese.

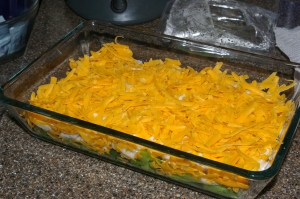
Cream of Mushroom SoupAnd now spread another layer of grated extra sharp cheddar cheese. Cover with plastic wrap, cut a slit in the center, and cook it in the microwave on high for 5-7 minutes or until the cheese is melted and the broccoli is cooked.

More CheeseI hadn’t made this in a long time, but I knew the cheese was the most important part, so I just kept adding some. I wasn’t sure how much was necessary. When I pulled it out of the microwave, it really just looked like a dish of cheese with a few broccoli bumps. I realized I went a little overboard, but obviously it was good because I tried to take a picture a few minutes later, but people were already digging in!

Broccoli Casserole

Happy Mother’s Day, Mom!

Seasonal Ingredient: Broccoli (end of April-May)

2 May

Broccoli is a rather short-lived crop in North Carolina, so when I checked my produce schedule and realized I only had a month to profile these tiny trees, I decided I better get crackin’. I researched broccoli a little bit, and I found out that it is a cruciferous vegetable What does this mean? I have no idea. But I do know that broccoli is super healthy! Check this out:

Broccoli Nutrient Chart

Vitamin C and Vitamin K are off the chart!

I never really thought much about how cooking style affects the nutrients of what you eat. But this is apparently a big deal when it comes to broccoli. Here’s the gist: you shouldn’t boil broccoli because it will lose all its nutrients and basically become pointless. Stir-frying and microwaving are not fantastic options, but aren’t terrible. The best way to prepare broccoli is to steam it. This website gives a lot of information on why this is the case, and why the other methods suck, but that’s the most important part. Read here for basic preparation of broccoli.

a.k.a. Tiny Trees

When I was a kid, I didn’t understand why the standard sitcom punchline for which food kids hate was broccoli. I didn’t think broccoli was so bad. As an adult, I now realize this is because my mom only ever served broccoli completely smothered with cheese. Delicious! I now eat broccoli prepared in more ways than just cheese-drenched, though that is my favorite. Check out there delicious broccoli recipes:

Sorry none of my broccoli recipes are super healthy. But there were just too good to pass up. Okay fine, here’s a healthy recipe for you: Chop up some broccoli, separating the tree part (floret) from the trunk part (stem). Throw the stems into your steamer or steam pot and steam for 2 minutes. Then throw in the florets and steam for 5 more minutes. Serve immediately as is, or garnished with dressing, herbs, or some such. So easy!