Tag Archives: vegan

Turnip & Sweet Potato Soup

12 May

Oh, the joys trials joys of a late winter/early spring CSA. So many root vegetables in March and April! Pounds of sweet potatoes, turnips, or rutabagas each week. Though now that it’s a bit warmer and there’s just greens greens and more greens, I kind of miss sweet potatoes. If you told me a month ago that I’d be saying that now, I would have said you were crazy, but there it is.

Actually, I don’t mind having a million sweet potatoes. I love ’em. I figured out how to cook them in the microwave, which makes for quick, last-minute meals. My favorite has been sweet potato & black bean quesadillas. Muy delicioso.

Rutabagas and turnips, on the other hand… Honestly, if I don’t see another rutabaga or turnip for a decade, I’d be okay with that.

At any rate, I had to figure out something to do with these veggies. I actually made this soup a couple months ago and forgot to post it, so here it is! If you get any last root veggies from your garden, try this out. It’s not incredibly flavorful, so you really taste the fresh vegetables. And I think that makes the walnuts necessary. The kale I could have done without, to be honest, but that was a healthy addition, so whatevs. It’s not very substantial, so serve this as an appetizer or side dish.

IMG_3134

Turnip and Sweet Potato Soup adapted from The New York Times

1 T olive oil
1 medium onion, chopped
2 garlic cloves, minced
1 pound turnips, peeled and diced
1/4 pound sweet potatoes, peeled and diced
6 cups water or vegetable stock
1 bay leaf
salt and pepper to taste
6 oz curly kale, stemmed and washed (optional)
1/3 cup toasted walnuts, chopped (optional)

Heat the oil over medium in a large soup pot. Add the onion and garlic and cook until tender, about 4-5 minutes.

Add the turnips, potatoes, water/stock, bay leaf, and salt. Bring to a boil. Reduce the heat, cover and simmer 45-60 minutes, until the turnips are very tender. Remove the bay leaf.

Optional: While the soup is simmering, blanch the kale in boiling salted water just until tender, 1-2 minutes. Transfer to a bowl of cold water, drain, and squeeze out excess water. Slice into thin strips.

After removing the bay leaf from your soup, puree with a hand blender or in batches in a regular blender. Season to taste with salt and pepper.

Serve in bowls topped with greens and toasted walnuts.

Turnip Soup


Linking Up With:

Funday Monday from Still Being Molly
Block Party from Hungry Happenings
Made by you Monday from Skip to my Lou
Inspiration Monday from Twelve O Eight
Time to Sparkle from Love Grows Wild
Life of the Party from The Grant Life
City of Links Party from City of Creative Dreams

(Vegan) Banana Bread Muffins

10 Mar

Last weekend I had some black bananas and needed breakfast, so I thought, why not muffins? But I checked the fridge and realized I was out of eggs. So after texting my egg supplier to place my order for the next day (my friend Rachel has some backyard chickens), I did some quick internet research for an egg-free muffin.

Luckily, or perhaps fore-sightedly, I keep flax seed on hand for this very reason. I’m forever running out of eggs, but flax seed serves is an eggs-cellent egg replacer (ha) and it keeps for months sealed airtight in the fridge. Even if you’re not vegan, I recommend this strategy if you’re also not so good at inventory and grocery shopping.

IMG_3087

The flax seed completely fulfills the eggs’ role as a binder, but not so much as a riser. So it will hold your muffins together, but you won’t get that light, airy, cake-y texture. But all the more perfect for banana muffins — these come up super dense and moist, like banana bread. Two-bite banana bread! What more could you ask for?

This recipe calls for coconut oil to make them truly vegan. I had butter on hand, so I used that. But I recently purchased a jar of coconut oil, so I look forward to experimenting with it.

This made about 9 small muffins. Keep in mind that because there are no eggs, the batter won’t really rise during the baking process, so however high you fill your cupcake holders, that’s about how big your cupcakes will be.

I thought they were delicious! And apparently so did my coworkers, seeing as the leftovers vanished pretty quickly. Enjoy!

IMG_3089

Banana Bread Muffins from Kitchen Treaty

1 T flax seed meal + 3 T water
1/2 cup whole wheat flour
1/2 cup all-purpose flour
1/2 tsp baking soda
1/4 tsp salt
2 overripe bananas, mashed
1/4 cup brown sugar
1/4 cup applesauce (about one of the individual cups)
2 1/2 T coconut oil or vegetable oil
1 tsp vanilla

Preheat the oven to 350 F. Grease or line a muffin tin.

In a small bowl, stir together the flax and water. Set aside for 5 minutes.

In a large bowl, whisk together the flours, baking soda, and salt.

In a medium bowl, mash the bananas. Add the brown sugar, applesauce, oil, vanilla, and flax/water. Mix well.

Pour the wet ingredients into the dry ingredients. Stir until just incorporated.

Spoon batter into muffin tins. Keep in mind that it won’t rise, so fill tins as big as you’d like your muffins.

Bake 18-22 minutes, or until an inserted toothpick comes out clean.

Yield: About 9 small muffins, or about 6 jumbo muffins with domed tops.

Banana Bread Muffins

Linking Up With:

Funday Monday from Still Being Molly
Block Party from Hungry Happenings
Made by you Monday from Skip to my Lou
Inspiration Monday from Twelve O Eight
Time to Sparkle from Love Grows Wild
Wonderfully Creative Wednesday from All She Cooks
Create It Thursday from Lamberts Lately
Full Plate Thursday from Miz Helen’s Country Cottage
All Things Pretty from Sparkles and a Stove

Silky Ginger PB Soup

6 Jan

A friend of mine made this tasty soup for an appetizer when we went to her house for dinner a couple months ago. I’ve been meaning to try it myself since then, and I finally got around to it. I’ll definitely be adding this to my regular recipe file.

If you use vegetable broth instead of chicken broth, this soup is totally vegan. It’s amazing how creamy and silky it is without any dairy. It makes for a smooth, rich, and filling lunch or dinner. The original called for just zucchini, but I decided to toss some carrots in there too. It came out a beautiful yellow color.

Silky Ginger Peanut Butter Soup

Overall, the flavors are strongly ginger-y and peanut butter-y, which is why I decided to go with that in the name. The original recipe didn’t use peanut butter at all, so I imagine the flavor profile changed quite dramatically. But the peanut butter is really tasty and adds more protein, which is especially helpful if you go with the veggie broth. The PB-ginger combo reminds me of Malay or Thai food. Delicious!

Try this out, and serve a big bowl as a main meal or a small cup as an appetizer for an Asian main course.

Silky Ginger Peanut Butter Soup

Silky Ginger PB Soup adapted from The Clothes Make the Girl

1 tablespoon olive oil
1/2 medium onion, diced
4 large cloves garlic, minced
1 teaspoon salt
1 ounce fresh ginger, peeled and chopped
1/2 teaspoon ground black pepper
2 medium zucchini, chopped
2 medium carrots, chopped
4 cups vegetable or chicken broth
1/2 cup peanut butter

Heat oil in a large soup pot on medium heat, 2 minutes. Add onions and garlic. Stir often and cook until the onions and garlic are soft and golden, but not browned, about 7 minutes. Add ginger, salt, and black pepper; stir to combine.

Add the zucchini and carrots into the pot. Stir well, then cook ’til beginning to soften, about 5 minutes. Add the broth, bring to a boil, cover, and reduce heat to simmer. Cook 45 -60 minutes until all the veggies are very soft.

Stir in the peanut butter. Puree with an immersion blender or by blending in batches in a blender or food processor. Serve hot.

Linking Up With:

Funday Monday from Still Being Molly
Block Party from Sumo’s Sweet Stuff
Made by you Monday from Skip to my Lou
Inspiration Monday from Twelve O Eight
Time to Sparkle from Love Grows Wild
Wonderfully Creative Wednesday from All She Cooks
Create It Thursday from Lamberts Lately
Full Plate Thursday from Miz Helen’s Country Cottage
All Things Pretty from Sparkles and a Stove

Black Bean & Quinoa Veggie Stew

25 Nov

Mmm so tasty and warm and filling… and healthy! I cooked up a huge batch, froze the leftovers in individual containers, and have been enjoying this hearty stew more and more as it’s gotten colder.

I like it like chili: with some shredded cheddar on top and scooped up with tortilla chips.

IMG_2722

I used collards because that’s what I had, but you could use other greens, like kale or spinach. Or you could leave ’em out altogether if that’s not your thing.

This is a short one, but I’ll leave you with this gem: beans, beans, they’re good for your heart colon.

Enjoy!

IMG_2724

Black Bean & Quinoa Veggie Stew adapted from Oh She Glows

1 cup uncooked quinoa, rinsed and drained
1/2 tbsp olive oil
3 garlic cloves, minced
1/2 large onion, diced
1 large sweet potato, peeled and chopped to 1/2″ dice
1 carrot, sliced
1 1/2 tsp ground cumin
1 tsp chili powder
6 cups vegetable broth
1 1/2 cups cooked black beans (1 can, drained and rinsed)
salt and pepper, to taste
1/4 tsp cayenne pepper
2 handfuls collard greens

In a medium-sized pot, add quinoa along with 1 1/2 cups water. Bring to a boil, reduce heat to medium, and cover. Simmer covered for about 15-20 minutes, or until the water is absorbed and quinoa is fluffy. Remove from heat, fluff with fork, and keep it covered until ready to use.

Meanwhile, heat oil in a large pot. Add garlic and onion, and sauté for a few minutes over medium heat. Season with salt and pepper. Add the sweet potato and carrots, and sauté for 5-7 minutes more.

Stir in the cumin, chili powder, and broth. Bring to a boil. Then reduce heat and simmer for about 18-20 minutes uncovered, or until the potatoes are tender.

Just before serving, stir in the cooked quinoa, black beans, cayenne, and greens. Season with salt and pepper to taste, adding more spice if desired.

Linking Up With:

Funday Monday from Still Being Molly
Block Party from Sumo’s Sweet Stuff
Made by you Monday from Skip to my Lou
Inspiration Monday from Twelve O Eight
Time to Sparkle from Love Grows Wild
Wonderful Food Wednesday from All She Cooks
Create It Thursday from Lamberts Lately
All Things Pretty from Sparkles and a Stove
Foodie Friday from Simple Living & Eating

Eggplant Bharta

14 Oct

When I was in Hendersonville, we stopped by a new spice and tea shop on Main Street, and I picked up a packet of garam masala. So since then, I’ve been wanting to use it to make something delicious. When I got an eggplant in our CSA, I thought that was the perfect opportunity.

I did a little internet research, trying to find a recipe that was authentic but wouldn’t have too many specialty ingredients that I’d have to go out and purchase. Naturally, the result was delicious, but maybe not quite as delicious as if I had spent the time and money on those speciality ingredients.

I know it looks like mush, but it's actually really good.

I served this eggplant bharta (I believe bharta just means ‘mashed’) with jasmine rice and mini chicken tikka samosas from Trader Joe’s. The eggplant was not incredibly flavorful, but combined with the samosas and rice, it was really delicious. The BF and I are both fairly light eaters, so this recipe and a box of frozen samosas made dinner for the both of us and another lunch for me. If you’re cooking for more than two, I would definitely recommend getting two eggplants and doubling the recipe. I also recommend attempting this on a weekend since prepping and roasting the eggplant will take quite some time. But the results are worth it! Try it out!

Eggplant Bharta

Eggplant Bharta adapted from Indianfood.about.com and FineCooking.com

1 medium-sized eggplant
1 tbsps cooking oil
1 shallot, diced
1 clove garlic, minced
1/2″ piece of ginger, grated
4 oz (~3/4 cup) grape tomatoes, chopped
1 tsp cumin powder
1/2 tsp garam masala

Slice the eggplant in half lengthwise. With the tip of a knife, score the flesh deeply in a diamond cross-hatch pattern by making two or three long cuts, cutting at a steep angle, and then rotating the eggplant to make another set of similar cuts. Press on the edges of the halves to open the cuts and sprinkle salt over the surface and into the cuts. Set aside, cut side up, for 30 min. Heat the oven to 400°F. Line a baking sheet with parchment.

Over the sink, gently squeeze the eggplant to extract the salty juice and wipe them dry with a paper towel. Brush each half thoroughly with olive oil. Place each half, cut side down, on the lined baking sheet. Roast for 1 hour. The eggplant will collapse and the bottoms will be a deep brown caramel color. Let cool considerably before handling, at least 20 minutes. Gently turn the cut side up, and scoop the flesh from the skin with a spoon. Coarsely mash and set aside.

Heat the cooking oil (olive oil, vegetable oil, etc.) in a pan over medium-high heat. Add the shallot and garlic, and saute until shallots are nearly translucent and the garlic releases its smell. Add the ginger and cook for one minute more. Add the tomatoes, cumin, and garam masala. Cook for 3-5 minutes, stirring often to prevent the spices from sticking to the pan. (Sprinkle a bite of water if necessary.) Add the eggplant and mix well. Cook for one more minute, then serve hot with rice and/or naan.

Linking up With:

Funday Monday from Still Being Molly and Lipgloss and Crayons
Block Party from Sumo’s Sweet Stuff
Made by you Monday from Skip to my Lou
Inspiration Monday from I Should Be Mopping the FloorTwelve O Eight,Redhead Can Decorate, and Scattered Thoughts of a Crafty Mom
Melt In Your Mouth Monday from Make Ahead Meals for Busy Moms
Time to Sparkle from Love Grows WildInside BruCrew LifeThe Recipe Critic, and The Gunny Sack
Create It Thursday from Lamberts Lately
Full Plate Thursday from Miz Helen’s Country Cottage
All Things Pretty from Sparkles and a Stove and My Fashion Forward Blog
Foodie Friday from Simple Living & Eating

Dairy-Free Chocolate Mousse

15 Jul

Mmm this is so delicious. Maybe not quite as delicious as the Best Chocolate Mousse Ever, but still pretty incredible. I have a friend who is both gluten-free and dairy-free, so coming up with a dessert that fit those parameters was difficult – I mean, I bake, right? But I was so excited for this amazing find. So simple, so quick, and so tasty.

IMG_2002

As long as you remember to refrigerate the coconut milk in advance, this only takes about 5 minutes to put together. Plus, mousse is like grown-up pudding. It’s as delicious and creamy as a Snack Pack, but super classy. To make it even classier, serve it out of something ridiculous like a martini glass or something a little less ridiculous like a stemless wine glass. And then when everyone’s done, bring out the bowl and mixing spoons and let people lick them clean. Classy.

For my mousse, I used a combo of regular Hershey’s cocoa powder and Special Dark Hershey’s cocoa powder. I haven’t tried it, but I imagine spending money on some high-quality cocoa powder would be worth it. There’s not a ton of sugar in this recipe, so unless you like really dark chocolate, be careful using too dark chocolate.

Also, need a good way to use the leftover coconut water? Try using it as the liquid base in smoothies! Super tasty with banana and pineapple.

Okay, go try this! It’s super easy to get a delicious, smooth, creamy, chocolate-y with a slight hint of coconut dessert that’s not too terribly unhealthy for you. I might just leave a can of coconut milk in the back of the fridge for whenever I need a quick chocolate fix.

Mmmousse

Dairy-Free Chocolate Mousse from The Urban Poser

1 cup full fat (canned) coconut milk, cream only (takes about 2 cans)
4-5 tablespoons cocoa
3 tablespoons honey or vegan alternative or stevia, to taste
1 teaspoon vanilla

Chill your cans of full-fat coconut milk in the refrigerator overnight.When ready to make the mousse, open up the cans and scoop the thick coconut cream into a large bowl, leaving the liquid behind. Add the rest of the ingredients to the bowl and beat the mixture for 2-5 minutes.Serve. Excellent with strawberries, raspberries, etc.

Linking Up With:

Funday Monday from Still Being Molly and Lipgloss and Crayons
Market Yourself Monday from Sumo’s Sweet Stuff
Made by you Monday from Skip to my Lou
Anything and Everything Blog Hop from My Thrifty Chic
Time to Sparkle from Love Grows WildInside BruCrew LifeThe Recipe Critic, and The Gunny Sack
Link Party Wednesday from Lil’ Luna
Create It Thursday from Lamberts Lately
All Things Pretty from Sparkles and a Stove and My Fashion Forward Blog

Curry Coconut Vegetable Stew

17 Jun

Oh my goodness, y’all, so I finally got around to finishing this last season of Revolution, and let me just say, after those last 10 minutes, my mind = blown. I almost gave up on that show because I thought the middle part of the season was getting kind of lame, but it really picked up there at the end. And that last scene? Whaaat? I don’t even know what to think.

Okay, Revolution is not at all related to this recipe, but I just had to get that out of my system. I don’t know anyone who watches that show, so I never get to talk about it. Onto the stew!

I had a ton of veggies in my fridge, and not much else. And I was looking for something easy, so what better than a soup? The thing I love about soups is that they’re easy to customize based on preference and available resources. Don’t like greens? Leave ’em out. Got zucchini but no squash? Whatever, that’s fine.  If you stick to similar weights/amounts, and then just use whatever suits you, you’ll be fine. And actually, I used chicken stock instead of vegetable stock, just ’cause that’s what I had.

Mmm... Stew

This is a really hearty stew. The rice and beans definitely fill you up. But the coconut curry flavor keeps it light enough to eat year-round. And it’s super healthy too. The coconut and curry flavors are delicious and definitely noticeable, but not so strong that you don’t still taste the vegetables themselves. You definitely want to stick with fresh vegetables, for that reason. Don’t bother with canned or frozen — just use whatever’s fresh in season.

You can’t really see it in the picture, but there’s definitely some liquid down in the bottom there. It’s soup-y the first go-round, and thickens up to more of a stew texture when eaten as leftovers. Both are equally delicious. As you’re cooking, try to keep the lid on the pot as much as possible so you don’t lose too much liquid. That way, at the end, if it’s too runny, you can simmer with the cover off for a little while to reduce it. But it’s hard to go the other direction.

Don’t forget that when it’s ready, you have to shout, “Soup’s on!” :)

So many veggies!

Curry Coconut Vegetable Stew

1 Tablespoon olive oil
3 Tablespoons garlic, minced
3 1/2 cups vegetable stock
3/4 cup white basmati rice
3/4 lb potatoes, diced
1/4 lb carrots, sliced
1 Tablespoon curry powder
salt and pepper
1 tomato, diced
1/2 lb squash, sliced
1/2 lb zucchini, sliced
1/2 lb green beans, ends removed and cut into 1″ pieces
1/4 lb greens (chard and kale)
1 can black beans, drained and rinsed
1 can light coconut milk

Heat the olive oil in a large stockpot over medium heat. Add the garlic and cook until fragrant, about 5 minutes. Add the stock and bring to a simmer.

Add the rice. Cover and cook for 8 minutes.

Add the potatoes and carrots. Cover and cook for 5 minutes.

Stir in the curry powder, salt, and pepper. Add the tomato, squash, zucchini, and green beans. Cover and cook for 8 minutes.

Add in the greens. Cook, stirring occasionally, until wilted.

Stir in the black beans and coconut milk. Cook until heated through. Serve hot.

Soup's On!

Linking Up With:

Funday Monday Link-Up from Still Being Molly and Lipgloss and Crayons
Market Yourself Monday from Sumo’s Sweet Stuff
Made by you Monday from Skip to my Lou
Anything and Everything Blog Hop from My Thrifty Chic
Time to Sparkle from Love Grows WildInside BruCrew LifeThe Recipe Critic, and The Gunny Sack
Create It Thursday from Lamberts Lately
All Things Pretty from Sparkles and a Stove and My Fashion Forward Blog

Green Smoothies

17 Mar

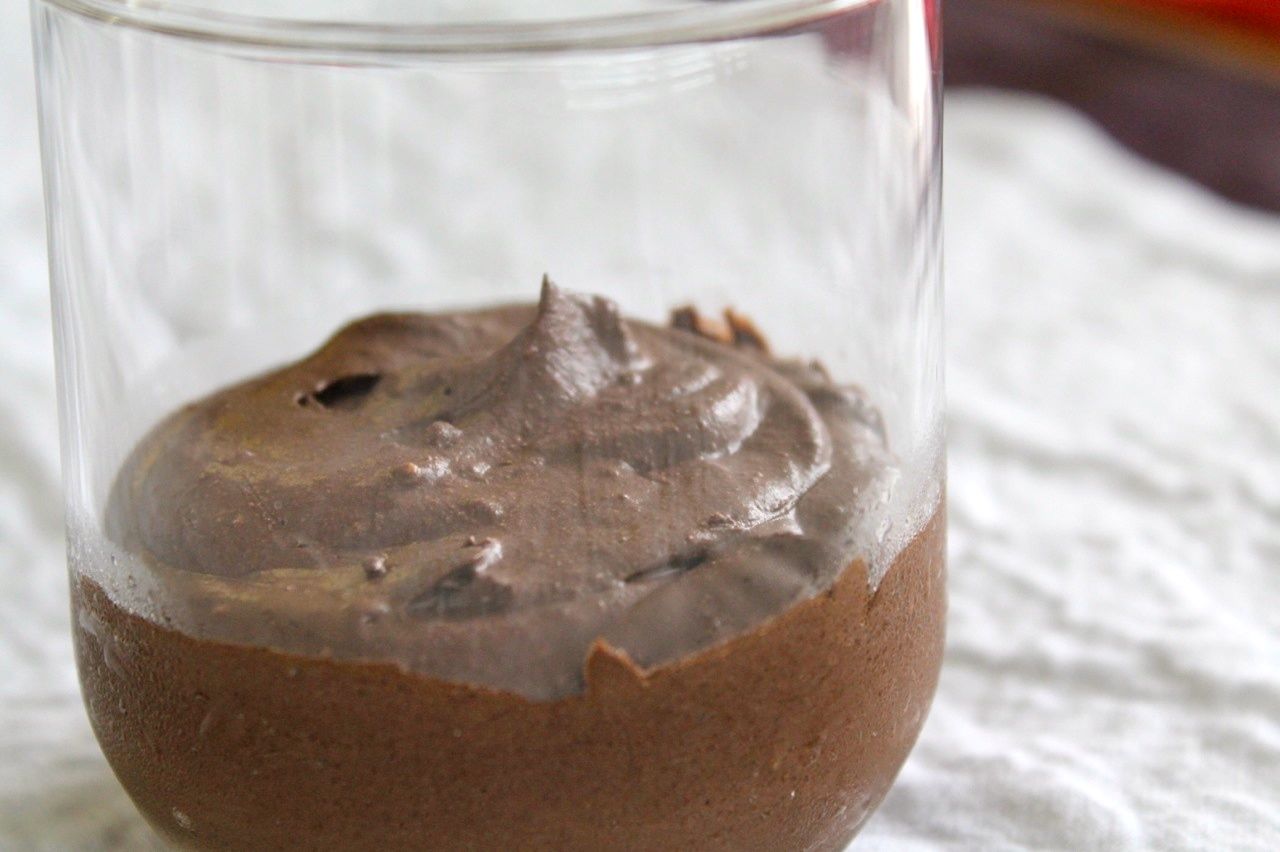
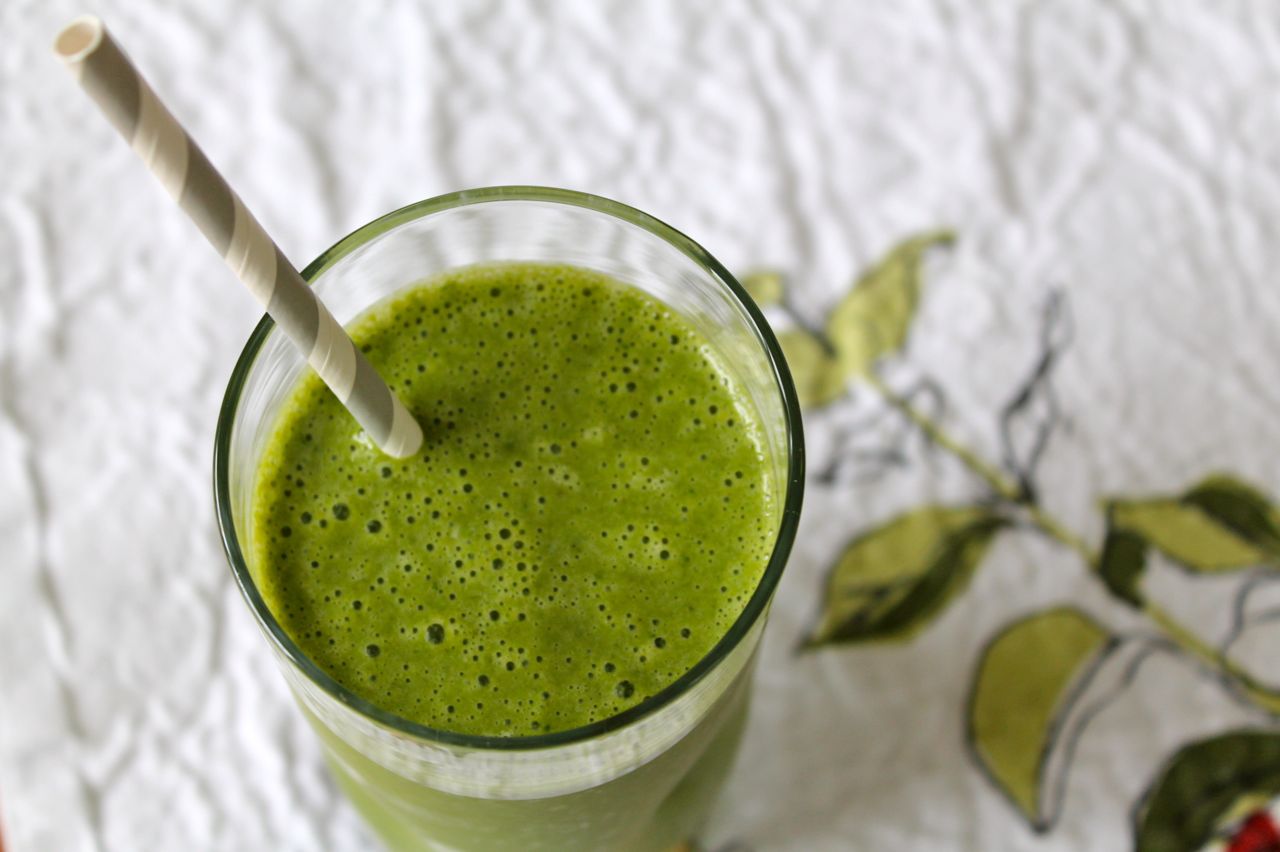
If you’ve been following my posts about the CSA we’re doing, you know that I’ve been having these for breakfast almost every morning. And I haven’t gotten tired of them! They’re so easy and super fast. If you get bored, you can also add in new fruits, veggies, flavors, and other ingredients to the mix. Don’t be turned off by the idea of greens in your smoothie! When you add enough fruits, you don’t taste the greens at all. It tastes like a delicious fruit smoothie, and you get the added benefit of an extra serving of veggies. Kinda like those V8 fruit/veggie juice things.

Here’s a few things I’ve learned while experimenting with smoothies. It’s a lot, so if you’re not in the mood to read my dissertation, just jump to my recipe for a basic green smoothie at the bottom.

Mmm... green

Shopping & Prep

I recommend buying organic greens — since they don’t have a peel or skin, they can absorb a high amount of pesticides and chemicals. For other fruits and veggies, I refer to the Dirty Dozen list (a list of veggies that you should always buy organic). But mostly, I follow this rule: If it doesn’t have a skin (greens) or if I eat the skin (apples), I buy organic. If it has a thick peel that I don’t eat (bananas, citrus, avocado), I don’t bother with organic. I do buy organic dairy products (yogurt, milk, etc).

I have learned to prepare my fruits and veggies way in advance, which makes it a breeze (about 3 minutes) to prepare breakfast each morning. For example, my freezer currently contains a bag of diced fresh pineapple, banana slices, and apple chunks, and I have strawberries and blueberries in the fridge.

I have not bothered with any fancy equipment. I’ve read some blogs that say you need a super expensive blender in order to get a well-blended smoothie, but I’m not spending that much money. I use a knock-off Magic Bullet single-serving blender that my mom got me for probably less than $40. Maybe I’m missing out on incredibly well-blended smoothies, but I doubt it.

Greens

To ensure that your greens blend in smoothly, blend your greens with your liquid first, and then add the rest of your ingredients. You can use any kind of greens, but each is going to be slightly different.

When I get a big bunch of greens, I go ahead and wash them and store them right in my salad spinner. Then they’re ready for each morning, when I pull out a couple handfuls and rip them up just a bit while I stuff them into the blender.

I learned from a little internet research that many greens, especially those from the brassica/cruciferous family (pretty much everything on my list except for spinach and lettuce) have a natural chemical that can disrupt hormone function. This is really not an issue for most people because you’d have to eat a TON of greens every single day. But since I already have thyroid problems (and my spring CSA has given me almost entirely brassica vegetables), I was a little more concerned. The good news is that cooking them can help. So for brassica greens, I wash them, rip them up a bit, steam them, and then store them in a bowl in the fridge. Then each morning I can just pull some up and stuff them into the blender. Easy peasy.

  • Lettuce: Easiest to mask their flavor because they’re super mild. But of course, they also have the least nutritional benefits. If you’re really not sure about green smoothies, start here and work your way up to something a little more green. OR… this can be a great way to use up slightly wilted salad lettuce. I used butterhead, which was great. Romaine would be great too.
  • Spinach: A classic in green smoothies. More health benefits then lettuce but still an easy flavor to mask with fruits.
  • Kale: A standard in green smoothies. Super healthy! To prepare for a smoothie, I prefer to cut the stems out before I chop them up. If you don’t mind yours a little chunky, keep the stems. They’re edible and full of nutrients. When blended, you may see some flecks, but you won’t notice any chunks when drinking. Check your teeth afterward though.
  • Turnip greens: They blend really smoothly. They have a slightly more green taste, but not noticeable if you blend in stronger or sweeter flavors like banana and sweet juices.
  • Kohlrabi leaves: Same as turnip greens.
  • Collards: Same as turnip greens.
  • Beet leaves: Really mild flavor. A great way to use up greens that you usually throw away. They will turn your smoothie pink instead of green.
  • Mustard greens: No. Don’t do it. Gross.

Liquids

For the liquid, I started off with orange-peach-mango juice from Trader Joe’s. It was incredibly delicious, but a little too much sugar to start off my morning. As I grew accustomed to the green-ness of the smoothies, I started cutting back on sugars. Apple juice is a good option — it’s lower in sugar and acids. These days, I usually mix about half apple juice and half almond milk. Prune juice can also be a good option if you need some natural assistance in that department — just be careful not to overdo it.

For a thickener, I always include yogurt. With that addition and the fact that I don’t freeze all my mix-ins, my smoothie comes out more like the consistency of a drinkable yogurt than a frozen smoothie. I prefer Greek yogurt since it adds more protein to my breakfast, helping me feel fuller longer and have a bit more energy. And as with the juice, I started off with vanilla or blueberry and have gradually progressed to plain yogurt, with the goal of cutting out extra sugar.

Mix-ins

Any fruit is great. Banana is the best for masking other flavors, plus it makes your smoothie a little thicker and smoother. I use pineapple with almost every smoothie. I’ve also used strawberry, blueberry, apple, and clementines — basically whatever I have laying around.

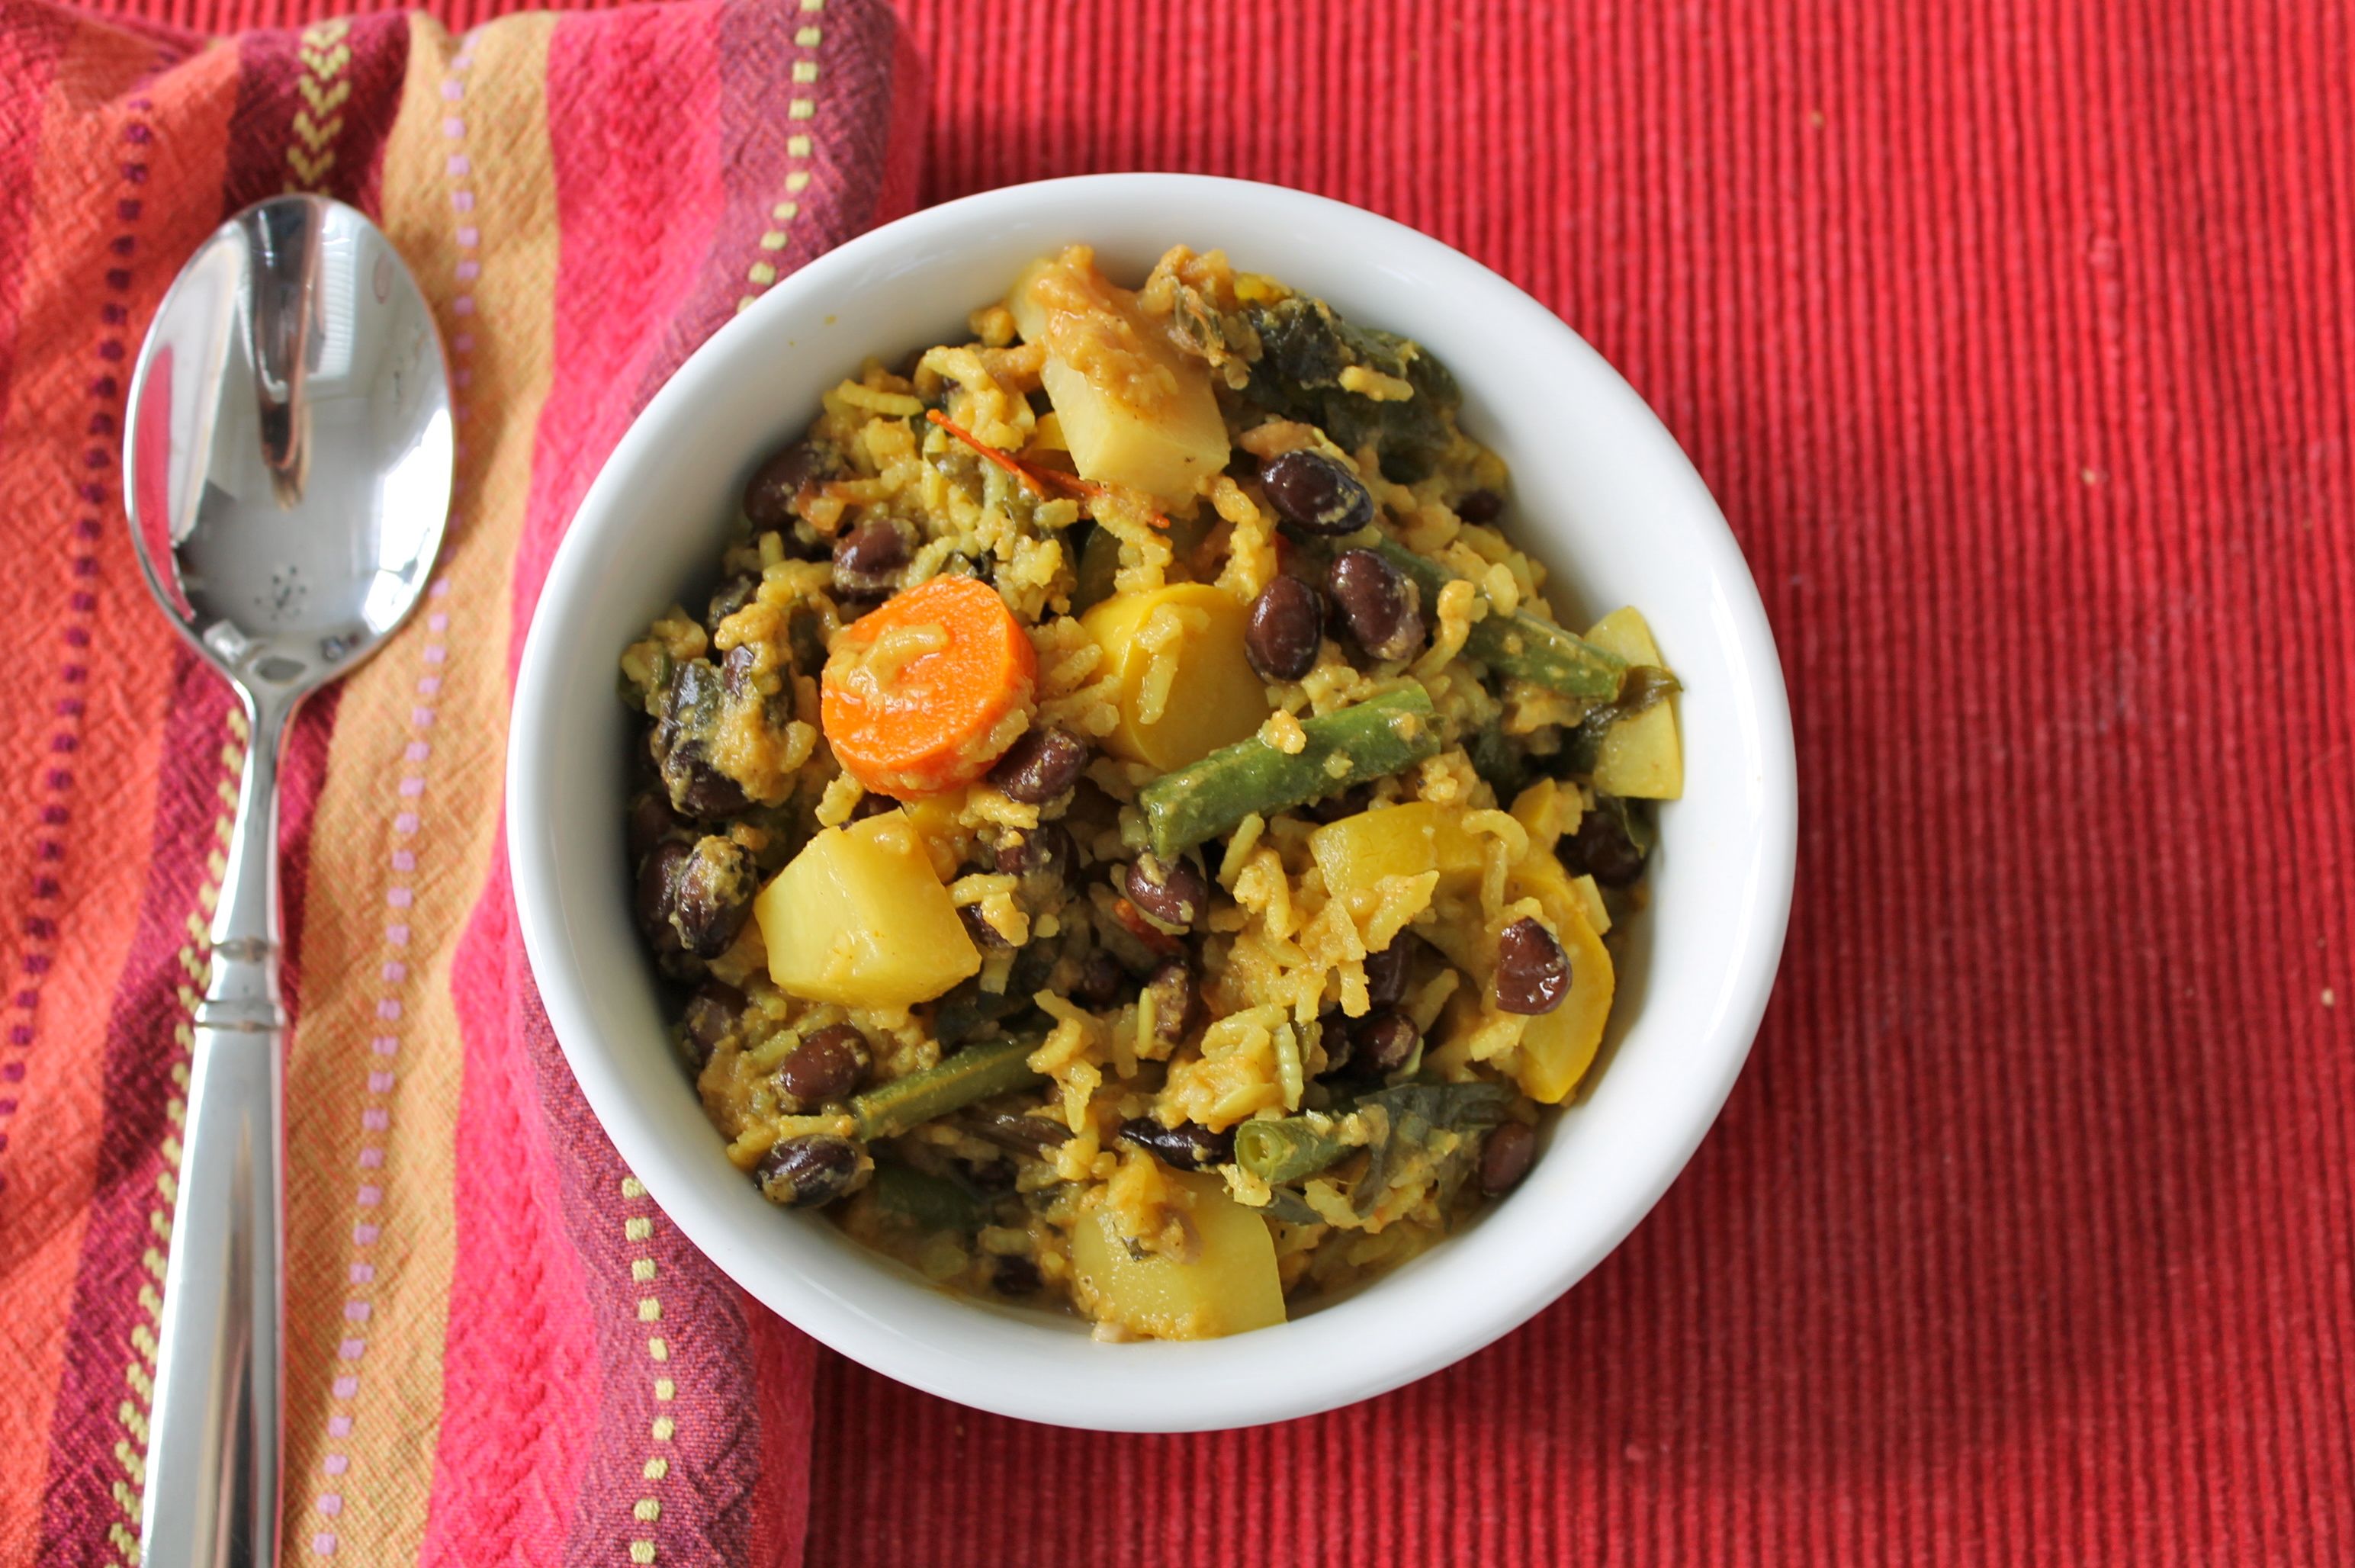
I’ve also mixed in veggies, either in addition to or instead of the greens. Carrot is a great option — it goes well with apple juice and bananas. Mixing in a few leftover turnip pieces didn’t change the flavor at all but did give it a slightly powdery, grainy texture. Beets are good too — they go well with apple and pineapple.

Keep in mind that some mix-ins will change the color of your smoothie, if that’s the sort of thing that bothers you. Mixing warm (red, orange) and cool (green, blue) colors will usually result in a brown color, which isn’t particularly appetizing. Though sometimes I just do it and drink it from an opaque cup. Mixing cool colors (greens and blueberries) will usually result in a cool blue color. Just think back to your elementary-school paint palette, and you’ll be fine.

Green smoothie

Okay, that is way more information than I thought I would share, so if that’s too much for you, here’s a recipe. Just try it. You’ll be glad you did.

Green Smoothie

1/2 cup apple juice
1/2 cup packed steamed spinach or other greens (use 1 1/2 to 2 cups if not steamed)
1/2 banana, sliced
1/4 cup pineapple chunks
1/4 cup vanilla Greek yogurt
apple juice or almond milk to taste

Blend the juice and greens together until greens are thoroughly chopped.

Add the banana, pineapple, and yogurt. Blend until smooth.

Add more juice or almond milk until smoothie reaches desired consistency. Blend well.

After you try this, experiment a little! Add whatever you have and whatever you like. That’s the beauty of a smoothie — you can’t make it wrong. Enjoy!

Linking Up With:

YOLO Mondays from Still Being Molly and Lipgloss and Crayons
Monday Meet Ups from Covered in Grace
Market Yourself Monday from Sumo’s Sweet Stuff
Your Great Idea Link Party from Or So She Says
Time for a Party from Fine Craft Guild
Made by you Monday from Skip to my Lou
Make Something Monday from Sarahndipities

Sweet Potato Fries

11 Mar

Yep, I said sweet potato fries. Oh my goodness, these were so delicious. They were so good, I made another batch 2 days later! We had some sweet potatoes from this week’s CSA, so this seemed like a great way to use them.

I had never used my mandoline before, so I decided to give it a try. It wasn’t quite as easy to use (or as easy to clean!) as I hoped it would be, but it still worked great. It sliced up my potatoes to a pretty consistent size and left a nice ridged surface for salt and pepper to hold on to. If you have one, use it, and then make your husband clean up afterward. But if not, just slice your potatoes thinly.

The recipe below is a very loose outline. Since everyone likes their fries with different flavors and textures and degrees of crispiness, make it your own. We enjoyed ours lightly salted, slightly crispy, and served alongside a super yummy veggie burger. Don’t forget the ketchup and the barbecue sauce!

Fries

Baked Sweet Potato Fries

Sweet potatoes
Olive oil or grapeseed oil
Salt & pepper

Preheat the oven to 425 F. Slice the sweet potatoes in thin rounds. Spread in an even layer on a baking sheet.

Pour a small amount oil over the potatoes. Toss until potatoes have a light, even coating. Sprinkle with salt and pepper to taste.

Bake at 425 F for 35-45 minutes or until potatoes reach desired crispiness.

Or chips?


Linking Up With:

YOLO Mondays from Still Being Molly and Lipgloss and Crayons
Monday Meet Ups from Covered in Grace
Market Yourself Monday from Sumo’s Sweet Stuff
Your Great Idea Link Party from Or So She Says
Time for a Party from Fine Craft Guild
Made by you Monday from Skip to my Lou
Make Something Monday from Sarahndipities

Kale & White Bean Soup

18 Feb

I was a little skeptical about a kale soup. It sounded just a little too… healthy. But I ended up loving this.

Each week when we receive our CSA, the nonprofit who provides it highlights an ingredient and a recipe for that ingredient. This week was kale, which I found out is rich in antioxidants and vitamins K, A, and C.

Since I had a ton of greens (it’s that time of year!), I decided to go ahead and try out the kale and white bean soup recipe that the CSA people shared with us. I followed the instructions but halved the amount.

Kale & Bean Soup

I thought it was a very delicious soup, especially when I dipped a hunk of baguette in it. It has a vegetable Italian -ish flavor, maybe kind of like a minestrone. And it didn’t occur to me until after I made it, but this dish is both vegan and gluten-free, so if you have dietary restrictions, this is a great option. Though if you want to substitute chicken broth for the vegetable broth, you certainly could.

I added in a tablespoon of flax seed, which adds fiber and serves as a thickener. It’s not necessary though, so if you’re not into it, just leave it out.

The recipe called for white beans, and had I planned on making a trip to the grocery store, I probably would have used white beans, Great Northern, cannelini, or something like that. But since I had everything else and didn’t want to go out, I just substituted garbanzo beans (chickpeas). You can use whatever variety of beans you prefer.

I had a big bowl of it for dinner, and there’s probably enough left for 2 or 3 more bowls.

Buon appetito!

Buon appetito!

Kale & White Bean Soup from Community Nutrition Partnership

1/2 Tablespoon olive oil
4 garlic cloves, minced
1/2 onion, chopped
2 cups kale, chopped
2 cups vegetable stock
1 can white beans
2 tomatoes, diced
1 teaspoon Italian seasoning
1 Tablespoon flax seed (optional)
salt and pepper, to taste

Heat oil in a large stock pot. Add garlic and onion; saute until fragrant. Add kale and stir frequently until wilted.

Add about half the broth and half the beans. Also add all of the tomatoes, seasoning, salt and pepper. Simmer 5 minutes.

Meanwhile,  use a blender, food processor, or fork to mix the remaining broth and beans until smooth. Stir into soup to thicken. Simmer 15 minutes. Serve hot.

Linking up with:

YOLO Mondays from Still Being Molly and Lipgloss and Crayons
Monday Meet Ups from Covered in Grace
Market Yourself Monday from Sumo’s Sweet Stuff
Your Great Idea Link Party from Or So She Says