Archive | Desserts RSS feed for this section

Broccoli Brownies

20 May

Sounds disgusting, right? But much like the spinach cupcakes, they were actually pretty good! Since I committed to creating one meal and one dessert for each seasonal crop in North Carolina this year, I was again at a bit of a loss for broccoli. I Googled “broccoli dessert” and had very little success with fitting results. A search for “Broccoli cake” turned out a little better. My favorite result was this Broccoli Forest Cake, which I may have to try out one day. But from reading the recipes, I wasn’t quite convinced that any of my findings would be sweet enough if I truly focused on the broccoli.  So instead I decided to pull another Jessica Seinfeld and just hide that broccoli in a delicious dessert. Brownies it is.

Fresh Broccoli

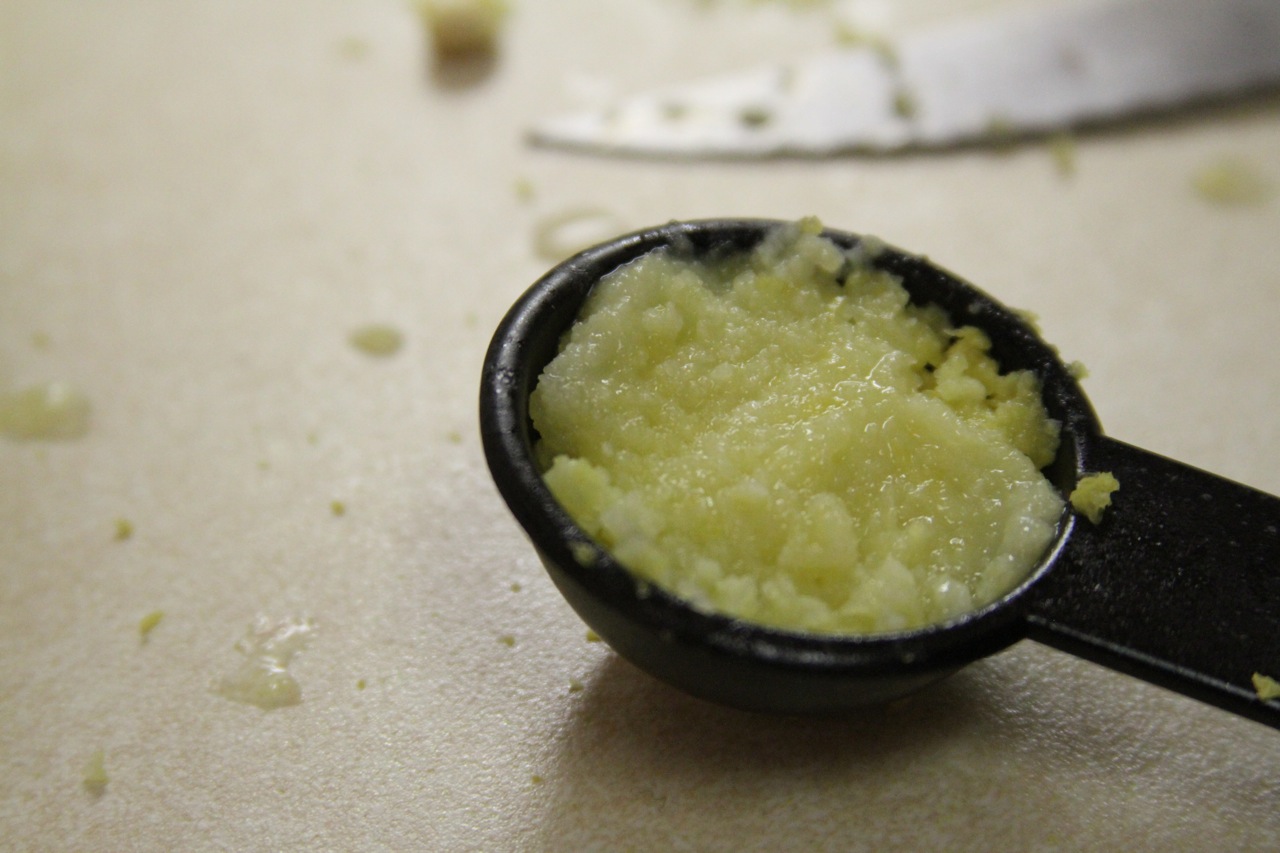
I started off by pureeing fresh broccoli florets in my food processor (best kitchen purchase EVER). It resulted in a consistency kind of between powder and sand. I pureed enough to make 3/4 to 1 cup broccoli and set it aside. I preheated the oven to 350 F and got to work on my batter.

About to get processed

In a large bowl, I whisked together the dry ingredients: 3/4 cup flour, 1/2 cup cocoa, 1/2 teaspoon baking powder, and 1/4 teaspoon salt.

Dry Ingredients

In a separate bowl, I combined 1/4 cup (1/2 stick) melted butter, 1/2 cup sugar, 1/2 cup packed brown sugar, 2 eggs, and 1 teaspoon vanilla. I stirred it by hand till it was just blended.

Ew, Wet Ingredients

Then I slowly added the wet mixture to the dry mixture, stirring by hand till it was just blended. Last, I stirred in the chopped broccoli and 1/2 cup dark chocolate chips.

Broccoli & Chocolate

Broccoli Brownie Batter

I greased an 8×8 pan and poured the batter in evenly. I baked the brownies for about 25-30 minutes. When you poke it, the brownies should indent just slightly. I let it cool in the pan before I cut it into slices.

Broccoli Brownies

How Sue Sees It:

  • Since the broccoli was pureed super fine, these look like normal brownies. You can’t see any green at all, just chocolate. Perfect!
  • Everyone who actually tasted them really liked them. I’d say about half of my tasters thought they were good and didn’t have any comment at all. The other half thought they were good, but did ask something like, “Hmm… this is good, but what is that?” They couldn’t quite place what they were tasting, but they did like them.
  • For a couple people, including my 16-year-old drama queen of a sister, the thought of broccoli was too much of a barrier. She ate the first half of it just fine and told me it was delicious, but when I told her there was broccoli in there, she refused to eat the rest. My brother was a similar story. I think they were being babies, but it was a good lesson: just don’t mention the broccoli at all.
  • Definitely take the time to completely puree the broccoli. If you don’t have a food processor, go get one. I got mine at Walmart for 30 bucks. The broccoli is pureed so small that you can’t taste or see it. It barely alters the flavor, and it doesn’t affect the texture at all.
  • I thought they were very tasty, especially with the chocolate chips added in for good measure. I just tasted chocolate. But similar to the spinach cupcakes, though they tasted relatively normal, they did have a bit of a funky smell to them. Store them in an airtight container to keep them moist, but open the container and let them air out a bit for a few minutes before you serve them. If someone gets a whiff of these as soon as you open the container, they may not be willing to taste them.
  • A perfect dessert for picky kids and spouses who aren’t getting enough vegetables in their diet!
  • If you would rather incorporate zucchini instead of broccoli, follow the same method, but increase the amount of flour to 1 cup to balance out the extra water content.

Mostly Organic Spinach Cupcakes

6 Apr

When I first started trying to figure out how to make leafy greens into a dessert, I thought of spinach. If you can make a carrot cake that doesn’t take like vegetables, why not a spinach cake? Thank goodness for the internet, because the only sweet spinach cake I could find was on this great blog about Turkish food. So I found Binnur’s original Spinach Cake (Ispanakli kek) recipe, adjusted it a little, and got to work.

I started with the spinach, which I bought organic since spinach is one of the Dirty Dozen vegetables. I bought 2 5-oz packages organic spinach, snapped the roots off, and pureed it all in the food processor. Side note: this was the first time I ever used a food processor, and it was amazing. I can’t wait to find other things to process.

BeforeAfter
I set the spinach aside so I could start the batter. First I preheated the oven to 375 F. In a large mixing bowl, I blended 3 organic eggs and 2 cups sugar with a hand mixer on low for about a minute. Then I added 1/2 cup vegetable oil, 2 tablespoons lemon juice, 1 tablespoon organic vanilla, and all the spinach and blended until it all incorporated.

IngredientsThen I slowly added 2 1/2 cups flour and 1 tsp baking powder. I blended that for about two minutes longer.

Batter

Cupcake Batter
Then I scooped the batter into paper-lined muffin cups. I popped them into the oven and baked for about 18 minutes, until it passed the toothpick test.

Muffin or Cupcake? Muffcake!

Spinach Cakes

I tasted one and it was actually pretty good! It smelled like spinach but tasted like cake. Though I will say, I kept some plain ones in a sealed plastic container for a couple days, and when I took the lid off, that was some strong spinach smell. I decided it could use some frosting, so I whipped up some vanilla buttercream.

I dropped 1 stick softened organic butter (1/2 cup) into a mixing bowl and blended it with a hand mixer for just 30 seconds or so till it was smooth. Then I added 1 1/2 cups confectioners sugar and blended on low until incorporated. Then I added 1 tablespoon organic vanilla, 1/4 teaspoon salt, and 2 tablespoons organic heavy cream. I blended on medium for about 2 minutes. Once it was the perfect texture, I frosted the cupcakes.

Spinach Cupcake!The vanilla buttercream balanced the spinach cake perfectly and made for a pretty light but sweet cake. And unusual too!

How Sue Sees It:
– You could probably serve these without the frosting and call them muffins, but they’re still pretty sweet. And they’re better with the frosting anyway.
– This is a great option for people who need to hide vegetables in food in order to get kids or spouses to eat them, a la Jessica Seinfeld.
– This would also be great to serve for a St. Patrick’s Day party!
– I took them to a party and was very hesitant and almost apologetic about serving spinach cupcakes. I explained what they were, and then went back outside to move my car to a more legal parking spot. By the time I got back 10 minutes later, there were only 3 left! I guess they were good.

Like hotcakes!

Lemon-Glazed Ginger Cookies

19 Mar

I haven’t been baking much lately, even though I’m supposedly a “Bake-aholic,” so I decided to stop being lazy and try something new. The original recipe for these delicious cookies was in one of my Martha Stewart holiday cookie magazines. I edited it slightly, using fresh ginger rather than candied ginger, and I thought they came out great. They’re more of a cake-like cookie, and the cookie itself isn’t very sweet, but it meshes perfectly with the super-sweet lemon glaze.

First, I prepared my ginger, because I used fresh ginger, and I figured it would take a while. But trust me, fresh ginger is worth it! It’s not that it even tastes way better than ground ginger spice, it’s just totally different. I used a flat grater to grate about 1 1/2 tablespoons fresh ginger. Tip: Freeze your ginger first!! It will grate sooooo much more easily, it won’t be as messy, and you won’t lose any of the flavorful juice.

I whisked to combine 2 cups all-purpose flour, 1/2 teaspoon baking powder, and 3/4 teaspoon salt, and set it aside.

In a separate bowl, I combined 3/4 cup (1 1/2 sticks) softened butter and 1 cup packed dark-brown sugar. Then I beat it with the hand mixer on medium for about 3 minutes, until it was a bit fluffy. I added in all that ginger I grated up and beat the mixture for another 2 minutes. Then I beat in 1 egg and 2 tablespoons vanilla until well combined.

I Need 3 Hands
I reduced the speed of the mixer to low and added the flour mixture a little at a time, beating until just combined.

Cookie Batter
The dough was much stickier than I expected, so I divided into two sections, wrapped it in plastic wrap, and left it in the fridge overnight.

So the next day, I came back, set the oven to 350 F, and got to work on the dough. I wasn’t going to try to roll the dough out and use cookie cutters, because we all know what happens when I try that alone, so instead I rolled it into a log and sliced it into rounds. To do it this way, it actually works better to be almost frozen because then the knife doesn’t mush it while you’re trying to cut it. And I’ll be honest here: one of the dough sections wasn’t cold enough, it mushed like crazy, and I ended up molding little flattened balls of dough onto the parchment paper with very sticky hands. This dough is sticky enough that if I had one, I would probably use a mini ice cream scooper or a melon baller to drop rounds instead.

Cookie Dough Rounds
So once they were all lined up on a pan lined with parchment paper, I put them in the oven for about 14 minutes, rotating once halfway through. Once they were slightly golden around the edges, I pulled them out and let them cool completely on a wire rack.

Looking at cookies through the grimy window of my oven.Cooling the Cookies
While they were cooling, I mixed up the lemon glaze. This was so delicious that I followed it exactly like the original Martha Stewart recipe. First I cut a lemon in half and juiced one half of it to get about 1 teaspoon fresh lemon juice. Then I took that same half and grated the peel on the flat grater — just like I did for the ginger — to get about 1 tablespoon finely grated lemon zest.

Zesting a Lemon
I whisked to combine 2 cups confectioners’ sugar, the lemon juice and zest, 1 tablespoon honey, 2 1/2 tablespoons water, and a pinch of salt. It was pretty easy to get this nice and smooth, and ohmygosh it was so good. I was dipping my fingers in it the entire time I was baking. I will be putting this lemon glaze on everything.

Glaze IngredientsLemon Glaze
Then I just took my lemon glaze and put it on top of my cooled ginger cookies. The whole drizzling thing was just not working for me.

Drizzling Was Not Working
So instead I just spooned it on top in big blobs and let it run to cover the whole top of the cookie.

Glazing a CookieGlazing
For the second half of the batch, I set up a cookie sheet lined with parchment paper and then rested a wire rack on top of it. I set the cookies on the wire rack and glazed them there, so that the excess glaze could run off the sides and be caught by the pan below, instead of pooling unattractively around the cookie. This gave the cookie a really nice look. I was in a hurry (when am I not?), so I popped the cookies in the fridge so the glaze would set more quickly. But it would harden enough to be transportable in probably half an hour.

Lemon-Glazed Ginger Cookies


How Sue Sees It:
– I suggest storing these in an airtight container with wax paper between layers of cookies. Martha says they can be stored at room temperature in an airtight container for up to 2 days. I think throwing away cookies after only 2 days is ridiculous.
– I ran a little short on the lemon glaze near the end, and I tried to quickly whip up a second batch with some of that lemon juice that’s in the plastic lemon bottle. DO NOT DO THIS. It was disgusting and I threw it away.
– Line anything going into the oven with parchment paper and everything else with either parchment or wax paper. Then you can just throw away the mess.
– You can add food coloring to the glaze if you want. It looks kind of freakish and a bit less appetizing, but I dyed some of it green for St. Patrick’s Day.

Chocolate, Chocolate, Chocolate Cake

20 Feb

This is my favorite cake ever. It has 3 different kinds of chocolate. And it may have more, depending on the variation you choose to make — I’ve had up to 5 before! And this cake is always a crowd pleaser, so if I’m heading somewhere new and not sure what people will appreciate, this is my go-to recipe. I’m a little worried about posting this one because it’s actually only semi-homemade, and I don’t want people to think I’m a slacker. But oh well — all my secrets shall be revealed here sooner or later. The pictures for this one are awesome, so I’m including quite a few more than usual. Compliments to the BF/amateur photographer. So feast your eyes, and I’ll go feast my belly.

I start off by moving the rack to the middle of the oven, pre-heating it to 350 F, and buttering a bundt pan. I like using a bundt for this particular cake for a few reasons: One, because it looks fancier without any extra effort. Two, it has a drizzle instead of a full icing, and I think that looks nicer on a bundt. And three, it’s pretty rich, and it’s easier to cut a bundt cake into smaller, neater slices than it is a round or sheet cake.

So after the prep, I dump almost all the ingredients rather unceremoniously into a large mixing bowl: 1 box devils food cake, 1 package chocolate instant pudding mix, 4 eggs, 1 cup sour cream, 1/2 cup warm water, and 1/2 cup vegetable oil.

Batter IngredientsI blend it with a hand-mixer on medium-low for 2-3 minutes. Then I fold in  1 1/2 cups semisweet chocolate chips, and once it’s well-mixed, pour it evenly into the bundt pan.

Mixing the BatterChips!Batter in the pan

I bake it for 45-50 minutes. The cake slightly pulls away from the sides of the pan, and it should pass the toothpick test. I let it cool it on a wire rack for about 20 minutes, and then remove it from the pan. If you don’t cool it long enough, it’s more likely to crack when you try to remove it. And if you’re having a hard time getting it to pop out of the pan, take a long wooden skewer and run it around the edge of the cake before flipping it over. This will loosen it up without cutting your cake or scratching your pan.

Plain cake
Once it’s completely cool, I add the ganache-y chocolate topping — the same one I put on top of the Banana Butterscotch-Chocolate Cake. The rule for this topping is a 2:1 ratio of chocolate to butter. So I melt about 1/2 cup semisweet chocolate chips and 1/4 cup (1/2 stick) of butter in 30-second intervals, stirring well in between. While it’s still warm and runny, I drizzle in back and forth over top the cake. As it cools, it will firm up but not harden.

DrizzleChocolate Chocolate Chocolate Cake

Not to toot my own horn or anything, but I just have to say it again: seriously, this is the best cake ever. The other reason I love this cake is because it’s sooo easy. There aren’t any silly rules about beating in eggs one at a time or anything like that. And aside from the sort-of long cooking time, it’s really quick and easy to throw together. Actually, I try to keep the ingredients for this on hand at all times in case I need a last-minute cake.

I also like that this cake is so versatile and easy to make your own. I’ve substituted the semisweet chips for milk chocolate chips. Once I did half semisweet and half white chocolate chips. You could get even more wild and crazy and use butterscotch or peanut butter chips, or maybe a caramel topping. I haven’t tried those yet, so if you do, let me know how it goes.

If you’re worried about it, it’s okay to swap light sour cream for regular sour cream. But if you’re honestly counting calories, that seems like a waste of time when it comes to this cake. I haven’t tried the whole swap your oil for applesauce thing, so I don’t know how that would work out with this particular recipe. If you try it, let me know!

Yum

Triple Chocolate Cake

Cake:

1 box devils foods cake mix
1 package instant chocolate pudding mix
4 eggs
1 cup sour cream
1/2 cup warm water
1/2 cup vegetable or canola oil
1 1/2 cups semisweet chocolate chips

Topping:

1/2 cup semisweet chocolate chips
1/4 cup (1/2 stick) unsalted butter

Instructions:

Preheat oven to 350 F. Spray a bundt pan with cooking spray and set aside.

Add all the cake ingredients to a large mixing bowl. Blend with a hand-mixer on medium-low for 2-3 minutes. Fold in 1 1/2 cups chocolate chips. Pour batter into prepared pan.

Bake for 45-50 minutes or until an inserted toothpick comes out clean and the sides spring away from the edges of the pan. Let cool for about 20 minutes before inverting onto a platter. Top with chocolate ganache topping.

For topping, place 1/2 cup chocolate chips in a medium bowl. Chop butter into rough chunks and add to bowl. Microwave in 30 second intervals, stirring well in between each interval. Do not over-cook. Once thoroughly melted without any chunks, pour over top the cooled bundt cake. Let cool.


Banana Butterscotch-Chocolate Cake

16 Feb

I don’t know why, but I have been having some issues in the kitchen lately. Burnt butterscotch,  chocolate blooms, spilled food, cracked cakes, depleted food stores… you name it. I’m in some kind of food funk, so I guess I’ve been avoiding the kitchen for a couple weeks. I re-entered carefully a few nights ago, trying out a new semi-homemade recipe I got off the back of a bag of Nestle Tollhouse butterscotch chips. Even this proved challenging for some reason, though the end result turned out tasty. I edited the recipe a little bit to include chocolate, since a dessert isn’t really a dessert unless chocolate is involved (and I ran short on butterscotch). I’ll go through how I made it, but word of warning: be sure to have quite a few medium and large bowls on hand, and preferably someone to wash all these dishes for you.

I started by pre-heating the oven to 375 F and buttering a bundt pan. Then I filled a large mixing bowl with a box of yellow cake mix, 4 eggs, 1/2 cup vegetable oil1/4 cup water, and 1/4 cup white sugar. I also added in 2 mashed bananas — I didn’t worry too much about mashing them well. I just kind of shmushed them with a fork as I dropped chunks of banana into the bowl. I figured the hand mixer would take care of them.

Ingredients

Then I mixed everything together with a hand mixer in medium-low speed for about 3 minutes.

In a medium-sized, microwave-safe bowl, I melted 3/4 cup of butterscotch chips by cooking at 20-second intervals in the microwave, stirring in between each round. I did the same thing with 3/4 cup of dark chocolate chips in another medium-sized, microwave-safe bowl. I added about a cup of the banana cake batter into each of the melted chips bowls.

Banana-Butterscotch BatterBanana-Chocolate Batter

So then I had: a bowl of banana batter, a bowl of chocolate-banana batter, and a bowl of butterscotch-banana batter.

3 Batters

Then I set about filling the bundt pan in a way that would give me a great marbling effect. I just dropped random spoonfuls of each batter into the pan: spoonful of banana, spoonful of chocolate-banana, spoonful of butterscotch-banana… repeat. The bowl looked pretty cool, with yellow, brown, and tan spots everywhere.

Marbled Cake Batter

Once the pan was full, I put it in the oven for about 35-40 minutes, until I poked it with a toothpick and it came out clean.

Hot Cake

Once again, I was too impatient, and I tried to take the cake out of the pan too soon, resulting in a cracked cake! And this time I didn’t have an icing to hide the cracks! BAhhh what was I gonna do!? Easy — I just cut it into two halves, and served it as two separate cakes. Where the cracks were messy, I just sliced off a bit of crumbled cake and ate it, so that the edges would be smooth cuts. This worked out really well since I was taking some to the office, and they never eat it all anyway. So I sent one to my office and one to the BF’s office.

But first — the topping! The recipe called for drizzling melted butterscotch over the top of the cake. Unfortunately, I completely burned and ruined the last bit of butterscotch I had, so that was a fail. (Told you I’ve been having kitchen issues lately.) So instead I topped it with melted chocolate, which is a fantastic substitute. (Even that took two tries though. Issues.) This is the same ganache-y topping I use on my Chocolate Chocolate Chocolate Cake. The general rule is one part butter to two parts chocolate. So I melted about 1/2 cup semisweet chocolate chips with 1/4 cup (1/2 a stick) butter, heating in the microwave in 20-second intervals, stirring well in between each round. While the chocolate is still warm and smooth, drizzle it over the top of the cake, evenly all around. As it cools, it will firm up to be solid, but it won’t get hard, thanks to the butter. Tasty!

Banana Butterscotch Chocolate Cake

How Sue Sees It:
– If you prefer only butterscotch and not the added chocolate (not sure why you would, but whatever), just replace all the chocolate with more butterscotch.
– Reviews for this cake were mixed — some loved it, some liked it, some didn’t care for it. I think it totally depends how the taster feels about banana. If you like banana, you’ll love this cake. If you don’t, you won’t. Duh.

6/7/8 Layer Magic Bars

1 Feb

Seven-layer bars are not anything new or exciting, but I had been craving these “magic bars” for days. I have no idea why — I haven’t had a seven-layer bar in years. But I pulled out my bar pan, and two trips to the grocery store later (I forgot stuff), I set to work on the bars. This is a classic recipe and can be found anywhere online or even on the back of a can of sweetened condensed milk. I probably know this one of the top off my head now, it’s so easy.

Graham Cracker & Butter Mixture
Once it was completely mixed, I pressed a small amount into each  of the 12 cups of the bar pan, pressing flat to make a solid crumb layer along the bottom.

Graham Cracker Crumb Layer
Then I set about filling up the layers. What I like about using the bar pan is that you can change up the ingredients. Someone doesn’t like nuts? Leave out the nuts on one row. No coconut? Leave out the coconut. What I don’t like about using the bar pan is that it takes more time, it’s difficult to spread the layers evenly, and it can be hard to remove the bars too. So if you want to use a normal baking pan and cut them into squares, that’s cool too.

Bar Layers
I managed to pry out a few bars and keep them whole, and they look delicious. (All the bars that I broke I dumped into a bowl and I just eat them with a fork. Talk about guilty pleasure.)

Magic Bars
I picked out the three best-looking bars and packaged them in a gift bag with a ribbon. Adorbs!

Magic Bars Gift Bag

I consider these true seven-layer bars because they include seven layers: graham cracker crust, white chocolate chips, dark chocolate chips, butterscotch chips, walnuts, coconut, and sweetened condensed milk. Other recipes do not include the white chocolate chips, but still call it seven layers by counting the butter that’s mixed into the graham cracker crust as a layer. And I call b.s. on that.

Be careful not to add in too much sweetened condensed milk, which is really easy to do in the small bar cups. I definitely should have used a spoon to drop in a small amount rather than being impatient and trying to pour it in. Some of my bars ended up with WAY too much sweetened condensed milk — these looked funny, and they were the ones that wouldn’t come out of the pan in one piece. Check out this picture — the bars in the front of the shot are nearly overflowing with sweetened condensed milk. Too much!Too Much!And next time I’ll probably add in the coconut at the end, after I spoon in the sweetened condensed milk. The coconut got kind of mushed under the weight of the milk, and it looks better when the coconut is fluffier.

Enjoy!

6/7/8 Layer Magic Bars

1 1/2 cups of graham cracker crumbs
1/2 cup melted unsalted butter
3/4 cup butterscotch chips
3/4 cup dark chocolate chips
3/4 cup white chocolate chips
1 cup chopped walnuts
1 cup shredded coconut
1 can of sweetened condensed milk

Preheat the oven to 350 F.

Mix the graham cracker crumbs and butter together. Press into the bottom of a bar pan or a 9×9 baking dish.

Layer on the chips and nuts evenly. Pour in the sweetened condensed milk. Spread the coconut evenly over top.

Bake for about 18 minutes, or until the edges are golden brown.

Let cool completely, and then carefully cut into squares and remove from pan.

Double Chocolate Brownies 3 Ways

22 Jan

I had the day off on MLK Day, so what better way to celebrate than make a batch of brownies from scratch? I cracked open my Martha Stewart Holiday Cookies magazine and got to work. (You can see a similar recipe of hers here, but the one in my magazine is slightly different, and that’s what I’ll outline below.) With one batch of brownies, I prepared 3 different types: double chocolate, chocolate chip, and rocky road.

I got to work by preheating the oven to 350 F and preparing my bar pan. I decided to use a bar pan instead of a traditional 9×13 pan for a few reasons: 1) It would make uniformly shaped brownies, 2) I would more easily be able to make multiple types of brownie without them running together, and 3) I got a bar pan for Christmas and hadn’t used it yet. I tried lining the bars with parchment paper because I was worried about them sticking, but that got really annoying after a while, so I gave up on that and just spread a little butter in the pan cups.

Parchment Paper
In a medium bowl, I whisked together 3/4 cup all-purpose flour, 1/4 cup cocoa powder, 1/2 teaspoon baking powder, and 1/2 teaspoon salt.

Dry Ingredients
In a large bowl, I melted 1 1/4 cups Ghiradelli semisweet chocolate chips and 1 stick of butter. I think the easiest way to do this is just microwave it in 30-second intervals, stirring well in between. (DON’T try to microwave it longer than that without stirring — the chocolate will seize up and become an unusable consistency. Then you’ll have to throw it away and start over, and there’s nothing much sadder than throwing away chocolate.)

Once it was melted, I stirred in 1 1/4 cups white sugar and then 3 eggs. Once those were incorporated, I slowly stirred in the flour mixture, stirring just until moistened. Then I filled six of the bar pan cups.

Batter
Halfway through, I stirred 1/4 cup Ghiradelli semisweet chocolate chips and 1/4 cup Ghiradelli white chocolate chips into the batter. (If you want chips in all your brownies, stir in about 1 cup of whatever combo of chips you like before you fill the pan.) I filled in the rest of the bar pan cups with this chocolate chip batter.

Filling the pan
I filled another bar pan with the rest of the batter — it only filled another 6 bar pan cups. For these, I baked them about 13 minutes.

Mmm... Brownie Batter
While I waited, I cut up 3 marshmallows into eighths and chopped up a handful of pecans.

MarshmallowsMarshmallows are so sticky! They kept sticking to my fingers, and when I tried to shake them off, they’d fly off and stick to the counter!

Pecans

I pulled the brownies out, topped each one with a few marshmallow and pecan pieces, and then baked them about 5 more minutes.

Rocky Road Brownies

For the plain and the chocolate chip brownies, I baked them about 18 minutes, until a toothpick I inserted into the center of a couple of them came out with only a few moist crumbs (unlike cakes and cupcakes, which should come out clean).

I ended up with 6 double chocolate brownies, 6 chocolate chip brownies, and 6 rocky road brownies. Delicious!

Brownies

How Sue Sees It:

– It’s pretty easy to impress people with an array of brownies by just adding various toppings in different stages of the baking process. Definitely try this! And create your own!
– Lining with parchment paper was a waste of time. It was difficult to get the paper to squeeze in there, and then since it wasn’t perfectly flat, the brownies came out all deformed because they oozed in between the folds of the paper. And it turns out that the pan is non-stick enough to not matter. A little butter in the pan just in case, and I only crumbled two brownies when removing them from the pan.
Deformed Brownie– When you pull the brownies out of the oven, let them cool in the pan for 15-20 minutes. Then remove them from the pan: Run a butter knife along the edges to loosen it up and then scoop them out with a fork. If they mush in on themselves, let them cool a little while longer before attempting to remove any more. (I think the two I crumbled were because I was too impatient and needed to wait for them to cool a bit more.)
– Eat one or two brownies yourself, with a fork straight out of the pan, while they’re still warm. The brownie is nice and warm, and the chips are all melted inside. OMG so good.

Coconut Cupcakes

20 Jan

I recently brought cupcakes to a coworker’s going away party. I tricked her into telling me that one of her favorite desserts is coconut cupcakes — well, not sure I had her fooled, I think she just went along with it, but that’s cool — then I set about finding the perfect recipe to test out. I adjusted a basic cupcake recipe to include both flaked coconut and coconut milk in the batter, and topped half with (what else?) a coconut cream cheese frosting and the other half with a chocolate coconut frosting.

For the cake: In a large bowl, I used the hand mixer to cream together 2 cups white sugar and 3/4 cup butter. I added 3 eggs and beat well. In another bowl, I whisked together  2 1/2 cups all-purpose flour and  2 1/2 teaspoons baking powder. I added this mixture into the butter mixture, alternating with adding 1 cup coconut milk. I added in 1 teaspoon vanilla and then beat the entire thing well.

Coconut Cupcake Batter
I filled a muffin pan with cupcake paper liners and filled the muffin tins about 2/3 of the way with the batter. Then I baked them at 350 degrees for about 18-20 minutes (a toothpick came out clean when I poked them).

Cupcakes in the Oven
I let them cool completely and then covered half of them with a coconut cream cheese frosting. This was super easy: I made my standard cream cheese frosting, adding 2 tablespoons coconut milk when I mixed it up. After it was mixed, I stirred in 1/2 cup shredded coconut. Yum!

The 4 Cs!
For the other half of the cupcakes, I covered them with a super-rich chocolate coconut frosting. Double yum! To make sure the coconut flavor was strong enough, I topped all the cupcakes with extra shredded coconut. Don’t skip this step! The flavors of the cake and the two frostings can really outweigh the coconut flavor without the extra on top.

Chocolate Coconut Frosting
At the party, I set up my cupcake tower and alternated the cupcakes in a black-white-black-white pattern. It looked super awesome!

Coconut Cupcakes

How Sue Sees It:

I really like these because the coconut is there, but not too strong. They also looked really cool alternating between black and white cupcakes on display. But frankly — and this may just be the chocoholic in me — the best part of this project was the chocolate frosting.

Best Chocolate Frosting Ever

17 Jan

I mixed up this chocolate frosting to cover some coconut cupcakes, and it is TO DIE FOR. It tastes like a chocolate bar turned into cream on top of a cupcake. I will mos def be using this for future baking projects.

With a hand mixer, I creamed 1/2 cup softened butter in a large bowl. I added in  2 1/4 cups powdered sugar and 3/4 cup cocoa. Then I added 1/4 teaspoon vanilla and blended in enough milk to make it a spreadable consistency — about 1/4 cup milk.

[UPDATE: I was making this with Betsy for a cake the other day, and she pointed out that I don’t read very well. Apparently I’ve been using ground sweetened chocolate, which is totally different than cocoa powder. As in, one has additional sugar, and one doesn’t. No wonder this frosting tastes amazing! It’s got about a million times more sugar than an average frosting. SOOO…. if you want a super delicious frosting that may induce diabetic shock, I recommend using Ghiradelli Sweet Ground Chocolate. 01/21/12]

DELICIOUS. This is just the classic version. To cover my coconut cupcakes, I decided they needed more of a coconut flavor, so I whipped up another batch…

Chocolate Frosting

CHOCOLATE COCONUT FROSTING: In this one, I substituted  1/4 cup coconut milk for the regular milk, and then stirred in 1/2 cup shredded coconut. Still mostly a chocolate flavor, with a slight hint of coconut. Perfect for my cupcakes!

Chocolate Coconut Cupcakes

How Sue Sees It:
All I have to say is: try this on EVERYTHING!

Chocolate Coconut Sandwich Cookies

4 Jan

I made these delicious sandwich cookies about a month ago and completely forgot to post them! They’re very classy – sure to impress. I took them to an office holiday party, and they completely disappeared. Here’s the basic plan: make some sugar cookies, shape them into balls, roll them in coconut, bake, then sandwich them together between melted chocolate. Yum!

I pre-heated the oven to 350 F. In a bowl, I whisked together 1 cups all-purpose flour, 1/2 teaspoon baking powder, and  1/2 teaspoon salt.

In another bowl, I beat together 1 1/2 sticks softened unsalted butter, 1/2 cup white sugar, and 1/2 cup packed brown sugar on medium for about 3 minutes. I then beat in 1 large egg and 1 teaspoon vanilla extract. I turned the mixer to low and gradually added in the flour mixture, mixing until just combined.

Batter Ingredients
Shredded Coconut

I popped the dough in the fridge for a little while to firm it up and prepared a plate of coconut flakes. After I pulled the dough out, I rolled little one-inch dough balls, rolled them in the coconut, and placed them about 2 inches apart on a cookie sheet lined with parchment paper.

Coconut Dough Balls

I baked them for about 10 or 12 minutes, rotating halfway through, until they were a light golden color around the edges. I moved them to a rack until they were cooled completely.

Coconut Cookies

I melted some milk chocolate and spread it on a quarter of the cookies, topping them with the other cookies to make milk chocolate coconut sandwiches. Then I melted some dark chocolate and spread it on the rest of the batch to make dark chocolate coconut sandwiches. The whole process took quite a while, baking multiple batches of cookies, waiting for them to cool, and then sandwiching the chocolate, but it was well worth it!

Cookie Sandwiches


How Sue Sees It:
– This recipe made about 20 sandwich cookies, with a couple extra coconut cookies that cracked or toasted a little too much. I served the milk chocolate and the dark chocolate separated on matching square platters. Classy!
– The coconut flavor was delicious, but not very strong. Next time, I would probably mix about a cup and a half of coconut into the batter. I’d still roll it in coconut, because it looks cool.
– To give this a more wintery, holiday vibe: Roll your dough balls a little smaller so that the final sandwich cookie is more of a round shape. Switch up the filling to white chocolate or vanilla buttercream filling (1 stick of butter, 1 cup confectioners sugar, and 1 teaspoon vanilla, blended on medium-high until pale and fluffy). Roll the final ball in coconut again so that you have fresh coconut sticking to the middle filling. Now you have a coconut snowball!